Thursday, November 21, 2013
Slow Cooker Herbed Chicken Noodle Soup
So I know a lot of people have childhood memories of food their parents made when they were sick. And I just can't think of any comfort food my Mom made consistently when I was ailing. I remember when I was sick I wasn't allowed to have any dairy products, so not being allowed to have cheese, pretty much felt like torture. I also remember that I got the Chicken Pox when I was approximately 12yrs old and it sucked horribly. But I don't have childhood ill food memories. I don't have memories of saltines, 7-up, chicken noodle soup or grilled cheese sandwiches. But I guess most importantly I do remember being loved and cuddled when I was sick, and truly that is what is most important.

However, as an adult I have created a few ill food traditions of my own. When I am sick I love the following:


However, as an adult I have created a few ill food traditions of my own. When I am sick I love the following:
- Hot tea-any type just love how it feels on an ouchie throat.
- Hot and Sour Soup-the spice clears up your sinuses and just feels healthy. And probably because it is so spicy you can taste it.
- Ice cold Gatorade-again I love the feel of super cold beverages on my throat when it is scratchy feeling....especially after drinking hot tea.
- Miso soup-love the salt!!!
Today I feel achy, I have lost my voice and I have a slight fever, hence the super sexy attire I am currently wearing-pink fuzzy slippers, cut off sweat shorts and a surf shop sweatshirt...yes, I know eat your heart out!! But the most valuable lesson is that when you are sick you truly never feel too old for Mom...definitely wishing my Mom lived closer on days like today. However, since she doesn't I opted to take matters into my own hands and make some chicken noodle soup.
So I made Slow Cooker Herbed Chicken Noodle Soup. It was an overcast drizzly day and it just sounded warm and cozy. I have no voice and I was looking for some comfort food that would be easy and for those requirements this recipe is perfect, as it seriously only requires chopping.
I do have to say it is slightly odd writing a food blog when you aren't sure of your taste buds. So I can tell you that I enjoyed the soup, but I can't really describe the specific flavors to you. Generically, I enjoyed the herbs and the salt of the chicken broth. I loved how well cooked the chicken thighs were and the vegetables just felt healthy. It did make the house smell amazing and it was a strong enough aroma that I could smell it, so that is saying something.
So to make this soup all you have to do is follow a few simple steps:
1. Combine the following in a slow cooker: 1 lb boneless skinless chicken thighs that are cut into 1" pieces, 1 can of cream of chicken soup, 2 stalks celery that are sliced, 2 chopped carrots, 1 chopped onion, 1 can sliced mushrooms, 1 clove garlic minced and dried sage, thyme and rosemary.
2. Cover the above ingredients with 28oz chicken broth and cook for 7 hours on low or 3 hours on high.

3. Add 8 oz egg noodles and cook on low for another hour. On side note, I couldn't find the frozen egg noodles that the recipe called for so I used dried, but that seemed to work fine.
4. Eat!! #4 is always my favorite part!!
I did some research as to why chicken noodle soup is a go-to for all of us when we are ailing. And there are a variety of theories ranging from urban legend to it just being comfort food to it actually having medicinal properties. One article I read said that chicken releases an amino acid when cooked that resembles the drug acetlycysteine, which is prescribed for bronchitis and other respiratory problems. The same article also said that the spices in chicken soup, such as garlic and pepper have similarities to cough medicines which thin mucus and makes breathing easier. And finally, it is believed that chicken soup acts as an anti-inflammatory which aides with cold like symptoms. If you want some additional reading on the subject here is an interesting article: http://abcnews.go.com/Health/story?id=117888
However, what I have decided is that if it is good enough for generations of Grandmas it is good enough for me.
Stay healthy and cheers!
Tuesday, November 19, 2013
Food/Wine Gratitude List & Pumpkin Chocolate Chip Cookies
I full on have to admit that sometimes I am a little slow, especially as it relates to trends. So when everyone started to post things they were grateful for on Facebook, I didn't think twice about it. It actually wasn't until last week that I caught on to the pattern and recognized the fact that people were posting 1 thing they were grateful for, every day for the month of November. And although I am grateful for aplethora of things, people, places, etc I decided to skip playing 19 days of gratefulness catch-up and just post the top 5 food/wine things I am grateful for.

Top 5 Food/Wine Gratitude List:
1. Wine (all of it)-the person who took a grape, let it rot and sit for an extended period of time and then decided to drink it...genius...love them!!
2. Cheese (all of it)-the person who took milk, let it mold and sit for an extended period of time and then eat it...brilliant! Yes, you probably see some similarities between #1 and #2.
3. The bbq-I love bbq'd food and although I love sushi and other raw food I am grateful for those cavemen and cavewomen who decided to cook, smoke and char their food...hmm do you think they also came up with the beer can chicken recipe? Just a thought.
4. Marco Polo (not the pool game) and the other adventurers who opened the spice trade. I just couldn't even imagine how boring food was before spices. Seriously salt and pepper which we take for granted today was a commodity of immense value...hell my salt habit would bankrupt me back in the day. It would be kind of like crack today...I would have like a $40 a day salt habit...not good.
5. My family-who taught me how to relish the tradition of cooking, breaking bread with those you love, exploring new foods, sharing the joys of the kitchen and celebrating life through food and wine. Thank you and love you!
I love trying recipes from other bloggers, hell if we can't support each other, seriously! So I decided to try this Pumpkin Chocolate Chip recipe from Sally's Baking Addiction. Here is the link if you want to try it: http://sallysbakingaddiction.com/2013/09/04/pumpkin-chocolate-chip-cookies/

I do love the spice (cinnamon, nutmeg, cloves and allspice) in the cookies and how can you go wrong with chocolate chips and pumpkin, right? So they have good flavor. However, in my opinion they are a little cakey. I love chewy cookies and these are definitely chewy, but there is something about the texture that throws me off a little. I also would have loved for these cookies to be a little more orange, not sure how to make that happen naturally, but that was one of my first thoughts when I pulled them out of the oven.

First of all, in a mixing bowl combine the melted butter, brown sugar and granulated sugar. Add the vanilla and pumpkin.
Combine the dry ingredients-flour, baking soda, baking powder, nutmeg, cinnamon, cloves and allspice .

Mix the wet ingredients into the dry ingredients. Add the chocolate chips. The dough needs to be refrigerated for 30 min-3 days. I chilled the dough for approximately 24hrs and that worked perfectly.

Next roll the dough into balls, place on a cookie sheet that is covered in parchment paper, and flatten. Bake for 8-10 minutes. The recipe recommends that you take them out of the oven at the 10 minute mark so they don't get dry, which I did.

Cool on a wire rack. Voila!

Monday, November 18, 2013
Culinary Dropout-The Yard Phoenix, AZ

Do you ever walk into a place and just never want to leave? This is totally the way I felt when I walked into Culinary Dropout. It is in this converted garage and by garage I mean automotive garage as in a place where people work on cars. From the outside it looks like nothing as it is basically a cinder block building, but when you walk inside, especially on the patio you feel so completely right at home. The patio is a mix of tables, comfy chairs and games (ping pong table, bean bag toss, etc), large TV screens, heating lamps if necessary and really incredible chandeliers.

We went with the intention of having brunch but we were so overwhelmed by the menu that we went with more of an antipasto platter so we could try lots of fun foods. To begin with, the pretzel bites with cheese fondue, are seriously one of the most sublime foods on the planet. The pretzel bites are shaped like donut holes and although they resemble a pretzel on the outside they are much more doughy and light on the inside and seriously how do you go wrong with cheese sauce!! Awesome!

We went on to try the grilled artichokes which were served with a mustard dipping sauce of some sort. I haven't had grilled artichoke in a long time and I loved these! We tasted some of their Gorgonzola cheese and bread-so creamy and really nice crusty French bread. We also tasted the roasted beets, grilled asparagus, prosciutto deviled eggs, olives and almonds, all of which was really well done. A few highlights included the balsamic reduction on the asparagus and the beets which were roasted to perfection.

The rest of their menu looked incredible, everything from grilled cheese sliders to Bloody Mary's with bacon infused vodka to the breakfast sandwich I was eyeing at the table next to me...practically almost fell into the girls lap trying to get a better glimpse of it. With all honesty everything I saw come out of the kitchen I wanted.

I would go back to this place in a heart beat. I would have been content spending my Sunday afternoon here, with a cold beer in my hand, watching football and eating pretzel bites. Or this place would also be awesome on a warm summer night with a great glass of wine and good friends.
Here is their web page: http://www.foxrc.com/restaurants/culinary-dropout/
They are located at 5362 N 7th St in Phoenix, AZ and they are open 7 days a week, but with varying hours. They do brunch on Saturday and Sunday, Happy Hour everyday except Saturday and lunch/dinner every day. Cheers!

Friday, November 15, 2013
Cobb Salad Tacos
So I have to admit that even while I was making these I was thinking,"how lame." I love cobb salad don't get me wrong, but that was exactly the problem with this recipe, why ruin a good thing? Salad is great well as a salad, why does it need to be in a taco?

However, I do have to admit when I am wrong and this was one of those cases, having a cobb salad in a taco was absolutely awesome. These tacos had great flavor, were fun to eat and I don't know why, but when you add a tortilla to something it just makes it better. Sure I have been on a taco kick lately so that may be part of my love for this recipe, but seriously these tacos had great flavors.
To begin with these tacos have bacon on them...win!! They also have blue cheese dressing...love!! And hard boiled eggs...which I could eat every day, well if I wasn't too lazy to actually cook the eggs...yes I know way lazy! And although the chicken is just plain 'ol rotisserie chicken it is cooked in the bacon fat and sauteed together with shallots, garlic, olive oil, Dijon mustard and red wine vinegar so it has a great tangy, bacon flavor to it as well. The vegetables (lettuce, tomato and avocado) added a nice texture and gave the tacos a nice crunch. Bottom line they made me happy.

I did find that these tacos took a little longer to cook than I expected. The recipe says 40 minutes and in my estimation it was probably closer to 60 minutes, just because there are a lot of components. Or it could have just felt longer because I had just completed a 12 mile run and I pretty much wanted to eat the world, so take my time estimation with a grain of salt.
First make the hard boiled eggs.
Next, make the blue cheese dressing, which consists of buttermilk, mayo and crumbled blue cheese.
Cook the bacon in a pan, until crisp. When the bacon has cooled, crumble it.

Use the bacon fat to cook the garlic and shallots, watch them carefully because they will cook quickly. Remove from the pan and add the shredded rotisserie chicken. I found this part of the recipe a bit confusing so I just kind of did my own thing and cooked the chicken until it is cooked through and then I added the shallot/garlic mixture back into the chicken along with the olive oil, mustard and vinegar. That seemed to work well and tasted great, but I am not sure if that was the true gist of the recipe.

Cook the tortillas. I just cook tortillas over an open flame on the stove, flipping them when they have a little color.
Finally put your tacos together, layering it with chicken, lettuce, tomato, avocado, bacon, hard boiled egg and dressing. Yum!!
2 large eggs
2 center-cut bacon slices
2 tablespoons minced shallots
2 garlic cloves, minced
2 tablespoons red wine vinegar
1 1/2 tablespoons extra-virgin olive oil
1/4 teaspoon Dijon mustard
2 cups shredded skinless, boneless rotisserie chicken breast
2 tablespoons canola mayonnaise (such as Hellmann's)
2 tablespoons low-fat buttermilk
1 ounce blue cheese, crumbled (about 1/4 cup)
8 (6-inch) corn tortillas
2 cups thinly sliced iceberg lettuce
1/2 cup diced tomato
1/2 ripe peeled avocado, chopped
Preparation
1. Place eggs in a large saucepan. Cover with water to 1 inch above eggs. Bring just to a boil. Remove from heat; cover and let stand 13 minutes. Drain; cool in ice water 5 minutes. Peel and dice eggs.
2. Cook bacon in a medium nonstick skillet over medium heat until crisp (about 8 minutes). Remove bacon from pan, reserving drippings in pan. Drain bacon on paper towels; crumble bacon, and set aside. Add shallots and garlic to drippings in pan; cook 1 minute, stirring frequently. Remove from heat; add vinegar, oil, and mustard, stirring until combined. Add chicken to pan; toss to coat. Combine mayonnaise and buttermilk in a small bowl, stirring until smooth. Stir in cheese.
3. Working with 1 tortilla at a time, heat tortillas over medium-high heat directly on the eye of a burner for about 15 seconds on each side or until lightly charred. Arrange about 1/4 cup chicken mixture in center of each tortilla; top tacos evenly with lettuce, tomato, and chopped avocado. Divide egg and bacon evenly among tacos, and drizzle evenly with dressing.
Hope you all have a fabulous weekend. Cheers!
Tuesday, November 12, 2013
Slow Cooker Chili & Thanksgiving Things You Need to Know About Me..
I love Thanksgiving! I always have and I have incredible childhood memories surrounding Turkey Days! So I thought I would share some of my Thanksgiving highlights and random food tips and/or ramblings with you all to get you good and ready for the upcoming holiday.


1. There is nothing better than the Macy's Thanksgiving Day Parade. I watch it to this day and I love every cheesy second of it!!
2. The only thing better than the Macy's Thanksgiving Day Parade is having a maple custard filled donut in my hand at the same time I watch the above mentioned parade. LOVE!!!
3. The first time I got DRUNK was at the ripe 'ol age of 12 at a family Thanksgiving dinner over grappa...and no I am not related to the Godfather.
4. I love making turkeys by tracing my hand. That was the only art form I truly excelled at as a child and I still have a mastery of this skill today.
5. Tofurkey is nasty...being raised as a vegetarian I know this beyond a shadow of a doubt.
6. I love you Mom, but mashed potatoes should not have skins and half of the potato still in chunk form or we should just not call them mashed potatoes, we should call them boiled smoooshed potatoes.
7. It is a family tradition to watch Planes, Trains and Automobiles....don't even ask me how this tradition started it is just what we do....and my family laughs hysterically every single year as if it is their first time seeing it...and they do not have Alzheimers yet.
8. Pumpkin pie for breakfast the day after Thanksgiving is truly a slice of heaven, pun intended.
9. Seriously rubbing mayo on the outside of your turkey really makes for an awesome crispy browned exterior...just don't tell anyone that you used mayo.
10. My family celebrates Thanksgiving for 3 days straight and it includes an Italian pasta dinner on Thanksgiving eve, a multi-course Thanksgiving dinner including antipasto and a recovery meal the next day...oh and we also have entertainment (yes, other than Planes, Trains and Automobiles)....everything from a private fireworks show to a jewelry trunk show to countless other events.
And not to get all sappy, but I really do have to say I have been incredibly blessed with an amazing family. This Thanksgiving will be one with new traditions and fun filled events. This year I am flying to Atlanta to spend Thanksgiving with some family that I have not seen for a long time and I look forward to creating new memories, running the Atlanta half marathon and toasting those that have mended and warmed my heart. Cheers!!

Plus because this is a food blog, let me share a yummy comfort food recipe with y'all (yes, I am practicing for Atlanta). The other night I made Slow Cooker Chili from Food Network and I have to say that this is one of the best chili recipes I have had in awhile. I love the chunks of meat, rather than ground beef. I also love the spice from the chili pepper, zesty but not overpowering and I love the texture from the crumbled tortilla chips...the oddest ingredient but it does add depth of texture. I also loved that this chili recipe is served over rice. I am always looking for well rounded protein/carb meals especially when I am training for distance runs, like I am now, and this recipe has it all.
So first of all, mix tomato paste and coffee in a small bowl. I love that I made coffee for my chili! And yes, of course I made enough so that I could drink some coffee as well...duh!!
Next make a spice mixture of chili powder, salt and pepper and toss the meat with it.

Add the meat to the slow cooker and combine with the pinto beans, crushed tortilla chips and coffee mixture. Cook for 8 hours...dang the house smelled awesome!!

Serve over white rice (cooked just for clarification) and topped with shredded cheddar cheese, green onions and avocado. Double Happiness!!
1/4 cup tomato paste
1/2 cup brewed coffee
2 pounds beef chuck, cut into 1 1/2-inch pieces
1 tablespoon chili powder
Kosher salt and freshly ground pepper
2 15-ounce cans pinto beans (do not drain)
1/2 cup crushed tortilla chips
4 cups cooked white rice
Shredded cheddar cheese, sliced scallions and diced avocado, for topping (optional)
Directions
Mix the tomato paste and coffee in a small bowl; set aside. Toss the meat with the chili powder, 1 1/2 teaspoons salt and 1/4 teaspoon pepper in a 6-quart slow cooker. Stir in the beans (with their liquid), the coffee mixture and the tortilla chips.
Cover the slow cooker and cook on low until the beef is tender, 8 hours. Season with salt. Serve the chili with the rice; top with cheese, scallions and avocado.
Have a great week!
Sunday, November 10, 2013
Pecan Pie & A Fall Feast
As many of you know I have been wanting to make a pecan pie for a few weeks now. I went to the Somis Nut House and bought pecans, found a recipe on-line and thought about making it for a good 2-3 weeks after that. That is one of the few drawbacks to being single, if you make a pie, you eat a pie, alone and that is just not the healthiest scenario. So when I got invited over to a friends house for dinner last night, I had visions of pecan pies dancing through my head...yes, kind of like the Night Before Christmas...but different.

This pecan pie was truly the easiest thing ever! So if you are looking for an easy pie recipe for your Thanksgiving Day festivities, this is the one. It is chewy, gooey and has that yummy brown sugar molasses taste! The recipe gave the option of using pecan halves or chopped pecans, but I had always had pecan pie growing up with halves so that is what I used and it turned out great.

So take a frozen crust, if you are short on time, use a store bought one. Actually Trader Joe's has really good frozen crusts. They are light and flakey! Or you can make your own, just depends on how over the top you want to be. Next sprinkle the bottom of the crust with pecans.


Mix the other ingredients together in a bowl-eggs, melted butter, dark corn syrup, sugar, cinnamon and vanilla. Pour over the pecans. The pecans will float to the top.

Bake for 45-50 minutes. Voila!

Here is the actual recipe: http://www.thecountrycook.net/2012/05/southern-pecan-pie.html

I was actually super excited because she asked me if I wanted to come over and cook with her and since I am always up for a new food adventure, I said "yes," without hesitation. I also love to cook in other peoples kitchen...something about being a cupboard voyeur...not in a creepy way.
She chose a Southwestern menu from one of her favorite restaurants in Sedona, AZ. The cookbook is beautiful and I loved the pics and she said the food at the restaurant was incredible...I so need to make it to Sedona...does anyone want to take me? Here is the link to the restaurant and the cookbook: http://www.elotecafe.com/

So for the menu we had seafood tacos, which were a combination of cod and Mexican shrimp. They were marinated in an orange juice, soy sauce, cumin, dried ancho pepper and some other seasonings. The marinade is cooked in a pan until the pepper is soft and then once the mixture has cooled, it is blended to make it smooth. The tacos were incredible!

And we served them with a spicy cabbage slaw, guacamole and a lime aioli.


As a side dish we did a jicama, orange, radish, cilantro salad with a spicy dressing that consisted of olive oil, cholula, lemon juice, cumin, salt and chili peppers. It was so light and refreshing!

We had a great time in the kitchen-cooking, drinking a glass of wine and sharing life stories! It was truly one of those perfect kitchen moments. If we got too quiet her husband would come check on us aka. taste test the food.
She also has an amazing eye for decorating so walking into her house and seeing her beautifully decorated table made me feel like I stepped into an issue of Architectural Digest. It was absolutely beautiful!

And I made a new friend!! I don't know if he was as interested in me as I was in him, but I was pretty sure we had a love at first site moment...hmmm or oh wait maybe that is why I am single. He may actually think I am a stalker...but what exactly is the definition of a stalker! Haha!

There is truly nothing better than good friends, good food and fun Fall festivities! Cheers!

Thursday, November 7, 2013
My Taco Kick Continues-Blackened Shrimp Tacos
Ok so I don't think I realized how obsessed I have been with tacos lately until my best friend pointed out the fact that I have eaten a crap load of tacos lately. And well once she said that I took a walk down taco memory lane in my head and well she is right...I have been a tab bit obsessed with tacos. It is an easy food to eat a lot of because there are SOOO many different fillings that you feel like you are constantly eating different food, but it is all in the...well taco family. So most recently I made Blackened Shrimp Tacos and these were so good!!

The Blackened Shrimp Tacos had great flavor as they are spicy and zesty from the spice rub. The shrimp are coated in a dry rub that consists of paprika, cumin, garlic powder, oregano, salt, thyme and red pepper and this is truly what makes the recipe! It also has a queso fresco, mayo, garlic, buttermilk and vinegar sauce and that really adds a nice salty tangy contrast to the spice and keeps it from being too overpowering. The tacos are also served with tomato and avocado and they are just seriously a perfect taco! And to make it even better they are made in under 30 minutes. Ok sure I cheated and bought shrimp that were already peeled and deveined, but even if you add peeling and deveining time these tacos can easily be on the table in under 30 minutes.
So first of all make the queso fresco sauce. Combine the queso fresco, buttermilk, canola mayo, garlic and vinegar in a bowl. Sorry I didn't take a pic of this because it was a white sauce in a white bowl and well it was just down right boring to look at.
Next make the spice rub, which consists of paprika, cumin, garlic powder, oregano, salt, thyme and red pepper. I put all of the spiced in a ziplock bag and tossed in the shrimp and shook the bag around for a bit...voila.

Next cook the shrimp on a grill pan until opaque. The recipe says 2 minutes per side, but I will be honest I just cooked them until they changed color. I was visiting and drinking wine so I forgot to set the timer...how is that for honesty.

The tacos were served with tomato and avocado. I served them on corn tortillas which I cooked on the open burner of the stove, approximately 7-10 seconds per side or until they start to turn color.
2 tablespoons buttermilk
2 tablespoons canola mayonnaise (such as Hellmann's)
1/2 teaspoon minced garlic
1/2 teaspoon white vinegar
2 ounces queso fresco, crumbled (about 1/2 cup)
2 teaspoons paprika
1 1/2 teaspoons ground cumin
3/4 teaspoon garlic powder
1/2 teaspoon dried oregano
1/4 teaspoon salt
1/4 teaspoon dried thyme
1/4 teaspoon ground red pepper
1 pound medium shrimp, peeled and deveined
Cooking spray
8 (6-inch) corn tortillas
1/2 cup diced plum tomato
1 ripe avocado, peeled and roughly mashed
Preparation
1. Combine first 5 ingredients in a small bowl; set aside.
2. Combine paprika and next 6 ingredients in a large zip-top plastic bag. Add shrimp to bag; seal and shake well to coat. Remove shrimp.
3. Heat a grill pan over high heat. Coat pan with cooking spray. Add shrimp; cook 2 minutes per side or until done.
4. Working with 1 tortilla at a time, heat tortillas over medium-high heat directly on the eye of a burner for about 15 seconds on each side or until lightly charred. Divide shrimp evenly among tortillas; divide tomato, avocado, and sauce evenly among tacos.
 This was a Cooking Light recipe so it was healthy...which totally aided to my Chardonnay justification. And as a side note this Darkhorse Chardonnay is really nice! It is buttery and slightly oakey but very smooth! I found it at Trader Joe's and I was very pleasantly surprised especially because it is very reasonably priced. Cheers!

The Blackened Shrimp Tacos had great flavor as they are spicy and zesty from the spice rub. The shrimp are coated in a dry rub that consists of paprika, cumin, garlic powder, oregano, salt, thyme and red pepper and this is truly what makes the recipe! It also has a queso fresco, mayo, garlic, buttermilk and vinegar sauce and that really adds a nice salty tangy contrast to the spice and keeps it from being too overpowering. The tacos are also served with tomato and avocado and they are just seriously a perfect taco! And to make it even better they are made in under 30 minutes. Ok sure I cheated and bought shrimp that were already peeled and deveined, but even if you add peeling and deveining time these tacos can easily be on the table in under 30 minutes.
So first of all make the queso fresco sauce. Combine the queso fresco, buttermilk, canola mayo, garlic and vinegar in a bowl. Sorry I didn't take a pic of this because it was a white sauce in a white bowl and well it was just down right boring to look at.
Next make the spice rub, which consists of paprika, cumin, garlic powder, oregano, salt, thyme and red pepper. I put all of the spiced in a ziplock bag and tossed in the shrimp and shook the bag around for a bit...voila.

Next cook the shrimp on a grill pan until opaque. The recipe says 2 minutes per side, but I will be honest I just cooked them until they changed color. I was visiting and drinking wine so I forgot to set the timer...how is that for honesty.

The tacos were served with tomato and avocado. I served them on corn tortillas which I cooked on the open burner of the stove, approximately 7-10 seconds per side or until they start to turn color.
2 tablespoons buttermilk
2 tablespoons canola mayonnaise (such as Hellmann's)
1/2 teaspoon minced garlic
1/2 teaspoon white vinegar
2 ounces queso fresco, crumbled (about 1/2 cup)
2 teaspoons paprika
1 1/2 teaspoons ground cumin
3/4 teaspoon garlic powder
1/2 teaspoon dried oregano
1/4 teaspoon salt
1/4 teaspoon dried thyme
1/4 teaspoon ground red pepper
1 pound medium shrimp, peeled and deveined
Cooking spray
8 (6-inch) corn tortillas
1/2 cup diced plum tomato
1 ripe avocado, peeled and roughly mashed
Preparation
1. Combine first 5 ingredients in a small bowl; set aside.
2. Combine paprika and next 6 ingredients in a large zip-top plastic bag. Add shrimp to bag; seal and shake well to coat. Remove shrimp.
3. Heat a grill pan over high heat. Coat pan with cooking spray. Add shrimp; cook 2 minutes per side or until done.
4. Working with 1 tortilla at a time, heat tortillas over medium-high heat directly on the eye of a burner for about 15 seconds on each side or until lightly charred. Divide shrimp evenly among tortillas; divide tomato, avocado, and sauce evenly among tacos.

Tuesday, November 5, 2013
For My Vegetarian Fans-Soba Noodles with Miso-Glazed Tofu and Vegetables
As many of you know I am not the biggest fan of leftovers, but for some reason I don't mind them if they are vegetarian. I don't know if this is some odd psychological thing, a throwback from my childhood days of being vegetarian or just the way I roll. I did google it and I couldn't find a diagnosis, so I am pretty sure I will survive. Because seriously if there is a medical condition out there, I can find it on the internet. I have finally had to stop looking up my ailments because I have incorrectly diagnosed myself so many times it just isn't funny...including ailments that haven't been around for the last 200 years....yup it is a miracle but they cropped up again in me!!! Don't even ask!!

So tonight I made a Cooking Light recipe for Soba Noodles with Miso-Glazed Tofu and Vegetables. And let me start by saying thanks to the miso this is the first Cooking Light recipe in quite some time that didn't require me to add a ton more salt. This was also my first time having soba noodles and I loved them! I also really enjoyed the texture of the tofu as it is sauteed in canola oil, which gave it a nice crispy crust, yet it is still tofu texture inside. And the sauce had great flavor from the sesame oil, ginger, miso, rice vinegar and soy sauce. I really enjoyed this recipe and it tasted fresh and healthy!

Soba noodles kind of reminded me of Top Ramen, they are salty and have a similar texture. However, they are a thin Japanese noodle made from buckwheat flour. They are normally served hot in a broth or chilled in a sauce. This recipe is kind of a combination as they are warm, but served with a sauce. Soba is often served on New Years and when someone moves. The word "soba," can also be used synonymously to mean any type of noodles, so it can get confusing, but the ones I used for this recipe did use buckwheat flour.

Ok back to this recipe. First of all make the sauce, which consists of canola oil, rice vinegar, white miso, ginger, garlic, soy sauce, sugar and sesame oil. I couldn't find white miso so I used a miso concentrate, which is supposed to be used as a base for miso soup and that worked just great.

Next cook the noodles. The majority of soba noodles I found had you cook them in boiling water for 2 minutes, stir them 5 times with chopsticks (I used a spoon) and drain. That is the process I followed and they turned out perfectly. On a side note, if you are not as much of a salt fiend as I am you can rinse the noodles after they are done cooking and that will decrease the salty flavor.

In a skillet, heat canola oil and cook the tofu slabs for 3 minutes on each side, until they are browned. Add 1 T of sauce to the pan.

Add additional oil to the pan and saute the asparagus and mushrooms for 4 minutes. I truly thought 4 minutes wasn't nearly enough time to cook the asparagus through, but it was perfect.
The recipe has you add sauce to the noodles and vegetables separately, however I just tossed the noodles and vegetables together and poured the sauce over both. In my humble opinion, that seemed to work just fine!
Serve the tofu on top of the noodle/vegetable mixture and top with green onions. Voila!
2 1/2 tablespoons canola oil, divided
3 tablespoons rice vinegar
2 tablespoons white miso
1 tablespoon minced peeled ginger
1 tablespoon minced garlic
1 tablespoon lower-sodium soy sauce
1 1/2 teaspoons sugar
1 teaspoon dark sesame oil
4 ounces uncooked organic soba noodles
1 (14-ounce) package extra-firm tofu, drained
6 ounces shiitake mushrooms, stems discarded
1 pound asparagus spears, trimmed and cut into 1-inch pieces
1/4 cup thinly sliced green onions
Preparation
1. Combine 1 tablespoon canola oil and next 7 ingredients (through sesame oil) in a medium bowl, stirring with a whisk.
2. Cook noodles according to package directions; drain and rinse. Combine noodles and 1/4 cup miso mixture in a bowl; toss to coat.
3. Heat a large nonstick skillet over medium-high heat. Add 1 tablespoon canola oil to pan; swirl to coat. Cut tofu crosswise into 4 (1-inch-thick) slices. Add tofu to pan; cook 3 minutes on each side or until browned. Add 1 tablespoon miso mixture to pan; toss to coat. Remove tofu from pan; keep warm. Add remaining 1 1/2 teaspoons canola oil to pan; swirl to coat. Add mushrooms and asparagus to pan; sauté 4 minutes or until tender. Add remaining 2 tablespoons miso mixture to pan; toss to coat. Sprinkle with green onions. Arrange 1/2 cup noodle mixture in each of 4 bowls; top each serving with 1/2 cup vegetable mixture and 1 tofu steak
This is really a great leftover dish or a healthy dinner! For all my vegetarian readers-enjoy! And for all my carnivores-don't worry I will cook you some meat very very soon!! Cheers!
Monday, November 4, 2013
Healthy Huevos Rancheros Tacos
So last night after my 9 mile run I decided to make something with a great deal of protein. For some reason, after my runs, I have been a bit shaky and so I have been searching for the magical cure for that. I will let you know when I find it and yes, I am sure some of you would recommend not running...but that just isn't an option for me as it is what keeps me sane at the moment and I have two big runs in the not so distance future. So for now I will continue to put one foot in front of another and try to eat more protein.

On a side note, it is 1730 and it is dark, how weird!! This will definitely take some getting use to and probably just about the time I adjust, we will change the clocks again. Yes, I know this happens every year and yes, every year I seem to be surprised. It is kind of like how people talk about the weather, they never get tired of discussing the time and the weather...myself included...so odd.
Anyway back to Huevos Rancheros Tacos. This recipe came from Cooking Light and instead of serving Huevos Rancheros on a flat tortilla, this one can be served folded like a taco. But realistically, I won't judge, you can eat it any way you want, and depending on how long you cook the corn tortillas they can be as soft or as crunchy as you want.
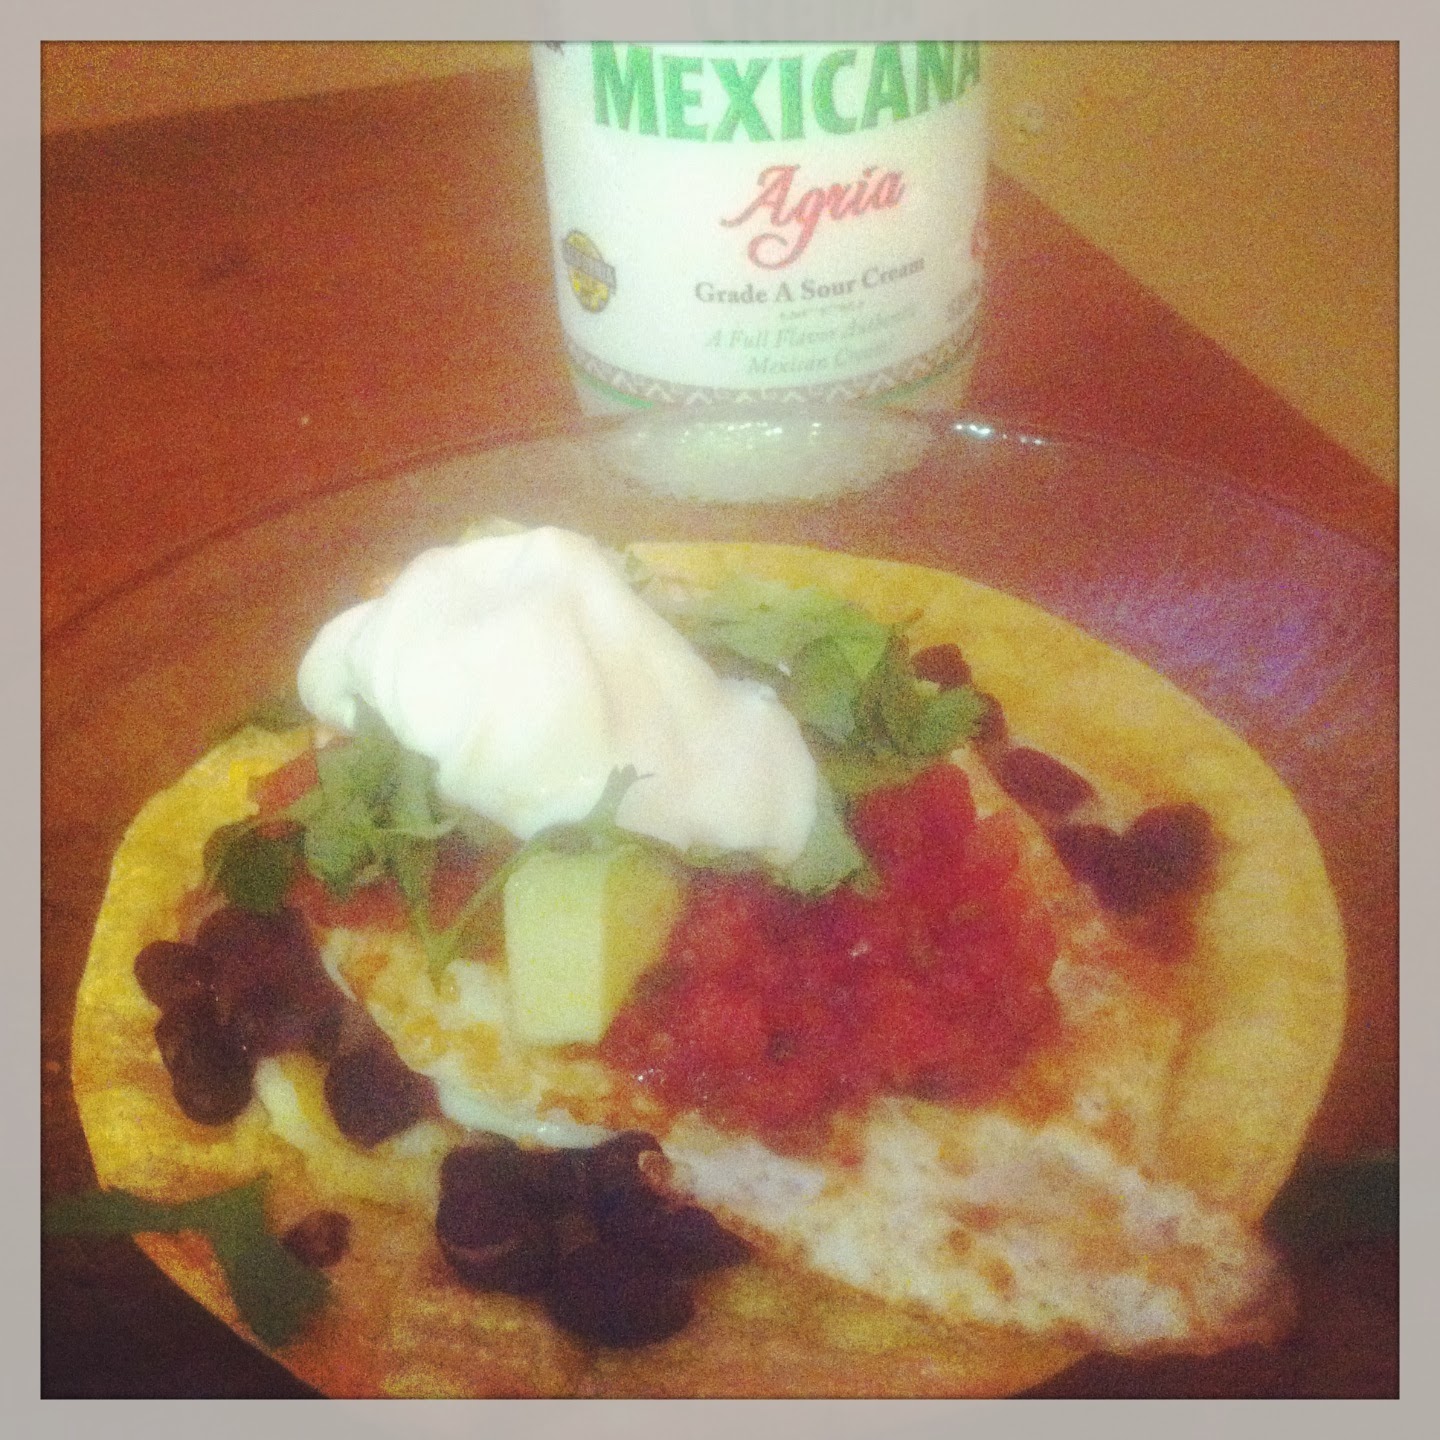
These tacos have great flavor between the cheese, avocado, salsa, black beans, cilantro, lime and fried eggs. They are also extremely easy to make and they are great for breakfast, brunch, lunch or dinner. ok I didn't eat them for all 4 occassions, but they would work for each one, I just made them as a breakfast for dinner kind of a thing. Btw, they are also great leftover, as long as you don't mind the fact that the tortilla gets a little soggy, but it still tastes great.

First of all place the tortillas on a cookie sheet and spray with cooking spray. Place in the broiler for 2 minutes, they will be slightly brown. Turn the tortilla over and sprinkle with cheese and spread the black beans over the tortilla. Cook in the broiler for another 1-2 minutes or until the cheese is melted.

Meanwhile, cook the fried eggs to your liking in a medium skillet. The recipe calls for oil, but I used cooking spray and this worked just fine.
Take the tortillas out of the oven and put 1 egg on each tortilla. Top the tacos with pico de gallo or salsa, crema, avocado and cilantro. Serve with a side of lime.

4 (6-inch) corn tortillas
Cooking spray
1/2 cup shredded reduced-fat 4-cheese Mexican blend cheese
1/2 cup black beans, rinsed and drained
2 teaspoons olive oil
4 large eggs
1/4 teaspoon black pepper
1/4 cup fresh pico de gallo
2 tablespoons Mexican crema
1/2 ripe peeled avocado, chopped
1/4 cup fresh cilantro leaves
4 lime wedges
Preparation
1. Preheat broiler to high.
2. Arrange tortillas on a baking sheet; lightly coat tortillas with cooking spray. Broil 2 minutes; remove pan from oven. Turn tortillas over. Top each tortilla with 2 tablespoons cheese and 2 tablespoons beans. Broil 1 minute or until cheese melts. Remove from oven.
3. Heat a large nonstick skillet over medium-high heat. Add oil to pan; swirl to coat. Crack eggs into pan; cook 2 minutes. Cover and cook 2 minutes or until whites are set. Place 1 egg in center of each tortilla; sprinkle with pepper. Top tacos evenly with pico de gallo, crema, avocado, and cilantro. Serve with lime.
Now for a few random facts, did you know that Huevos Rancheros means rancher's eggs? And I also learned that there is a dish called Huevos Divorciados, divorced eggs, which have two different types of sauces, one on each egg. I am going to have to try and make those next time, just because I love the name. Did you also know that the addition of cheese, lettuce and sour cream is non-traditional? Just in case you wanted to know.
 Happy MondayY'all!!
On a side note, it is 1730 and it is dark, how weird!! This will definitely take some getting use to and probably just about the time I adjust, we will change the clocks again. Yes, I know this happens every year and yes, every year I seem to be surprised. It is kind of like how people talk about the weather, they never get tired of discussing the time and the weather...myself included...so odd.
Anyway back to Huevos Rancheros Tacos. This recipe came from Cooking Light and instead of serving Huevos Rancheros on a flat tortilla, this one can be served folded like a taco. But realistically, I won't judge, you can eat it any way you want, and depending on how long you cook the corn tortillas they can be as soft or as crunchy as you want.
These tacos have great flavor between the cheese, avocado, salsa, black beans, cilantro, lime and fried eggs. They are also extremely easy to make and they are great for breakfast, brunch, lunch or dinner. ok I didn't eat them for all 4 occassions, but they would work for each one, I just made them as a breakfast for dinner kind of a thing. Btw, they are also great leftover, as long as you don't mind the fact that the tortilla gets a little soggy, but it still tastes great.

First of all place the tortillas on a cookie sheet and spray with cooking spray. Place in the broiler for 2 minutes, they will be slightly brown. Turn the tortilla over and sprinkle with cheese and spread the black beans over the tortilla. Cook in the broiler for another 1-2 minutes or until the cheese is melted.

Meanwhile, cook the fried eggs to your liking in a medium skillet. The recipe calls for oil, but I used cooking spray and this worked just fine.
Take the tortillas out of the oven and put 1 egg on each tortilla. Top the tacos with pico de gallo or salsa, crema, avocado and cilantro. Serve with a side of lime.

4 (6-inch) corn tortillas
Cooking spray
1/2 cup shredded reduced-fat 4-cheese Mexican blend cheese
1/2 cup black beans, rinsed and drained
2 teaspoons olive oil
4 large eggs
1/4 teaspoon black pepper
1/4 cup fresh pico de gallo
2 tablespoons Mexican crema
1/2 ripe peeled avocado, chopped
1/4 cup fresh cilantro leaves
4 lime wedges
Preparation
1. Preheat broiler to high.
2. Arrange tortillas on a baking sheet; lightly coat tortillas with cooking spray. Broil 2 minutes; remove pan from oven. Turn tortillas over. Top each tortilla with 2 tablespoons cheese and 2 tablespoons beans. Broil 1 minute or until cheese melts. Remove from oven.
3. Heat a large nonstick skillet over medium-high heat. Add oil to pan; swirl to coat. Crack eggs into pan; cook 2 minutes. Cover and cook 2 minutes or until whites are set. Place 1 egg in center of each tortilla; sprinkle with pepper. Top tacos evenly with pico de gallo, crema, avocado, and cilantro. Serve with lime.
Now for a few random facts, did you know that Huevos Rancheros means rancher's eggs? And I also learned that there is a dish called Huevos Divorciados, divorced eggs, which have two different types of sauces, one on each egg. I am going to have to try and make those next time, just because I love the name. Did you also know that the addition of cheese, lettuce and sour cream is non-traditional? Just in case you wanted to know.

Subscribe to:
Posts
(Atom)
Visit My Website!


