Sunday, December 30, 2012
My First Quinoa Cooking Experience
So my first quinoa experience EVER occurred in Solvang a few months ago at a restaurant, however last week when I went to a health food store I saw it for sale and I decided to try and cook it myself. And that is exactly what I did. Tonight I made Quinoa with Roasted Garlic, Tomatoes and Spinach. Let me start by saying I love the smell of roasted garlic and I was so impressed by how quickly the smell started to permeate my house...yum. I also learned a few things about quinoa in preparation for writing this blog...did you know?


This recipe has a ton of flavor...a hint of sweetness from the garlic, a nutty flavor from the Parmesan and a hint of spice from the pepper. Quinoa also has a great texture and pair that with the tomatoes and spinach and it is just a great combination!! This dish will definitely be made again at my house.

- Quinoa is in the grass family even though everyone thinks it is a grain.
- Quinoa originated in Ecuador, Peru, Bolivia and Colombia
- Quinoa is related to beets and spinach
- Archaeologists believe quinoa date back 7,000 years...if it has been around that long it really shouldn't have taken me this long to discover it...just saying.
- Quinoa is high in iron, calcium and phosphorous...I love stuff that tastes good and is healthy!
- The Incas believed quinoa was sacred and after the dish I made tonight I agree with them
- 2013 is International Year of the Quinoa (I did not make that up)
- When the Spanish conquered the Incas they forced them to grow wheat instead of quinoa...not really sure why they cared
So the recipe I made tonight came from Cooking Light. Start by cutting a bulb of garlic in half, wrapping half of it in foil and using the other half some other time. Roast the foil half in the oven for an hour at 350 degrees...this is the part that smells so good!!

Next cook 1T olive oil in a pan and add the red pepper flakes and shallots. I also love the smell of cooking oil so pair this with the odor of the garlic and I was pretty darn happy. I also have to say the red pepper is a really nice flavor booster to this dish so do not leave it out, just adjust it as necessary to accommodate your spice quotient.
Add the quinoa and cook for 2 minutes with the shallots, oil and pepper. Add 1T wine. I know you are thinking, damn 1T of wine and I have to open a bottle just for that. However, let me just say let's change the frame of mind on this to..."oh thank goodness I get to open a bottle of wine and this recipe only calls for 1T so I get to drink more of it while I am cooking." Yes, I do always have a positive attitude like this. Cheers!!
Next add the broth and bring to a boil. Once it has boiled, cover the pot and simmer for 15 min. Finally add the grated Parmesan, chopped tomatoes, spinach and roasted garlic. Voila!!

- 1 whole garlic head
- 1 tablespoon olive oil $
- 1 tablespoon finely chopped shallots
- 1/4 teaspoon crushed red pepper
- 1/2 cup uncooked quinoa, rinsed and drained
- 1 tablespoon dry white wine $
- 1 cup fat-free, less-sodium chicken broth
- 1/2 cup baby spinach leaves $
- 1/3 cup chopped seeded tomato (1 small) $
- 1 tablespoon shaved fresh Parmesan cheese $
- 1/4 teaspoon salt
Preparation
- 1. Preheat oven to 350°.
- 2. Remove papery skin from garlic head. Cut garlic head in half crosswise, breaking apart to separate whole cloves. Wrap half of head in foil; reserve remaining garlic for another use. Bake at 350° for 1 hour; cool 10 minutes. Separate cloves; squeeze to extract garlic pulp. Discard skins.
- 3. Heat oil in a saucepan over medium heat. Add shallots and red pepper to pan; cook 1 minute. Add quinoa to pan; cook 2 minutes, stirring constantly. Add wine; cook until liquid is absorbed, stirring constantly. Add broth; bring to a boil. Cover, reduce heat, and simmer 15 minutes or until liquid is absorbed. Remove from heat; stir in garlic pulp, spinach, tomato, cheese, and salt. Serve immediately.
This recipe has a ton of flavor...a hint of sweetness from the garlic, a nutty flavor from the Parmesan and a hint of spice from the pepper. Quinoa also has a great texture and pair that with the tomatoes and spinach and it is just a great combination!! This dish will definitely be made again at my house.
Wishing everyone a blessed and Happy New Year...best wishes for 2013!!
Thursday, December 27, 2012
Jumping on the Gluten Free Bandwagon
So I had always thought that gluten free was the equivalent of sacrifice...kind of like a death sentence but a little different. Kind of like,"give me flour or give me death." Yes, I am a self proclaimed bread head and I truly think there is nothing better than fresh baked bread, cheese and baguettes or pasta. So the thought of going gluten free just meant starvation, living hell and deprivation to me....until recently. Sure the idea of gluten free has become more popular and along with it the gluten free options have exploded. Most recently I discovered gluten free flour and I decided to give it a try with some cookies... and the cookies were great. I couldn't taste the difference, but hello they are cookies so seriously you add chocolate to just about anything and you can mask things that are less than pleasant. So for my second soiree into gluten free I decided to try something savory just to see if I could taste the difference or recognize the difference in texture and I have to say I really can't. Today I made Jalapeno and Cheddar Cornbread and this recipe is now one of my favorite cornbread recipes...gluten recipes included. Damn this gluten free idea has come a long way!!

This recipe came from the cookbook The Gluten Free Table, which was written by Emeril Legasse's two daughters. I love that the recipe is cooked in a cast iron skillet and it would look great as a table centerpiece especially if you were serving something like a vat-o-chili alongside of it. The cornbread has great flavor, as it has a hint of spice from the jalapeno, great texture from the corn and a really classic homey cornbread taste from the buttermilk. Plus you add in a bit of cheddar cheese and green onions and this cornbread is heaven!! It is also very moist, but it does have crispy buttery edges as you melt butter in the skillet prior to adding the mixture and baking. This recipe is yum!!

The recipe is also very easy. Mix the dry ingredients-gluten free flour, cornmeal, baking powder, baking soda, salt and sugar. Then in a separate bowl beat 2 eggs and an egg white and add the buttermilk. Fold in the liquid ingredients to the dry. Then add the shredded cheddar cheese, green onions, jalapenos and creamed corn.
 Melt the butter in the cast iron skillet and then add the cornbread mixture. Bake for 30 minutes and then eat!!


Since I am on a gluten free kick I also tried these gluten free chocolate chip cookies. They are made with coconut flour so they have a flavor reminiscent of coconut macaroons which I LOVE!! The texture is a little different, but the cookies have great flavor. I bought them at a natural food store and the owner was telling me that they are also awesome when frozen...which I will try next. I also just seriously love the packaging. These are also made locally so I love to support local ventures. Here is the web page check it out: http://glutenfreecookies.org/

This recipe came from the cookbook The Gluten Free Table, which was written by Emeril Legasse's two daughters. I love that the recipe is cooked in a cast iron skillet and it would look great as a table centerpiece especially if you were serving something like a vat-o-chili alongside of it. The cornbread has great flavor, as it has a hint of spice from the jalapeno, great texture from the corn and a really classic homey cornbread taste from the buttermilk. Plus you add in a bit of cheddar cheese and green onions and this cornbread is heaven!! It is also very moist, but it does have crispy buttery edges as you melt butter in the skillet prior to adding the mixture and baking. This recipe is yum!!

The recipe is also very easy. Mix the dry ingredients-gluten free flour, cornmeal, baking powder, baking soda, salt and sugar. Then in a separate bowl beat 2 eggs and an egg white and add the buttermilk. Fold in the liquid ingredients to the dry. Then add the shredded cheddar cheese, green onions, jalapenos and creamed corn.


Ingredients
- 1 tablespoon unsalted butter, plus additional for topping
- 1 cup gluten-free all-purpose flour blend
- 1 cup finely ground cornmeal
- 1 tablespoon superfine sugar
- 2 teaspoons gluten-free baking powder
- 1/4 teaspoon salt
- 1/2 teaspoon baking soda
- 2/3 cup buttermilk
- 2 large eggs plus 1 large egg white, lightly beaten
- 1 cup grated cheddar cheese
- 1/2 cup canned creamed corn
- 3 small green onions, thinly sliced
- 2 to 3 jalapeno chiles, seeded, deveined and finely chopped
Directions
Preheat the oven to 400 degrees F. In a 10-inch cast-iron skillet over medium-low heat, melt 1 tablespoon butter. If using an 8-inch-square baking dish instead, simply grease the bottom of the dish with some of the butter and place the remainder in the bottom of the dish. Set the skillet or dish aside.
Sift the flour blend, cornmeal, sugar, baking powder, salt and baking soda together into a large bowl.
In a small bowl, mix the buttermilk and eggs together well. Fold the wet ingredients into the dry ingredients to thoroughly mix.
Fold in the cheese, creamed corn, green onions and chiles and stir until well combined.
Pour the mixture into the prepared skillet or baking dish and dab a bit more butter on top. Bake for 30 to 35 minutes, or until a toothpick inserted in the center comes out clean and the top is golden brown. Leave to cool in the pan or dish a few minutes before slicing and serving while warm.

Since I am on a gluten free kick I also tried these gluten free chocolate chip cookies. They are made with coconut flour so they have a flavor reminiscent of coconut macaroons which I LOVE!! The texture is a little different, but the cookies have great flavor. I bought them at a natural food store and the owner was telling me that they are also awesome when frozen...which I will try next. I also just seriously love the packaging. These are also made locally so I love to support local ventures. Here is the web page check it out: http://glutenfreecookies.org/
Monday, December 24, 2012
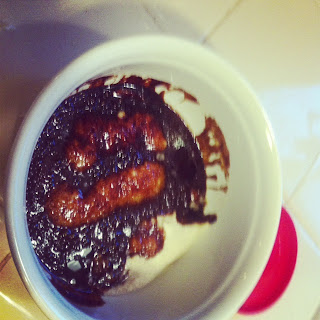
"No Fuss Truffles"
So I have decided that Betty Crocker and I are not BFF's. The last 2-3 recipes I have made of hers just haven't been as promised. That chai bread was nasty and these truffles were just down right fussy. And in all actuality these "truffles" were actually cake balls. And granted at the end of the day they taste great they weren't as easy, pretty and festive as the recipe promised.
I have decided that maybe to Betty Crocker "no fuss" means the following:


Here is the recipe in case anyone wants to try the recipe (I know I did a great job selling it, right): http://www.bettycrocker.com/recipes/christmas-truffles/c15e7b00-1a71-4bfb-ac98-15d8d177ead1
However, I do have to say at face value the recipe looked easy enough. Cook a cake mix that has red food coloring and cocoa powder added to it. That part was accomplished and my bestie and I drank champagne and watched Magic Mike while it cooled....talk about a win/win.
Once the cake has cooled add a cup of frosting to the crumbled cake and form into balls. Ok also accomplished. We did find that some of the balls were a little more squishy than expected, but this part all worked out.
Then came our challenges. We started melting the chocolate and then we started rolling our cake balls into the chocolate and we had disaster after disaster occur....cake balls falling apart, the red cake flaking into the white chocolate, the chocolate getting scorched, the chocolate getting hard and a strange consistency, yada, yada, yada.
 I was super proud of us when it came to sprinkling the red sugar on the truffles...that part went off without a hitch!!
So yes at the end of the day the cake balls/truffles taste great, but they definitely are not the prettiest. However, the cooking experience I wouldn't take back for anything. It was a rainy afternoon, the fire was lit and my best friend and I had a great festive baking experience...Cheers and Happy Holidays!
 |
| This is the truffle we are most proud of |
I have decided that maybe to Betty Crocker "no fuss" means the following:
- The red velvet will look so blood red when you put it in the oven that it looks like fresh blood and you are afraid of scaring your friends with your cake balls.

- However, when you take them out of the oven they will look more maroon and not very festive
- Putting red cake balls in white chocolate allows for the red cake to flake off and make your white chocolate kind of "dirty" looking...yummy!

- Having technical difficulties with the white chocolate...ok actually scorching the hell out of it in the microwave which in turn makes the house smell like burnt marshmallows over a camp fire

- Running out of white chocolate due to the scorching and having to make half of the "truffles" with dark chocolate
- The dark chocolate not smoothing out so you go through 2 bags of chocolate chips and 16 bowls (yes slight exaggeration) trying to melt enough chocolate to cover the cake balls/truffles

Here is the recipe in case anyone wants to try the recipe (I know I did a great job selling it, right): http://www.bettycrocker.com/recipes/christmas-truffles/c15e7b00-1a71-4bfb-ac98-15d8d177ead1
However, I do have to say at face value the recipe looked easy enough. Cook a cake mix that has red food coloring and cocoa powder added to it. That part was accomplished and my bestie and I drank champagne and watched Magic Mike while it cooled....talk about a win/win.
Once the cake has cooled add a cup of frosting to the crumbled cake and form into balls. Ok also accomplished. We did find that some of the balls were a little more squishy than expected, but this part all worked out.
Then came our challenges. We started melting the chocolate and then we started rolling our cake balls into the chocolate and we had disaster after disaster occur....cake balls falling apart, the red cake flaking into the white chocolate, the chocolate getting scorched, the chocolate getting hard and a strange consistency, yada, yada, yada.

So yes at the end of the day the cake balls/truffles taste great, but they definitely are not the prettiest. However, the cooking experience I wouldn't take back for anything. It was a rainy afternoon, the fire was lit and my best friend and I had a great festive baking experience...Cheers and Happy Holidays!
Saturday, December 22, 2012
Kitchen Collaboration-Lobster Risotto
There is truly nothing better than being in the kitchen with people you love...especially around the holidays. Last night I had the pleasure of being in the kitchen with my best friend. I have been wanting to try and make lobster risotto for quite some time and that is just not the kind of recipe you want to make for just yourself. So I invited myself over to make risotto for my best friend and her husband, however this time there was a caveat attached...she had to make her famous toaster oven rib eye. We also decided to make artichokes sauteed in olive oil and garlic. And of course we had to drink wine...not because we wanted to...but because it was festive (yes slight exaggeration bordering on drama here).

So I do not have a lot of lobster cooking experience. I am very good at ordering lobster in a restaurant and I excel at dipping it in melted butter and putting it in my mouth. However, I really did not know a whole lot about the nuances of cooking lobster. So I went to the store and purchased 5 lobster tails. I do have to admit I thought the butcher was kind of cute and so I asked him how to cut open a lobster and he was extremely helpful telling me where to cut using a sharp knife. Unfortunately my crush was extremely short lived as when I told him I was making lobster risotto he gave me a blank stare as if he had ABSOLUTELY no idea what risotto was. Seriously? You don't know what risotto is!!! Oy!! The End!!
 Back to the risotto...so take chicken broth and bring it to a boil. Add the lobster and cook for 4 minutes. Remove the lobster tails and let them cool. Once they are cool enough to handle remove the lobster meat. I actually used kitchen shears and cut the back of the shell and the meat came out very easily. I chopped the meat and set it aside.

I took the lobster shells and put them in a ziplock bag and took out my aggressions on them with a meat mallet. The shells then go back into the broth and you simmer them for 20 minutes so the broth absorbs the flavors. Don't worry the shells are strained out. After they have cooked strain the broth and put it back on the stove to simmer.
 Saute 1T butter in a pan and then add the arborio rice. Add 1 cup of the broth and cook, stirring constantly until the liquid is nearly absorbed. Add the broth 1/2 cup at a time, stirring until it is nearly absorbed. I actually did find that I needed to use extra chicken broth because my risotto was still pretty al dente even after using all of my broth...but that was just my experience.
 Once the risotto is cooked add the butter, extra broth, peas and chopped lobster. Voila!!
The risotto was nice and creamy, the lobster was rich and the broth had a nice seafood flavor and the perfect amount of salt. I would have liked a little Parmesan cheese, but that is probably because I am use to traditional risotto recipes.
Here is the risotto recipe if you would like to try it:


So I do not have a lot of lobster cooking experience. I am very good at ordering lobster in a restaurant and I excel at dipping it in melted butter and putting it in my mouth. However, I really did not know a whole lot about the nuances of cooking lobster. So I went to the store and purchased 5 lobster tails. I do have to admit I thought the butcher was kind of cute and so I asked him how to cut open a lobster and he was extremely helpful telling me where to cut using a sharp knife. Unfortunately my crush was extremely short lived as when I told him I was making lobster risotto he gave me a blank stare as if he had ABSOLUTELY no idea what risotto was. Seriously? You don't know what risotto is!!! Oy!! The End!!


I took the lobster shells and put them in a ziplock bag and took out my aggressions on them with a meat mallet. The shells then go back into the broth and you simmer them for 20 minutes so the broth absorbs the flavors. Don't worry the shells are strained out. After they have cooked strain the broth and put it back on the stove to simmer.


The risotto was nice and creamy, the lobster was rich and the broth had a nice seafood flavor and the perfect amount of salt. I would have liked a little Parmesan cheese, but that is probably because I am use to traditional risotto recipes.
Here is the risotto recipe if you would like to try it:
- 4 cups fat-free, lower-sodium chicken broth$
- 3 (5-ounce) American lobster tails
- 3 tablespoons butter, divided
- 1 cup uncooked Arborio rice or other medium-grain rice
- 3/4 cup frozen green peas, thawed
Preparation
- Bring broth and 1 1/2 cups water to a boil in a saucepan. Add lobster; cover and cook for 4 minutes. Remove lobster from pan; cool for 5 minutes. Remove meat from cooked lobster tails, reserving shells. Chop meat. Place shells in a large zip-top plastic bag. Coarsely crush shells using a meat mallet or heavy skillet. Return crushed shells to the broth mixture. Reduce heat to medium-low. Cover and cook for 20 minutes. Strain shell mixture through a sieve over a bowl, reserving broth; discard solids. Return broth mixture to saucepan; keep warm over low heat. Heat 1 tablespoon butter in a medium saucepan over medium-high heat. Add rice to pan; cook 2 minutes, stirring constantly. Stir in 1 cup broth mixture, and cook for 5 minutes or until liquid is nearly absorbed, stirring constantly. Reserve 2 tablespoons broth mixture. Add the remaining broth mixture, 1/2 cup at a time, stirring constantly until each portion is absorbed before adding the next (about 22 minutes total). Remove from heat, and stir in lobster, the reserved 2 tablespoons broth mixture, 2 tablespoons butter, and green peas.
And because I thought you might like to know a few risotto facts let me share with you:
- Arborio rice (the rice used for risotto) is usually imported from Italy
- Arborio rice has a high surface starch content
- Risotto is stirred constantly to coax the starch from the rice kernels which gives the dish its creamy texture.
- Risotto is typically al dente and has more of a bite to it than normal rice dishes
- The traditional risotto has broth, Parmesan, butter and onion

Now if you are interested in making the artichokes it was super easy. We did learn a valuable lesson about cutting the artichoke. We decided to steam the artichoke first and then cut it and saute it in olive oil and garlic. However, we discovered that once the artichoke is steamed it is pretty hard to cut because it is pretty floppy...yes that is a technical term. So my recommendation is to cut it first and then steam it and then saute it in garlic and olive oil. It still tasted great, but it did look a little tore up...yes that is another technical term.

The meal was the perfect way to celebrate the first day of winter and the fact that the Mayans were wrong and we are all still alive. So Cheers and Happy Holidays!!
Tuesday, December 18, 2012
Chocolate Facial & Thai Winter Squash Soup
So just like all of you my email inbox is being bombarded right now with holiday gift ideas. This morning I woke up to yet another 60 of these style of emails, however one of them caught my eye as it was for....a chocolate facial. Sure I haven't had one so maybe I shouldn't knock it, but seriously I love my chocolate and I can think of a lot of uses for chocolate but spreading it on my face is not one of them. I will even go so far as to say I have seen chocolate chip shower gel and I was like ok maybe, but a chocolate facial just gives me an image of some lady taking out a bottle of Hersheys chocolate syrup, squeezing it all over my face, rubbing it in and just letting me sit there....as I got sticky and crusty. Sure this could all just be an imaginary bias, but I think I will keep my chocolate in the kitchen.

However, this blog is actually about the Thai Winter Squash Soup I made last night in the crock pot. I love those recipes you can put in the crock pot and forget about. Especially during this crazy busy time of year there is nothing better than turning a knob and coming home to a warm and cozy meal. I will admit I was a little worried about this soup because as it was cooking it did smell a little odd, but once I added the cilantro and coconut milk at the end it really had some nice flavor from the cilantro, jalapeno and ginger. It also had a smooth creamy texture from the coconut milk that was complimented by the sweet butternut squash. Yum!!! And I have to admit I really liked this recipe because it wasn't your typical crock pot dish...sure there is a time and place for crock pot pot roast or chili but I liked the fact that I was making something out of the ordinary in this 1950's cooking accoutrement.

I also liked the fact that this was seriously one of the easiest crock pot dishes ever. There was none of this brown the meat first before putting it in the slow cooker...it was throw everything into the crock pot, put it on low and go on your merry way. It is also low in calories and low in fat which during this time of year there just isn't many things you can say that about...just saying.
So here is the recipe:
2 lbs butternut squash, peeled and cut into 3/4 inch pieces **I actually bought it at Fresh and Easy already peeled and chopped. I know that Trader Joe's also sells it like this **
2 cups thinly sliced bok choy
1 medium onion, cut into thin wedges ** I used red onion and it does turn a slightly odd color when it cooks but it tastes great **
1 medium jalapeno, seeded and finely chopped ** watch your eyes **
1/2 tsp finely shredded lime peel
2 T lime juice
1 tsp ground ginger
 1/2 tsp salt
3 cloves garlic, minced
2 14 oz cans vegetable broth ** I used vegetable bouillon in a jar for the first time and it worked great **
1 cup unsweetened coconut milk
1 T fresh cilantro
1T fresh basil
1. In a slow cooker combine squash, bok choy, onion, chile pepper, lime peel, lime juice, ginger, garlic and salt. Pour broth over it all
2. Cover and cook on low for 7-8 hours or on high 3 1/2-4 hours
3. Stir in coconut milk, cilantro and basil.
Sunday, December 16, 2012
Curry Fried Rice
So tonight my goal was to cook dinner without going to the grocery store. It is raining, I am tired after a 7 mile run and I just felt like staying home and making cookies. So I found a recipe in Food Network Magazine for Curry Fried Rice and I had all the ingredients so it was a win/win. I know that people either love curry or they hate curry...I am on the love side.

I also decided to educate myself a little bit about curry. I learned that curry is a Western invention and does not reflect a specific Indian food. It is closely related to garam masala and Tamil sambar powder which are both prevalent in Indian foods, however curry itself is a blend of several different spices. Normally curry powder is a blend of coriander, turmeric, cumin, fenugreek and red pepper or some variation. It can also include ginger, garlic, fennel seed, caraway, cinnamon, clove, mustard seed, cardamon, nutmeg and pepper. It is believed the curry was a corruption of the word kari which loosely translates to a dish that includes sauce, vegetables and meat.
I also learned that curry became popular when the British colonized India. However, it became more popular in the US in the 1960's and 70's. I also learned that there isn't a standardized version of curry so people may enjoy one curry variety and not another. Finally, my last curry tidbit for the day...I also learned that often times the curry recipe is passed down through a family so different families may have different curry variations.
 Ok back to the recipe. This is by far one of the most simple recipes, however I did learn a great technique for cooking egg. So you know how fried rice has thin bits of chopped up egg in it well I learned how this is done. Heat vegetable oil in a pan, add a beaten egg and swirl the pan. The more you swirl the pan the thinner the egg and as you swirl it the egg starts to set. Once you have swirled it to a desired thickness let it set completely and then take it out of the pan. Cook the rest of your rice and at the end add your egg back in and chop it as you stir it in.
Heat 1 1/2 tablespoons vegetable oil in a large nonstick skillet over high heat. Add 1 beaten egg and swirl the pan; let set, then transfer to a plate. Add 6 roughly chopped scallions to the pan along with 2 teaspoons curry powder, and pepper to taste; stir-fry 2 minutes. Stir in 4 cups cooked rice; spread in an even layer and cook 3 minutes. Add the egg, and salt to taste; stir to break up the egg. Drizzle with sesame oil.
This recipe has great flavor. I love the consistency of the cooked rice and the egg. I love the flavor of the curry powder, sesame oil and salt. And the green onions added a nice hint of crunch. All in all this was an easy dish with a lot of flavor and it will be perfect for lunch leftovers throughout the week. Cheers!

I also decided to educate myself a little bit about curry. I learned that curry is a Western invention and does not reflect a specific Indian food. It is closely related to garam masala and Tamil sambar powder which are both prevalent in Indian foods, however curry itself is a blend of several different spices. Normally curry powder is a blend of coriander, turmeric, cumin, fenugreek and red pepper or some variation. It can also include ginger, garlic, fennel seed, caraway, cinnamon, clove, mustard seed, cardamon, nutmeg and pepper. It is believed the curry was a corruption of the word kari which loosely translates to a dish that includes sauce, vegetables and meat.
I also learned that curry became popular when the British colonized India. However, it became more popular in the US in the 1960's and 70's. I also learned that there isn't a standardized version of curry so people may enjoy one curry variety and not another. Finally, my last curry tidbit for the day...I also learned that often times the curry recipe is passed down through a family so different families may have different curry variations.

Heat 1 1/2 tablespoons vegetable oil in a large nonstick skillet over high heat. Add 1 beaten egg and swirl the pan; let set, then transfer to a plate. Add 6 roughly chopped scallions to the pan along with 2 teaspoons curry powder, and pepper to taste; stir-fry 2 minutes. Stir in 4 cups cooked rice; spread in an even layer and cook 3 minutes. Add the egg, and salt to taste; stir to break up the egg. Drizzle with sesame oil.
This recipe has great flavor. I love the consistency of the cooked rice and the egg. I love the flavor of the curry powder, sesame oil and salt. And the green onions added a nice hint of crunch. All in all this was an easy dish with a lot of flavor and it will be perfect for lunch leftovers throughout the week. Cheers!
Friday, December 14, 2012
Is it still Cooking Light if you drink a beer with it?
So tonight I decided to try and make Cooking Light's Green Chile Chili...sure I was intrigued by the name and it was seriously the coldest day of the year...well for So Cal anyway... so I thought chili would be the perfect comfort food. However, since the recipe called for a beer I also thought I needed to drink a beer while I cooked. Ya know one for the chili and one for me. That is the deal, right? And after my cooking experience/dinner I thought to myself, hey great choice picking a Cooking Light recipe but if you drink a beer while you are cooking does it cancel out the Cooking Light benefits? After much thought I decided,"no because the happiness factor wins." The beer made me happy, the chili made me happy and happiness is healthy...add that to Cooking Light chili and its a win/win.

So I do have to say that I don't really understand the name of this recipe. Yes, there are green chilies in this recipe, but it is the farthest thing from green known to man. So I probably wouldn't have named this Green Chile Chili...but just my opinion. The recipe called for a tablespoon of chili powder and I decided to use chipotle chili powder and let me just say it did add a little extra kick, but it also added a nice smoky flavor to the chili.
This recipe also calls for ground sirloin, which worked fine, but I love chili that has big 'ol chunks of meat in it so my next chili will definitely have a more meaty texture. I am also not a huge fan of canned kidney beans in chili and in this recipe they did work ok but they do seem to always maintain a sort of grainy texture in my opinion. I also tend to like my chili with a little more of a soup/stew texture and this was definitely more just packed full of stuff. However, after enough beer all can be forgiven. I guess what I am really trying to say is this chili was ok...it had great spicy, smoky flavors and I did like the spice with the smoked cheese. I also enjoyed it with the cold beer, but I would never make this dish again if I was being completely honest.
But here are a few random chili facts just so all is not wasted by reading my blog:

Here is the recipe in case you want to try it yourself or put your own spin on it:

So I do have to say that I don't really understand the name of this recipe. Yes, there are green chilies in this recipe, but it is the farthest thing from green known to man. So I probably wouldn't have named this Green Chile Chili...but just my opinion. The recipe called for a tablespoon of chili powder and I decided to use chipotle chili powder and let me just say it did add a little extra kick, but it also added a nice smoky flavor to the chili.
This recipe also calls for ground sirloin, which worked fine, but I love chili that has big 'ol chunks of meat in it so my next chili will definitely have a more meaty texture. I am also not a huge fan of canned kidney beans in chili and in this recipe they did work ok but they do seem to always maintain a sort of grainy texture in my opinion. I also tend to like my chili with a little more of a soup/stew texture and this was definitely more just packed full of stuff. However, after enough beer all can be forgiven. I guess what I am really trying to say is this chili was ok...it had great spicy, smoky flavors and I did like the spice with the smoked cheese. I also enjoyed it with the cold beer, but I would never make this dish again if I was being completely honest.
But here are a few random chili facts just so all is not wasted by reading my blog:
- Did you know there is an International Chili Society? www.chilicookoff.com
- Chiles are made hot from a substance called capsaicin, which is located on the inside of the pepper.
- Eating dairy products like milk are the fastest way to cool off your mouth after spicy chili or chiles.
- The mildest pepper is the bell pepper
- Chiles are high in vitamin A and C and are supposedly helpful in lowering blood pressure
- The first reference to chili peppers is in 7000BC in Mexico
This recipe is easy to make. Saute the meat in 1T oil for approximately 5 minutes. Add the onions, paprika and chili powder and cook for 4 minutes. Add the garlic and cook for 1 minute more. Put the beer in the pot and bring to a boil, lower the heat and cook for 15 minutes or until the beer is nearly evaporated...this is the point where I decided I get a beer too.

Add the salsa verde, diced green chiles, tomatoes and kidney beans and again bring the mixture to a boil. Lower the heat and simmer for 30 minutes. Put the cheese and green onions on top of the chili as "toppings" and voila!!
Here is the recipe in case you want to try it yourself or put your own spin on it:
- 1 tablespoon canola oil
- 12 ounces ground sirloin $
- 1 1/2 cups chopped onion $
- 1 tablespoon chili powder
- 1 teaspoon hot paprika
- 5 garlic cloves, minced
- 1 (12-ounce) bottle dark beer $
- 1/2 cup salsa verde
- 1 (4-ounce) can diced green chiles, undrained
- 1 (15-ounce) can no-salt-added tomatoes, undrained and crushed
- 1 (15-ounce) can organic kidney beans, rinsed and drained $
- 1/4 cup (1 ounce) shredded sharp cheddar cheese $
- 1 green onion, sliced
Preparation
- 1. Heat a large Dutch oven over medium-high heat. Add oil to pan; swirl to coat. Add beef; sauté for 5 minutes or until no longer pink, stirring to crumble. Add chopped onion, chili powder, and paprika; sauté 4 minutes, stirring occasionally. Add garlic; sauté for 1 minute, stirring constantly.
- 2. Stir in beer; bring to a boil. Cook 15 minutes or until liquid almost evaporates. Add salsa and the next 3 ingredients (through beans); bring to a boil. Reduce heat, and simmer for 30 minutes, stirring occasionally. Ladle 1 1/4 cups chili into each of 4 bowls, and top each serving with 1 tablespoon cheese. Sprinkle with green onion.
Wednesday, December 12, 2012
Poser Potato Pancakes
So I will totally admit these are poser potato pancakes and
I am pretty much a poser Jew. Let me also say that I mean absolutely no
disrespect, as the reason I am a poser Jew is because I have a curiosity, an
interest and a connection with the religion. Sure initially it was a scam to
get more presents out of the holiday season…this whole Christmas thing was
great, but when I found out there was a holiday in which you could get 8
presents…seriously I am not great at math but that is a no brainer. However, this
scam started as an adult and my curiosity towards the religion started as a
child.

I do have to admit it wasn’t until countless years of
therapy that I started to realize where this curiosity came from. As a kid I
went to a Montessori school that had a strong educational philosophy based on
exploration of other cultures, religions and view points. So we pretty much
embraced, studied and attempted to understand cultures/religions from around
the world. This was pretty great as a kid as we got to celebrate every holiday,
we ate foods from around the world and every day was an adventure and
exploration.
My introduction to potato pancakes started at this school
and it was a true love affair from the moment we met. I remember sitting in the
“cafeteria” eating potato pancakes with apple sauce and sour cream and although
I was small I was able to pack those things away. My love affair for Jewish
food has continue and grown over the years…with some of my favorite foods being
matzoh ball soup, and latkes.
But as I mentioned I also started to realize over the years
that my curiosity and desire to know more about the religion is much more
deeply rooted than matzoh ball soup and macaroons. My biological father, whom I
have never met, is/was Jewish and it is a part of who I am that I have craved
to understand. It is definitely strange growing up and having a void as to who
or what half of you was and so I have found that I have had curiosities and
exploration based on the limited knowledge I have of him, Judaism being one of
them. And although I still do not know, by a long shot, everything about this
religion, I do love the sense of community, the fact that it is a religion
based on love, the fact that it is tradition based and well the food.
Speaking of learning about the Jewish faith I did a little research about latkes aka potato pancakes at www.jewishanswers.com...yes that is a real web page. And did you know that latkes were not involved in the original Hanukkah story at all. Actually the potato was not known to most of the world until the 16th century. However, the oil that the latkes are fried in is part of the story. Hanukkah is the celebration of the miracle of a day supply of consecrated temple oil burning for 8 days. During Hanukkah it is customary to eat food friend in oil, hence the latkes.
So yes these are definitely poser potato pancakes not only
because I am a poser but also because they contain bacon and leeks. However,
they are my way of celebrating a part of me, a way of commemorating a religion
based on love and well a good excuse to eat one of my favorite foods.
These potato pancakes came from Cooking Light. Seriously, it
is hard to indulge in fried carbohydrates after running 6 miles at the gym. It
just seems counter intuitive to slave over the treadmill and then shove your
face full of fried food so this Cooking Light version was perfect for my
mindset... By the way did I mention I did something insane and signed up for my
first full marathon so I am definitely a little more health conscious and
neurotic than normal.

Back to the pancakes….just like all of my cooking endeavors
these pancakes were also very easy to make. First you cook the bacon until crisp…done.
Then sauté the onions in the onion grease…makes the house smell so good!! Add
the leeks and garlic and continue to cook. The leeks were actually a nice
addition as it gives the pancakes a slightly earthy flavor.

Remove the mixture from the heat and add to a bowl. Combine
the shredded potatoes, which gave me an upper body work out. Grating potatoes
is not easy!!! Then add the shredded cheese, salt and pepper…yes since it is a
Cooking Light recipe I did add extra salt, and 2 eggs. Combine all of that in a
bowl.
Take the mixture and shape it into 8 patties. Place the
patties on a cookie sheet that is greased with cooking spray and then spray the
top of your pancakes with additional spray. I was a little concerned because
the pancakes do look a little liquidy when you first place them on the baking
sheet but they do dry out in the oven so do not be alarmed.

Cook them for 25 minutes and serve with sour cream and back.
The bacon adds a nice salty flavor, the sour cream a bit of tang and I love the
earthy flavor of the potatoes and leeks. I will be honest they are not “just
like” fried potato pancakes but if you don’t get too obsessed with the original
variety you will be happy.
Here is the recipe:
- 2 center-cut hickory-smoked bacon slices$
- 2 cups chopped onion $
- 1 cup thinly sliced leek
- 3 garlic cloves, chopped
- 1 1/2 pounds shredded peeled baking potato (about 2 large) $
- 1/3 cup (1 1/2 ounces) shredded sharp cheddar cheese
- 3/4 teaspoon salt
- 1/2 teaspoon freshly ground black pepper
- 2 large eggs $
- 1 tablespoon butter $
- 1/4 cup reduced-fat sour cream $
Preparation
- 1. Preheat oven to 350°.
- 2. Cook bacon in a large skillet over medium heat until crisp. Remove bacon from pan using a slotted spoon, and crumble. Add onion to drippings in pan, and cook for 5 minutes, stirring occasionally. Add leek and garlic; cook for 2 minutes, stirring frequently. Combine onion mixture, grated potato, cheddar cheese, 3/4 teaspoon salt, black pepper, and 2 large eggs in a medium bowl, stirring well.
- 3. Divide the potato mixture into 8 equal portions, and shape each portion into a 1/2-inch-thick patty. Squeeze moisture from each patty. Melt 1 tablespoon butter in a nonstick skillet over medium-high heat. Add patties to pan; sauté 2 minutes on each side. Transfer patties to a baking sheet; bake at 350° for 15 minutes or until set. Top with crumbled bacon and sour cream.
Cheers and Happy Hanukkah!!
Subscribe to:
Posts
(Atom)
Visit My Website!


