Monday, March 31, 2014
Potato Hash w/Poached Eggs
Sure I love to run, but realistically I run for food. I run because I love to eat and drink wine and I also love to look fit. Yes, I can admit that I am a tad bit vain and I like to fit into my size 4 jeans while downing a beer and a Dodger dog. So often times I am running with a goal in mind, sure there is always a mileage goal because well you need to know when to stop, right? But for me there is often a food or wine goal in the back of my mind as well, ya know I am a good multi-tasker.

Yesterday I went and ran with my running club. I am trying to get back into the running club thing because they push me and take me out of my comfort zone. So yesterday we were scheduled to run 5 miles, which is a doable distance for me, training or not and I was confident in my completion.
However, I wanted to kick up the speed a little, but I needed some added motivation and breakfast is motivation enough for me. So I went through my 5 mile run at a 9 minute mile pace with visions of poached eggs and potato/sausage hash dancing through my head. And I am not sure if this was just a really good recipe or if the 5 mile anticipation made it more than it was, but this is just downright yummy!!

The potato hash is chock full of vegetables and sausage and it has a nice hint of heat to it, from the sausage and the red pepper flakes. I loved the variation in texture between the hash and the poached egg and it had that nice smokey flavor from the smoked paprika and the cooking process. It was truly, at least for me yesterday, the breakfast of champions.

To begin with, saute the onion, carrot, celery, potatoes, garlic, red pepper flakes, salt and sausage in canola oil, for approximately 15 minutes or until the potatoes are soft.

Meanwhile make the poached eggs, bring water and vinegar to a simmer in a pan, add the eggs and cook for approximately 4 minutes (depending on desired consistency).
Serve the poached eggs over the hash.
Here is the actual recipe:
Ingredients
1 tablespoon canola oil
1/2 medium onion, diced
1 carrot, diced
2 stalks celery, diced
2 large red-skinned potatoes, diced
1/2 pound sweet Italian sausage, casings removed
1 teaspoon paprika
1 teaspoon chopped garlic
1/2 teaspoon red pepper flakes
Kosher salt
1 teaspoon white vinegar
4 large eggs
Freshly ground black pepper
Directions
Heat the canola oil in a large skillet over medium heat. Add the onion, carrot, celery, potatoes, sausage, paprika, garlic, red pepper flakes and 1/2 teaspoon salt. Saute, stirring frequently, until the potatoes and carrots are tender and the sausage is cooked through, about 15 minutes.
Meanwhile, bring a medium pot of water to a simmer over low heat and add the vinegar. Crack an egg into a small bowl and carefully slide it into the simmering water. Quickly repeat with the remaining eggs. Using a slotted spoon, carefully corral the white of each egg around its yolk. Poach the eggs until the whites are firm, or to the desired degree of doneness, 3 to 5 minutes.
Divide the hash among 4 plates. Top each with a poached egg. Season with salt and black pepper.
Yes, it also totally helps that this is an easy and fast recipe because after 5 miles I am usually ready to eat the world and patience is not a virtue of mine even on a good day.
Cheers!
Yesterday I went and ran with my running club. I am trying to get back into the running club thing because they push me and take me out of my comfort zone. So yesterday we were scheduled to run 5 miles, which is a doable distance for me, training or not and I was confident in my completion.
However, I wanted to kick up the speed a little, but I needed some added motivation and breakfast is motivation enough for me. So I went through my 5 mile run at a 9 minute mile pace with visions of poached eggs and potato/sausage hash dancing through my head. And I am not sure if this was just a really good recipe or if the 5 mile anticipation made it more than it was, but this is just downright yummy!!
The potato hash is chock full of vegetables and sausage and it has a nice hint of heat to it, from the sausage and the red pepper flakes. I loved the variation in texture between the hash and the poached egg and it had that nice smokey flavor from the smoked paprika and the cooking process. It was truly, at least for me yesterday, the breakfast of champions.
To begin with, saute the onion, carrot, celery, potatoes, garlic, red pepper flakes, salt and sausage in canola oil, for approximately 15 minutes or until the potatoes are soft.
Meanwhile make the poached eggs, bring water and vinegar to a simmer in a pan, add the eggs and cook for approximately 4 minutes (depending on desired consistency).
Serve the poached eggs over the hash.
Here is the actual recipe:
Ingredients
1 tablespoon canola oil
1/2 medium onion, diced
1 carrot, diced
2 stalks celery, diced
2 large red-skinned potatoes, diced
1/2 pound sweet Italian sausage, casings removed
1 teaspoon paprika
1 teaspoon chopped garlic
1/2 teaspoon red pepper flakes
Kosher salt
1 teaspoon white vinegar
4 large eggs
Freshly ground black pepper
Directions
Heat the canola oil in a large skillet over medium heat. Add the onion, carrot, celery, potatoes, sausage, paprika, garlic, red pepper flakes and 1/2 teaspoon salt. Saute, stirring frequently, until the potatoes and carrots are tender and the sausage is cooked through, about 15 minutes.
Meanwhile, bring a medium pot of water to a simmer over low heat and add the vinegar. Crack an egg into a small bowl and carefully slide it into the simmering water. Quickly repeat with the remaining eggs. Using a slotted spoon, carefully corral the white of each egg around its yolk. Poach the eggs until the whites are firm, or to the desired degree of doneness, 3 to 5 minutes.
Divide the hash among 4 plates. Top each with a poached egg. Season with salt and black pepper.
Yes, it also totally helps that this is an easy and fast recipe because after 5 miles I am usually ready to eat the world and patience is not a virtue of mine even on a good day.
Cheers!
Saturday, March 29, 2014
Spring Has Sprung & Balsamic Berries
Living in Southern California you seriously lose the concept of seasons. For example, I was laying out on the patio this afternoon in a tank top and shorts and it is March. However, even though we don't have seasons here we still have a concept of time and so it feels like Spring. Now just in case you wanted to know what Spring feels like in So Cal let me help you:


- The agricultural fields are growing strawberries...and cilantro...
- When you go for a run you can smell the orange blossoms...intoxicating!
- There are bunnies everywhere and I am not just talking about the chocolate kind in the grocery store.
- The birds are super loud...they actually keep waking me up...on my day off...at 0630...not sure if I love or hate them...joking it is a joyful sound.
- It is no longer 70's...it is closer to 75-80's....ahhh my rough life
- I stop wearing boots...of course you can tell the season based on fashion
- I can run at night after work...love affair with Daylight savings time!!
- I can buy daffodils and tulips at Trader Joe's for my dining room table
- The grocery store has peeps
- I start using fake tanning lotion again on my legs because I am wearing shorts again and I don't want to blind people with my whiteness
- The Easter bunny is at the mall
- My BFF put fake tulips in her flower boxes...inst-a-Spring
- Baseball season starts...time to pull out the Dodgers blue
And since it is Spring you need the perfect dessert. For a dinner party the other night I made Balsamic Berries, which uses the strawberries that are in season and pairs them with a mascarpone and whipped cream and a balsamic reduction sauce. I love the contrast of the acidity from the vinegar with the sweetness of the cream paired with the fresh berries. There is also a hint of citrus from lemon zest as well. This dessert would be incredible with a citrusy champagne or prosecco or if you want to add more depth you could easily pair this with a fruit forward port. It is also by far one of the easiest desserts on the planet.
Now of course I changed this recipe, like I do everything else. The recipe calls for white balsamic vinegar, however I decided to use fig balsamic vinegar which gave it a little more depth of flavor and a little bit of a contrasting color. So to begin with bring the vinegar and sugar to a boil and cook until reduced. Next whip the cream and mascarpone in a mixer, adding an additional 2T of sugar. The consistency will be closer to the consistency of the mascarpone so don't expect it to be as light and fluffy as whipped cream.
Next toss the strawberries with the lemon zest and vinegar reduction. Top with the mascarpone mixture.
Here is the actual recipe if you want measurements:
2/3 cup white balsamic vinegar
1/4 cup sugar
1/2 cup heavy cream, chilled
1/2 cup mascarpone, chilled
3 cups sliced strawberries
1/2 teaspoon lemon zest
pepper
directions
In small saucepan, boil vinegar and 2 tbsp. sugar until reduced, 8 minutes; cool. Whip cream, mascarpone and remaining 2 tbsp. sugar (do not overbeat). Toss berries with syrup and lemon zest. Top with whipped cream and pepper.
Hope you are all enjoying the Spring in the air! Cheers!
Friday, March 28, 2014
Lasagna Bolognese

Lasagna was something I grew up with. My Mom would make it on a regular basis and I have very fond lasagna memories. I hated leftovers as a kid, but I loved lasagna for breakfast. I loved the smell of my Mom making homemade marinara sauce and how she would steam up the windows of the kitchen as it simmered. I truly believe my love affair with cheese started at a young age due to my early introduction to lasagna.

So the other night I had some friends over and I decided to try a new recipe I found for Lasagna Bolognese and although it was good....well my Mom's lasagna still wins...hands down! Guess this might be one of those situations where Mom just knows best. Don't get me wrong this is a good recipe, it is just not the same as my childhood memories. This recipe uses layers of sauce, 2 different types, the bolognese and a bechamel and to be completely honest I just really missed the ricotta and mozzarella cheese.

If you are unfamiliar with a bechamel sauce it is a butter, flour, milk and Parmesan cheese sauce and although it is very rich, I felt the subtle flavors of the sauce were lost against the bolognese. Plus I just missed the richness of real cheese. The bolognese was good and I really enjoyed the non-traditional addition of pancetta to the sauce, however this sauce only cooked for 30 minutes and a traditional bolognese spends hours on the stove. It just needed further flavor development in my opinion. Now please don't get me wrong this is a good lasagna, but my Mom's is just better.

So to begin with you make the bolognese. Saute the pancetta in olive oil until it is lightly browned, about 5 minutes.

Next add the vegetables (onion, carrot, celery, garlic, bay leaf and thyme) and cook until they are soft, approximately another 5 minutes.
Push the vegetables to the side and add the ground beef to the center of the pan. Cooking for 3 minutes without touching. How fun is that? My favorite part of cooking is touching everything.
Break up the meat and cook for another 3 minutes or until the ground beef is browned.

Add crushed tomatoes and 2 cups water and simmer for approximately 30 minutes. Add salt and pepper to taste.

To make the bechamel sauce, melt the butter in a pan. Whisk in 1/4 cup flour and cook for 1 minute, stirring constantly. Do not let it start to brown as you want this to be a white sauce. Slowly add 2 1/2 cups whole milk, whisking as you add the milk. There is nothing worse than burnt milk, so seriously keep stirring.
Remove from the heat and add 1 cup Parmesan and season with salt and pepper.
 |
| Don't ya hate when the steam from the noodles fogs up your camera |
Cook the lasagna noodles according to the package directions (normally adding them to boiling water with olive oil and cooking for 11-13 minutes).

To assemble the lasagna, place a layer of the bolognese sauce on the bottom of a greased 13x9 pan. Add a layer of noodles, overlapping is completely acceptable. Top with a layer of bolognese, a layer of noodles, a layer of bechamel, you get the picture.

Finish with the bolognese sauce and bake covered for 1 hour.

Uncover and sprinkle with additional Parmesan cheese and bake for 15 minutes more. Sit for 30 minutes before slicing.
Here is the actual recipe:
ingredients
3 tablespoons EVOO
4 ounces pancetta, finely chopped
1 small onion, finely chopped
1 carrot, finely chopped
1 rib celery, finely chopped
1 clove garlic, minced
1 bay leaf
1/2 teaspoon dried thyme
1 pound 85% lean ground beef chuck
1 can (28 oz) crushed tomatoes
Salt and pepper
4 tablespoons butter
1/4 cup flour
2 1/2 cups whole milk, warmed
1 1/4 cups grated Parmesan
3/4 pound dried lasagna noodles
directions
In a deep skillet or pot, cook 1 tbsp. EVOO and the pancetta over medium heat, stirring, until the pancetta is lightly browned, about 5 minutes. Add the onion, carrot, celery, garlic, bay leaf and thyme and cook, stirring, until the veggies are softened, about 5 minutes; push to the side of the pan. Increase the heat to medium-high. Add 1 tbsp. EVOO to the center of the pan and crumble in the ground beef; cook without stirring for 3 minutes. Break up the meat and continue to cook, stirring occasionally, until well browned, about 3 minutes.
Add the tomatoes and 2 cups water to the skillet; simmer, stirring occasionally, until thickened, about 30 minutes. Discard the bay leaf; season with salt and pepper. Remove from the heat; let cool.
Meanwhile, in a medium saucepan, melt the butter over medium heat. Add the flour and cook, whisking constantly, for 1 minute. Whisk in the milk in a steady stream and simmer for 2 minutes, whisking. Remove from the heat, stir in 1 cup Parmesan and season with salt and pepper. Let cool, stirring occasionally to prevent a skin from forming.
In a pot of boiling, salted water, add the remaining 1 tbsp. EVOO and the lasagna noodles. Cook, stirring, until al dente. Drain and transfer to a bowl of cold water.
Preheat the oven to 400 degrees . Grease a 9-by-13-inch baking dish; add 3/4 of the cup meat sauce to coat. Add a layer of noodles, overlapping slightly. Top with 1 cup of the meat sauce, then a layer of noodles; add 1 cup of the bechamel, spreading to coat. Repeat the layers. Add a fifth layer of noodles and top with the remaining meat sauce; dollop with the remaining bechamel. Cover with greased parchment, then wrap the pan with foil. Bake for 1 hour; uncover and sprinkle with the remaining 1/4 cup parmesan. Bake for 15 minutes more. Loosen the foil; let stand for 30 minutes before slicing
This is the start of my long weekend. I love that I work for an organization that gives us Caesar Chavez Day off...hence the long holiday weekend....it has definitely made me a fan of Caesar...hell anyone who can get me a day off is a friend of mine. Cheers!
Saturday, March 22, 2014
Chipotle Rubbed Shrimp Taco Salad
Don't you just love those little causes for celebration. I had one today that made me feel all powerful, ya know kind of like "I am woman hear me roar." I remember when my ex and I were separating my therapist asked me why I was still in the marriage and I looked at her and I said,"well he is pretty handy he can fix things." She laughed, I laughed and she asked if there was anything else...and I just couldn't come up with anything else. That is when she gave me the best advice I have ever had,"you can hire someone to fix things. I think you might want to get a divorce." And so today when I...wait for it...hooked up my own DVD player...I felt pretty damn bad ass. I realized that yes I can hire someone to fix things or do it myself and yes, my divorce was one of the best things I ever did. And yes you can totally laugh, but I am going to continue to gloat for right now.

So I have been missing being in the kitchen. As you all know I have been having a lot of fun, but I just needed some kitchen time this Saturday afternoon. And I also needed to drink a lot of water (ok sure I did have a beer because this recipe just needed one) and eat healthy since I think I ate and drank the world yesterday. So tonight I made Chipotle Rubbed Shrimp Taco Salad, however because I never stick to a recipe I decided I didn't want the tortilla and left the "taco" part of the salad off. I loved the dressing on this salad as it is a nice combination of citrus and sweet with the combo of olive oil, lemon juice, honey, cilantro and shallots. I also loved the dry rubbed chili shrimp, they were spicy but not overpowering and they were perfect with the dressing and the sweet mango. This recipe screams a warm summer evening, but since it's March in So Cal, it is pretty much the same thing.

So for the dressing combine the cilantro, shallots, lime juice, honey and salt. Whisk in the olive oil.

For the shrimp, toss them in a dry rub of chipotle chili powder, regular chili powder and salt. Heat a grill pan, that has been sprayed with cooking spray and cook them for 2 minutes on each side (per the recipe).

I honestly found I probably cooked them for more like 90 seconds on each side just because I hate over cooked chewy shrimp.

For the salad, chop the romaine lettuce, mango, cherry tomatoes and radishes. Toss with the salad and serve with the shrimp on top.
Here is the actual recipe:
3 tablespoons chopped fresh cilantro
3 tablespoons minced shallots
3 tablespoons fresh lime juice
2 teaspoons honey
1/8 teaspoon salt
2 tablespoons olive oil
1 refrigerated (8-inch) flour tortilla taco salad shell kit (such as Azteca)
1 pound peeled and deveined jumbo shrimp
1/2 teaspoon chili powder
1/4 teaspoon ground chipotle chile powder
1/8 teaspoon salt
Cooking spray
6 cups packaged prechopped romaine hearts
1 1/2 cups chopped peeled ripe mango (about 1 large)
1/2 cup cherry tomatoes, halved
4 radishes, quartered
Preparation
1. Preheat oven to 350°.
2. Combine first 5 ingredients in a small bowl, stirring with a whisk. Gradually add oil, stirring constantly with a whisk.
3. Bake tortilla shells at 350° according to package directions.
4. While shells bake, heat a grill pan over medium-high heat. Combine shrimp, chili powders, and salt in a large bowl; toss well to coat. Coat pan with cooking spray. Add shrimp to pan; cook 2 minutes on each side or until done.
5. Combine lettuce, mango, tomato, and radishes. Drizzle vinaigrette over salad; toss to coat. Place about 1 1/2 cups salad in each tortilla shell; divide shrimp evenly among salads.

Hope everyone is having a fabulous weekend and now I am going back to basketball...this March Madness stuff is addicting!
So I have been missing being in the kitchen. As you all know I have been having a lot of fun, but I just needed some kitchen time this Saturday afternoon. And I also needed to drink a lot of water (ok sure I did have a beer because this recipe just needed one) and eat healthy since I think I ate and drank the world yesterday. So tonight I made Chipotle Rubbed Shrimp Taco Salad, however because I never stick to a recipe I decided I didn't want the tortilla and left the "taco" part of the salad off. I loved the dressing on this salad as it is a nice combination of citrus and sweet with the combo of olive oil, lemon juice, honey, cilantro and shallots. I also loved the dry rubbed chili shrimp, they were spicy but not overpowering and they were perfect with the dressing and the sweet mango. This recipe screams a warm summer evening, but since it's March in So Cal, it is pretty much the same thing.
So for the dressing combine the cilantro, shallots, lime juice, honey and salt. Whisk in the olive oil.
 |
| Beautiful Key West Shrimp! |
For the shrimp, toss them in a dry rub of chipotle chili powder, regular chili powder and salt. Heat a grill pan, that has been sprayed with cooking spray and cook them for 2 minutes on each side (per the recipe).
I honestly found I probably cooked them for more like 90 seconds on each side just because I hate over cooked chewy shrimp.
For the salad, chop the romaine lettuce, mango, cherry tomatoes and radishes. Toss with the salad and serve with the shrimp on top.
Here is the actual recipe:
3 tablespoons chopped fresh cilantro
3 tablespoons minced shallots
3 tablespoons fresh lime juice
2 teaspoons honey
1/8 teaspoon salt
2 tablespoons olive oil
1 refrigerated (8-inch) flour tortilla taco salad shell kit (such as Azteca)
1 pound peeled and deveined jumbo shrimp
1/2 teaspoon chili powder
1/4 teaspoon ground chipotle chile powder
1/8 teaspoon salt
Cooking spray
6 cups packaged prechopped romaine hearts
1 1/2 cups chopped peeled ripe mango (about 1 large)
1/2 cup cherry tomatoes, halved
4 radishes, quartered
Preparation
1. Preheat oven to 350°.
2. Combine first 5 ingredients in a small bowl, stirring with a whisk. Gradually add oil, stirring constantly with a whisk.
3. Bake tortilla shells at 350° according to package directions.
4. While shells bake, heat a grill pan over medium-high heat. Combine shrimp, chili powders, and salt in a large bowl; toss well to coat. Coat pan with cooking spray. Add shrimp to pan; cook 2 minutes on each side or until done.
5. Combine lettuce, mango, tomato, and radishes. Drizzle vinaigrette over salad; toss to coat. Place about 1 1/2 cups salad in each tortilla shell; divide shrimp evenly among salads.
Hope everyone is having a fabulous weekend and now I am going back to basketball...this March Madness stuff is addicting!
Sunday, March 16, 2014
Happy St. Patrick's Day (well tomorrow) & Black and Tan Brownies
I discovered the joy of an Irish pub early on in my drinking career. My first ex-husband took me to my first pub when we started dating, it was a seedy, dark, traditional pub somewhere in San Francisco. He taught me the joy of the black and tan, the cocktail, which is Guiness and Harp in the same glass. However, the two beers stay seperated because of some type of chemistry thing or because it is one of the wonders of world, causing the pint glass to look black and tan.

However, did you know that the term "black and tan" actually came about historically in 1916 when the English soldiers were sent to Ireland to squelch the rebels involved in the Easter Rising. Since they did not have enough uniforms for everyone some wore black and some wore tan, which brought about the phrase "black and tan."
These brownies are named after that some color conglomeration as there is a layer of tan brownie and a layer of black brownie. These brownies are also made with Guiness, however to be honest I can't specifically taste the beer, I get more a deep chocolate flavor from the black brownie and a light brown sugar flavor from the tan. These are good brownies and they are definitely on the cakey side and they are a perfect way to celebrate this fun Irish holiday.
Now just in case you wanted a few random St Patrick's Day/Irish facts:

Ok back to the brownies. To begin with, make the tan brownies. Cream the sugar and butter in a mixer. Add the vanilla and eggs and beat until combined.

Add the flour, baking powder, salt and chopped pecans and mix until thoroughly incorporated.


Layer the mixture in a greased 13x9 pan and bake for 15 minutes in a 350 degree oven.

 Next make the black layer. Melt the butter and chocolate in the microwave, stirring after 20 seconds. Usually it takes about a minute to fully melt.


Whisk in the Guiness, the vanilla and the eggs. Add in the flour and salt.

Pour the black layer over the backed tan layer and bake for another 25 minutes.
 Let cool on a wire rack. Voila!

However, did you know that the term "black and tan" actually came about historically in 1916 when the English soldiers were sent to Ireland to squelch the rebels involved in the Easter Rising. Since they did not have enough uniforms for everyone some wore black and some wore tan, which brought about the phrase "black and tan."
These brownies are named after that some color conglomeration as there is a layer of tan brownie and a layer of black brownie. These brownies are also made with Guiness, however to be honest I can't specifically taste the beer, I get more a deep chocolate flavor from the black brownie and a light brown sugar flavor from the tan. These are good brownies and they are definitely on the cakey side and they are a perfect way to celebrate this fun Irish holiday.
Now just in case you wanted a few random St Patrick's Day/Irish facts:
- Did you know that in Ireland they don't drink "Irish car bombs," actually they haven't even heard of them? i learned that when I was there and tried to order one and they looked at me as if I was a crazy girl.
- Did you know that the official color of St Patty's day was blue? In the 19th century it got switched to green.
- The tradition of a green beer came about in the US as a result of a tradition called "drowning the shamrock," in which the Irish put a shamrock in their beer or whiskey and drank it as a sign of good fortune. Somehow that morphed into coloring our beer green...obviously this occured while playing the game "telephone," while intoxicated.
- Did you know that Lucky Charms, the cereal, came about in 1963? And Lucky the Leprechaun is the cereals mascot.
- Did you know that St. Patrick was not Irish and he actually was a slave? Hmmm....
Ok back to the brownies. To begin with, make the tan brownies. Cream the sugar and butter in a mixer. Add the vanilla and eggs and beat until combined.
Add the flour, baking powder, salt and chopped pecans and mix until thoroughly incorporated.
Layer the mixture in a greased 13x9 pan and bake for 15 minutes in a 350 degree oven.
Whisk in the Guiness, the vanilla and the eggs. Add in the flour and salt.
Pour the black layer over the backed tan layer and bake for another 25 minutes.
Here is the actual recipe:
Tan Brownies:
6 tablespoons butter, softened
1 1/2 cups packed brown sugar
2 large eggs
1 teaspoon vanilla extract
4.5 ounces all-purpose flour (about 1 cup)
1 teaspoon baking powder
1/4 teaspoon salt
1/2 cup chopped pecans
Cooking spray
Black Brownies:
3 ounces unsweetened chocolate, finely chopped
4 tablespoons butter
1 cup granulated sugar
2 large eggs
1 teaspoon vanilla extract
1 cup Guinness Stout
4.5 ounces all-purpose flour (about 1 cup)
1/4 teaspoon salt
Preparation
1. Place one rack in lower third of oven; place another rack in center of oven. Preheat oven to 350°.
2. To prepare Tan Brownies, place 6 tablespoons butter and brown sugar in a medium bowl; beat with a mixer at medium speed until light and fluffy. Beat in 2 eggs and 1 teaspoon vanilla. Weigh or lightly spoon 4.5 ounces (about 1 cup) flour into a dry measuring cup; level with a knife. Combine 4.5 ounces flour, baking powder, and 1/4 teaspoon salt, stirring well. Add flour mixture and pecans to sugar mixture, beating just until combined. Spoon into a 13 x 9–inch baking pan coated with cooking spray, spreading evenly with a knife or rubber spatula. Bake at 350° in lower third of oven for 15 minutes.
3. To prepare Black Brownies, melt chocolate and 4 tablespoons butter in a large microwave-safe bowl on HIGH for 1 minute or until melted, stirring after every 20 seconds until smooth. Add granulated sugar, stirring until well combined. Add 2 eggs, 1 teaspoon vanilla, and Guinness, stirring with a whisk until well combined. Weigh or lightly spoon 4.5 ounces (about 1 cup) flour into a dry measuring cup; level with a knife. Combine 4.5 ounces flour and 1/4 teaspoon salt, stirring well. Add flour mixture to chocolate mixture, stirring to combine. Pour mixture evenly over Tan Brownies.
4. Bake on the center rack at 350° for 25 minutes or until a wooden pick inserted into center comes out almost clean. Cool in pan on a wire rack; cut into squares.
Hope everyone has a Happy and Safe St Patrick's Day! Cheers!
Saturday, March 15, 2014
Living the Life and Making Fried Rice
So let me start by apologizing for being such a sporadic writer lately...however after my 28 day detox I needed to get out and live a little...and well I have definitely made up for lost time. In the past week or so I have:


- Discovered that after a detox I am a total light weight...buzzed after two mimosas, really? I feel like I am losing my touch.
- Flown to Arizona for a 24 hr trip to celebrate one of my besties birthdays. Happy Birthday LP!
- Gone to a Lakers game with a guy I met on a plane coming back from Arizona...he was good looking how could I say no, right? And the Lakers won! Woot woot!
- Been at a bar in which I was one of two people in the entire place...not including the bartender...but the beer was good and I laughed a lot!
- Got lost in the Santa Monica Mountains (at least I think that is where we were) for 3 hours...but I took some really great pics...so many that my phone died which could have been detrimental if a rescue attempt became necessary.
- Got attacked by a tree branch while scaling the mountain trying to find the trail again
- Celebrated the fact that we were still alive after a 3 hour hike in the middle of nowhere...just because the trail ended and I thought the dried up river bed was another trail...and my friend blindly followed me....what?
 |
| The "no outlet" sign could have been a clue, but we didn't see it until we found our way back...oopsie |
- Made cookies with a 7 year old...yes he knows me...look he is smiling...that is not a look of fear...and they were awesome Nutella peanut butter cookies
- Talked to my ex-husband...isn't it always great to be reminded of why you wanted a divorce.
And oh yeah last night I made Chicken Fried Rice...sometimes I get side tracked and I forget that I am writing a food blog. I know that you all love the commentary about my life, but I am sure you also get hungry at times. So I haven't been cooking much, probably because I have been so busy. So last night I decided to stay home and enjoy a quiet night with Miss Kitty.
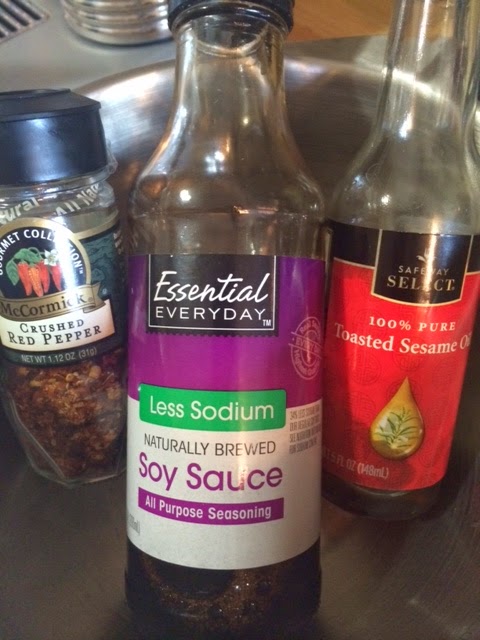
This rice has a lot of great flavor, however I do have to warn you that the texture is not the same as traditional fried rice. I am not sure if that is because I used brown rice or if it was just too moist (gosh I hate that word, it just sounds nasty). Anyway I love the flavor of the ginger, the spice from the crushed red pepper, the nutty flavor from the sesame oil and the saltiness from all of the soy sauce. It has a nice crunch from the peanuts, water chestnuts and red bell pepper. It is truly a yummy rice dish, but it just doesn't totally remind me of fried rice.
To begin with, combine the soy sauce, sesame oil, crushed red pepper and brown sugar. I used smoked brown sugar and that added a nice flavor.
In a wok or skillet, heat the 2T of canola oil. Saute the diced red bell pepper, onion and green onion. Cook for 3 minutes or until tender.
Add ginger and garlic and cook for another minute.
Next add the cold brown rice, diced cooked chicken and water chestnuts. Don't forget to use leftover rice as this decreases the moisture content and makes it....well fried rice. I also just used a rotisserie chicken and that worked wonderfully and made this recipe that much easier.
Add the soy sauce mixture to the rice/veggie mix and cook for 2 minutes.
Serve with chopped peanuts and green onions.
Here is the actual recipe:
1/4 cup less-sodium soy sauce
1 tablespoon dark brown sugar
1 teaspoon dark sesame oil
3/4 teaspoon crushed red pepper flakes
2 tablespoons canola oil
2 cups red bell peppers, diced (about 2)
1 cup onion, diced
1/4 cup green onion, thinly sliced and divided
2 tablespoons fresh ginger, peeled and minced
2 large garlic cloves, minced
5 cups brown rice, cooked and cold
2 cups chicken, cooked and diced (about 1 pound)
1 (8 ounce) can sliced water chestnuts, drained and chopped
1/3 cup dry-roasted unsalted peanuts
Directions:
1. Combine first 4 ingredients in a small bowl; stir well with a whisk.
2. Heat canola oil in a wok or large nonstick skillet over medium-high heat. Add bell peppers, diced onion, and 2 tablespoons green onions to pan; stir-fry 3 minutes or until tender. Add ginger and garlic; stir-fry 1 minute. Add rice, chicken, and water chestnuts; stir-fry for 5 minutes or until thoroughly heated, stirring gently. Add soy sauce mixture; cook 2 minutes more, tossing to coat. Sprinkle with remaining 2 tablespoons green onions and peanuts.
Well I am off for more adventures...today my day includes working a snack shack at a little league baseball field, getting my ass kicked by a trainer and any other adventures I may stumble upon. Cheers!
Subscribe to:
Posts
(Atom)
Visit My Website!


