Sunday, June 24, 2012
Corn and Shrimp Chowder W/Bacon
So one of my earliest Grandpa memories involved corn. We would travel to New Jersey often times in the summer to go visit my Grandparents. I assume we went in the summer because I was out of school, however I also remember going in the summer before I started school and I am POSITIVE we didn't go in the summer because of the weather. Maybe it was cheaper or maybe it was just a form of torture. Anyway if you haven't been to New Jersey in the summer my only advice is don't. Because although my Grandma now lives on the Jersey Shore...no she doesn't have 6 pack abs and wear wife beater t-shirts...when I was a kid she did not live on the shore. So where my Grandparents lived it was just humid, hot and sticky. Anyway I digress...
Back to Grandpa and corn memories. I remember my Grandpa would always cut corn off the cob for me. And I was thrilled by the novelty. As a kid I always hated how corn on the cob would get stuck in my teeth, it was too big for my mouth and I would always burn my mouth because it was hot. So cutting it off the cob was pure bliss for me as a kid. I remember sitting with my Grandpa while he cut off the cob and he would do it to his corn so I would always ask him to do it for me as well. Little did I know back then it was because of dentures that he did it...hell I just thought it was cool.
I also remember that after our trips to Jersey I would always ask my Mom to cut the corn off the cob for me like Grandpa did and she would always tell me no. Up until now I just thought she was mean, but after making this corn chowder I totally get it. I had to cut the corn off 6 cobs and OMG I swear half the corn ended up on the floor, I almost cut off my hand because the corn kept sliding off the plate and I had a crap load of corn kernels stuck to the front of my shirt. So Mom I am sorry I thought you were mean you were just down right smart.

This is a great chowder recipe because it's not as loaded down with fat as a lot of the recipes. It does have whole milk but it doesn't have whipping cream or butter like a lot of recipes. It tastes really fresh because the corn is just slightly cooked and the texture of the corn still has that crunch which I love. I did find that I had to add salt because the recipe calls for seafood seasoning and I think the seasoning I bought didn't have salt in it and I like that salty flavor...just my observation. And hell it has bacon so how could I go wrong!!!

Has anyone else noticed that bacon smells delicious when its fresh but the smell of old bacon is just disgusting? For this recipe I had to cook the bacon until it was crispy and holy wow the smoke from the bacon took over my entire house...thankfully the smoke detector did not sound...but I had to turn on the vent fan, open some windows and just get that bacon smoke moving on out...because I do not want to wake up tomorrow to that nasty old bacon smell...just saying.
 Anyway this recipe is from Martha Stewart and here it is:
Hope everyone had a fabulous weekend! Cheers! And if anyone isn't on Facebook this is the pony I want and fell in love with this weekend.

Back to Grandpa and corn memories. I remember my Grandpa would always cut corn off the cob for me. And I was thrilled by the novelty. As a kid I always hated how corn on the cob would get stuck in my teeth, it was too big for my mouth and I would always burn my mouth because it was hot. So cutting it off the cob was pure bliss for me as a kid. I remember sitting with my Grandpa while he cut off the cob and he would do it to his corn so I would always ask him to do it for me as well. Little did I know back then it was because of dentures that he did it...hell I just thought it was cool.
I also remember that after our trips to Jersey I would always ask my Mom to cut the corn off the cob for me like Grandpa did and she would always tell me no. Up until now I just thought she was mean, but after making this corn chowder I totally get it. I had to cut the corn off 6 cobs and OMG I swear half the corn ended up on the floor, I almost cut off my hand because the corn kept sliding off the plate and I had a crap load of corn kernels stuck to the front of my shirt. So Mom I am sorry I thought you were mean you were just down right smart.

This is a great chowder recipe because it's not as loaded down with fat as a lot of the recipes. It does have whole milk but it doesn't have whipping cream or butter like a lot of recipes. It tastes really fresh because the corn is just slightly cooked and the texture of the corn still has that crunch which I love. I did find that I had to add salt because the recipe calls for seafood seasoning and I think the seasoning I bought didn't have salt in it and I like that salty flavor...just my observation. And hell it has bacon so how could I go wrong!!!

Has anyone else noticed that bacon smells delicious when its fresh but the smell of old bacon is just disgusting? For this recipe I had to cook the bacon until it was crispy and holy wow the smoke from the bacon took over my entire house...thankfully the smoke detector did not sound...but I had to turn on the vent fan, open some windows and just get that bacon smoke moving on out...because I do not want to wake up tomorrow to that nasty old bacon smell...just saying.

- 6 ears corn, husks and silks removed
- 4 slices bacon, cut into 1/2-inch strips
- 8 scallions, white and green parts separated and thinly sliced
- 2 medium baking potatoes, peeled and cut into 1/2-inch pieces
- 2 tablespoons all-purpose flour
- 3 cups whole milk
- 1 teaspoon seafood seasoning
- 1/2 teaspoon dried thyme leaves
- 1 pound large peeled and deveined shrimp
- Coarse salt and ground pepper
- Crackers, for serving (optional)
Directions
- Cut off tip of each cob. Stand corn in a wide shallow bowl; using a sharp knife, slice downward to release kernels. Scrape length of each cob with a spoon to release pulp. Discard cobs.
- In a large saucepan, cook bacon over medium-high until crisp and browned, 4 to 6 minutes. With a slotted spoon, transfer bacon to paper towels.
- Add scallion whites and potatoes to pan; cook, stirring, until scallions have softened, 1 to 3 minutes. Add flour and cook, stirring, 1 minute. Add milk, seafood seasoning, thyme, and 2 cups water.
- Bring to a boil; reduce to a simmer and cook, stirring occasionally, until potatoes are tender, 10 to 12 minutes. Add corn, shrimp, and scallion greens. Cook until shrimp are just opaque, 2 to 3 minutes. Season chowder with salt and pepper. Serve topped with bacon, with crackers alongside if desired.
Hope everyone had a fabulous weekend! Cheers! And if anyone isn't on Facebook this is the pony I want and fell in love with this weekend.

Friday, June 22, 2012
A little obsessed with arugula right now...
So as you know I seem to get obsessed with certain foods and I get stuck in a bit of a rut...
Recently I went through the buffalo chicken phase, the chocolate and peanut butter phase, the risotto phase and now I am in the arugula phase...
The first time I tried arugula I thought dear god this stuff is hideous...its spicy, gritty and pretty much just downright yucky. However, I have found that when its paired with the right food the contrast is just perfect with a slight hint of spicy and peppery. Tonight I made an Arugula Salad with Grilled Chicken, Corn, Tomatoes and Blue Cheese.

This is the perfect summer salad! It has light grilled chicken which is just seasoned with salt and pepper. It has the fresh veggies in the arugula, tomatoes and corn. The original recipe calls for raw corn, but I personally prefer cooked corn so I grilled my corn and it had a nice charred flavor that complimented the salad well. It has the sharp accent of the arugula and the gorgonzola cheese and it has a dressing of olive oil and lemon juice. I do have to admit that I cheated a little bit as I used an arugula/spinach salad blend and I actually liked how the spinach mellowed out the sharpness of the arugula but that is just me. I also added a little red wine vinegar just because I love vinegar in my salad dressings.
It was heaven. I served it with a buttery chardonnay and since it was served outside all was good in the world. As many of you know I love eating outside. I don't know if its still a novelty since when I lived in Nor Cal it was always too cold to eat outside or if its just a personal obsession. All I do know is that I always feel festive eating outside. It is fun, entertaining and just feels like I am stepping into an episode of the Real Housewives of OC so I am all over that. Whenever I get the option of eating outside or inside the choice is easy...OUTSIDE!!! Love patios, patio furniture, patio food, etc. I love wearing sunglasses while I eat, taking pictures of food in natural light and breathing fresh air. Sounds like I should love camping,right? Well it has been so long since I have been camping I honestly don't remember it. I use to camp but hmm that was long long time ago in a land far far away.
 Anyway back to the salad. Here is the recipe:
In the event that you were looking for a great cooking mix. Momofuku Corn Cookie Mix is too die for! This mix seriously makes some of the best cookies I have had in a long time. They are super buttery and they are crispy on the exterior and chewy on the inside. Yum! The mix can be purchased at Williams-Sonoma both in the stores and on-line. Thanks LP for the recommendation.

Now in case you wanted some random arugula information here it is. Arugula is common in Italian cuisine. It is very low in calories and Vitamin A and C. I know you are thinking oh thank god well if its high in Vitamin A and C all is right with the world...you are welcome and I am glad I could help. Did you also know that the seeds of arugula were thought to be an aphrodisiac back in the first century A.D.? I haven't tried it personally so I can't vouch for it, but if anyone wants to give it a shot...no pun intended...and let my blog viewers know how it works please feel free to share. I am sure we would all like to know about your random sexual prowess utilizing arugula seed.
Well since one of the most valuable lessons I learned in Journalism school was that sex sells I think I will leave this blog on the high note of talking about arugula seed as an aphrodisiac. Have a great weekend and cheers my friends!
Recently I went through the buffalo chicken phase, the chocolate and peanut butter phase, the risotto phase and now I am in the arugula phase...
The first time I tried arugula I thought dear god this stuff is hideous...its spicy, gritty and pretty much just downright yucky. However, I have found that when its paired with the right food the contrast is just perfect with a slight hint of spicy and peppery. Tonight I made an Arugula Salad with Grilled Chicken, Corn, Tomatoes and Blue Cheese.

This is the perfect summer salad! It has light grilled chicken which is just seasoned with salt and pepper. It has the fresh veggies in the arugula, tomatoes and corn. The original recipe calls for raw corn, but I personally prefer cooked corn so I grilled my corn and it had a nice charred flavor that complimented the salad well. It has the sharp accent of the arugula and the gorgonzola cheese and it has a dressing of olive oil and lemon juice. I do have to admit that I cheated a little bit as I used an arugula/spinach salad blend and I actually liked how the spinach mellowed out the sharpness of the arugula but that is just me. I also added a little red wine vinegar just because I love vinegar in my salad dressings.
It was heaven. I served it with a buttery chardonnay and since it was served outside all was good in the world. As many of you know I love eating outside. I don't know if its still a novelty since when I lived in Nor Cal it was always too cold to eat outside or if its just a personal obsession. All I do know is that I always feel festive eating outside. It is fun, entertaining and just feels like I am stepping into an episode of the Real Housewives of OC so I am all over that. Whenever I get the option of eating outside or inside the choice is easy...OUTSIDE!!! Love patios, patio furniture, patio food, etc. I love wearing sunglasses while I eat, taking pictures of food in natural light and breathing fresh air. Sounds like I should love camping,right? Well it has been so long since I have been camping I honestly don't remember it. I use to camp but hmm that was long long time ago in a land far far away.

- 2 tablespoons olive oil, plus more for grates
- 1 pound chicken cutlets
- Coarse salt and ground pepper
- 4 ears corn, husks and silks removed
- 2 tablespoons fresh lemon juice
- 1 pound arugula (about 3 bunches), thick stems removed
- 2 large tomatoes, sliced into wedges
- 1/2 cup crumbled Gorgonzola (2 ounces)
Directions
- Heat grill to high; clean and lightly oil hot grates. Season chicken with salt and pepper. Grill until opaque throughout, 1 to 2 minutes per side. Let rest 5 minutes; cut into strips.
- Cut off tip of each cob. Stand corn in a wide shallow bowl; using a sharp knife, slice downward to release kernels. Discard cobs.
- In a large bowl, whisk together lemon juice and oil; season with salt and pepper. Add arugula, tomatoes, Gorgonzola, chicken, and corn and toss to combine. Serve immediately.

Now in case you wanted some random arugula information here it is. Arugula is common in Italian cuisine. It is very low in calories and Vitamin A and C. I know you are thinking oh thank god well if its high in Vitamin A and C all is right with the world...you are welcome and I am glad I could help. Did you also know that the seeds of arugula were thought to be an aphrodisiac back in the first century A.D.? I haven't tried it personally so I can't vouch for it, but if anyone wants to give it a shot...no pun intended...and let my blog viewers know how it works please feel free to share. I am sure we would all like to know about your random sexual prowess utilizing arugula seed.
Well since one of the most valuable lessons I learned in Journalism school was that sex sells I think I will leave this blog on the high note of talking about arugula seed as an aphrodisiac. Have a great weekend and cheers my friends!
Tuesday, June 19, 2012
I love pizza!!!
So tonight after the gym I decided I was going to cook and I thought hmmm I could make soup but after sweating my ass off in the gym soup just wasn't what I wanted. I thought of making cookies but I don't usually eat my cookies and I was friggin starving tonight. So I thought well hell...yes I actually think the same way I talk...and obviously I write the same way I think and talk...at least I am consistent. Anyway I decided to make pizza. But because its me I couldn't make like traditional pizza I had to make a Food Network Arugula Prosciutto Pizza.

I thought the arugula would add some green leafy vegetables, the pizza would add the carbs and the cheese would add my happiness. Ahh yeah slice of heaven and with red wine I am seriously in a state of perfection and bliss. Yes, that is pretty close to my natural state but this is even one step better.

So lets talk food. I bought my pizza dough from Fresh and Easy and I learned a very valuable lesson the last time I used store bought crust. Let the crust sit out for 20 min or until its at room temperature. It is so much easier to use and roll out. I tried rolling it out last time straight out of the fridge and it was seriously like wrestling with a sumo...ok I don't have any personal sumo wrestling experience but trying to mold that dough was exactly what I thought it would be like.
 I have to say I was pretty proud of myself with this dough and it actually rolled out looking pretty much like a round circle and like a pizza should. I however did hit a bump in the road when I put it in the oven as it formed a pizza dough hematoma (aka giant dough bump). So I had to pop it and all was good.
I also couldn't find just arugula at the store so I bought a bag of spinach/arugula and used that and it actually worked really well. I like the contrast of the lemon juice and the salt.
As a side note if you don't have a pizza stone buy one. They are one of my most favorite kitchen accouterments and I have used mine for well pizza but also cookies, biscuits and you name it.


 I drank Zinfandel with the pizza. It actually would have probably been better with a white just because of the olive oil, rosemary and white cheeses but I found this pretty light zin at Fresh and Easy and its decent especially for $7.99. Its called Small Wonder and its a wine from Paso Robles. In parting as many of you know it takes a lot to impress me when it comes to food and I have to say this recipe impressed me. It was easy, flavorful and light and perfect for the summer. Cheers!

I thought the arugula would add some green leafy vegetables, the pizza would add the carbs and the cheese would add my happiness. Ahh yeah slice of heaven and with red wine I am seriously in a state of perfection and bliss. Yes, that is pretty close to my natural state but this is even one step better.

So lets talk food. I bought my pizza dough from Fresh and Easy and I learned a very valuable lesson the last time I used store bought crust. Let the crust sit out for 20 min or until its at room temperature. It is so much easier to use and roll out. I tried rolling it out last time straight out of the fridge and it was seriously like wrestling with a sumo...ok I don't have any personal sumo wrestling experience but trying to mold that dough was exactly what I thought it would be like.

I also couldn't find just arugula at the store so I bought a bag of spinach/arugula and used that and it actually worked really well. I like the contrast of the lemon juice and the salt.
As a side note if you don't have a pizza stone buy one. They are one of my most favorite kitchen accouterments and I have used mine for well pizza but also cookies, biscuits and you name it.
- 1 pound prepared pizza dough, at room temperature
- All-purpose flour, for dusting
- Cornmeal, for dusting
- 4 tablespoons extra-virgin olive oil
- 1 clove garlic, grated
- 1/2 teaspoon chopped fresh rosemary
- Kosher salt and freshly ground pepper
- 1/2 cup part-skim ricotta
- 1 cup shredded mozzarella cheese
- 4 cups baby arugula
- 1 small shallot, thinly sliced
- Juice of 1/2 lemon
- 3 ounces thinly sliced prosciutto
- Shaved parmesan cheese, for topping
Directions

Place a pizza stone or upside-down baking sheet in the oven and preheat to 450 degrees F. Roll out the dough on a lightly floured surface into a 12-inch round. Transfer to a cornmeal-dusted pizza peel or another upside-down baking sheet; slide the dough onto the hot pizza stone or baking sheet. Bake 8 minutes. Meanwhile, combine 2 tablespoons olive oil in a bowl with the garlic, rosemary, and salt and pepper to taste.

Remove the pizza from the oven, brush with the olive oil mixture and top with the ricotta and mozzarella. Return the pizza to the oven; bake until the cheese is golden and bubbly, about 6 more minutes.
Meanwhile, toss the arugula and shallot in a large bowl with the lemon juice, the remaining 2 tablespoons olive oil, and salt and pepper to taste. Top the pizza with the arugula salad, prosciutto and shaved parmesan. Cut into slices.
 I drank Zinfandel with the pizza. It actually would have probably been better with a white just because of the olive oil, rosemary and white cheeses but I found this pretty light zin at Fresh and Easy and its decent especially for $7.99. Its called Small Wonder and its a wine from Paso Robles. In parting as many of you know it takes a lot to impress me when it comes to food and I have to say this recipe impressed me. It was easy, flavorful and light and perfect for the summer. Cheers!
Sunday, June 17, 2012
Happy Fathers Day!
So as many of you know I have never met my biological Father and this past year has been a lot about reflecting on that loss. But what I have truly realized is that what can be considered a loss can also be considered a gift because in his place I have had some of the most amazing mentors, father figures, close friends and confidence that a girl could ever want. I have never wanted for love, security, "fatherly advice", laughter or compliments. So I would like to take a moment to say thank you to all of you who have held my hand, made me laugh, told me I was beautiful, dried my tears, held me when I was scared, picked me up from scraped knees, taught me how to fix things around the house, let me touch jelly fish at the beach, gave me too much alcohol, told me about things my Mom didn't want me to know about and made me the woman I am today. I won't list you by name because my intention is not to embarrass you in this blog...but thank you...thank you for touching my life and making me the strong, radiant, independent, beautiful woman that I am today...and oh yeah thanks for teaching me about food and wine too...its much appreciated. And Happy Fathers Day to all of you who have been that person who touched a child's life....they may not recognize it at the time but you have meant the world to someone.

Ok enough sentimentality let's go back to talking about food. Tonight I decided to experiment with steak. As many of you know I am a true believer in grass fed beef, but I decided to take it a step further and try Washgyu Rib Eye Steaks. We have all heard of kobe style beef, right? But what exactly is that?
The true kobe beef must come from Japan. It is a cut of beef from the Wagyu cattle or to be more specific the Tajima-ush breed of Wagyu cattle. These cattle are raised based on traditional Japanese methods and they are well known for their flavor, tenderness and marbeling. However, since kobe beef has become such a commodity there has become a knock off version called "kobe style beef." This beef can be raised in the US and its normally a Wagyu cattle crossed with an Angus cattle. They are normally raised on an all grain diet and are supposed to be better for you as they are higher in unsaturated fats. They tend to be raised longer prior to being slaughtered and they are usually hormone, antibiotic and GMR free. So I decided to order some rib-eye steaks from Williams-Sonoma and give this "kobe style beef" a try. I really wanted to know if this was a gimmick or if I could taste and experience a difference in texture or was I just getting ripped off by spending a ton of money on steaks.

And let me just say I am a believer. I have seriously never had such a tender cut of steak. This steak melts in your mouth and even the fat is palatable as its not grisly and hard. It melts and enhances the flavor of the meat without causing you to gag at the back of your throat. I also just seasoned the steak with wine salt and pepper and cooked it on the grill and it was perfect. It had the nice grilled flavor on the exterior and it was still moist and tender inside. It needed no other sauces or seasonings as the grain fed flavors of the meat were inherent. Sure you do have to pay a pretty penny for this type of meat, but for a special occasion this is well worth it. In the event you are looking for Washgyu Steaks my recommendation would be to order them direct from Williams-Sonoma or you can usually find kobe style beef at places like Whole Foods or specialty grocery stores. I do have to say it was pretty cool to get a package in the mail that included a cooler with ice packs and steaks inside...just the very novelty of it made me chuckle. I know I am seriously very easy to entertain.
Hope you all had an amazing weekend. Cheers!
Saturday, June 16, 2012
A little professional jealousy...but she is awesome
So I love to check out other peoples food blogs. And I have to admit I gloat a bit when I see ones that are lame and I also have to admit to having little baby professional jealousy temper tantrums when I see others successes. However, I quickly get over it when I start falling in love with these writers personalities and their recipes. Well I have a new temper tantrum jealous based love affair-Joy the Baker. She has an awesome food blog-www.joythebaker.com and she is also on Facebook and Twitter if you want to follow her. She just came out with her first cookbook...which I haven't purchased yet...so if anyone wants to surprise me my birthday is August 16th and this would be a great gift...yes I know I am super subtle. Anyway I found an article about her in Sunset magazine so I decide to look her up and also try one of her recipes and to be honest what is not to love about her. She is an LA based writer who is sarcastic just like myself. She has a kind of a retro housewife look and she makes amazing food. Now if I can only figure out where she lives...she said near the water in L.A....hmmm Manhattan Beach? Venice? Santa Monica? Oops now I am starting to sound like a stalker and not a fan. Don't worry I am joking about this last part...none of you should get any late night phone calls from me asking if you can bail me out of jail because I got arrested for trespassing, stalking or the like.
Here are a few of the quotes that made me fall in love:
"Peanut butter is like the little black dress of the kitchen world. Dress it up with dark chocolate or dress it down with crackers and a spoon." -Joy the Baker
"I'll just come right out and say it: I'm an excellent house guest. I usually come with an edible treat that usually involves butter and sugar. Heck...I'll even bring a pink box of doughnuts and champagne if the mood strikes me. If I don't have anything edible in tow, rest assured that I come bearing The Gift of the Dance...meaning that I'll shake my groove thing all over the house (this may or may not involve a cartwheel or two)." -Joy the Baker

 So I decided to try and make her recipe for Single Girl Melty Chocolate Peanut Butter Cake. The title made me laugh and it sounded perfect for tonight...I am home alone and tired after a crazy day of 5 year old birthday party fun....let me just say you all will be happy to know that I opted not to wear my pirate costume even though it was a pirate themed party and I also opted to stay out of the jolly jump even though I swear that thing was calling my name. Hey another great bday idea....let's get me a jolly jump...again its August 16th...and if its my birthday I think I am allowed to get in a jolly jump...unless I exceed the weight limit because could you imagine how friggin embarrassing it would be to pop a jolly jump...ugh definitely bad for the ego.
Anyway back to cooking...this recipe makes 1 cake and I had visions of red wine, chocolate and peanut butter dancing through my head as I was baking. I also had the theme song from Snow White and the Dwarfs running through my head...ya know the hi-ho one. Whatever that was all about!!

I have to say this is one of the fastest and easiest chocolate fixes I have had in a long time. I did cheat a bit and I melted the butter and chocolate in the microwave instead of the bowl over boiling water thing. However, I am sure both techniques would work equally well. I also decided that this recipe was meant to be as it called for one ramekin and that is exactly what I have...1! Yeah I don't know why I have 1 ramekin...maybe I stole it from a friend or someone left it at my house or it just magically appeared via the cooking fairies or I guess in my case cooking pixie since all of you keep telling me I look like a pixie. Yeah don't ask me if looking like a pixie is a compliment or not...due to my positive nature I have decided duh of course its a compliment...seriously everyone wants to look like a pixie. Right?
I also have to confess that my cake didn't turn out aesthetically pleasing. The recipe lists various baking times depending on how molten you want the center of your cake. I went with 7-10 minutes for the molten center however when I inverted the cake the molten center melted right out of the cake and across the plate (as seen in the picture above). However, this did not impact the flavor of the cake in the least it has an intense chocolate flavor with a hint of peanut butter and its extremely decadent. I actually only had 2 bites and decided that I needed to stop unless I wanted to find myself in a food and/or diabetic coma within the next 15 minutes.
Here is the recipe:
Hope everyone is having a fabulous weekend full of good karma, good wine and good food. Cheers my friends!
Here are a few of the quotes that made me fall in love:
"Peanut butter is like the little black dress of the kitchen world. Dress it up with dark chocolate or dress it down with crackers and a spoon." -Joy the Baker
"I'll just come right out and say it: I'm an excellent house guest. I usually come with an edible treat that usually involves butter and sugar. Heck...I'll even bring a pink box of doughnuts and champagne if the mood strikes me. If I don't have anything edible in tow, rest assured that I come bearing The Gift of the Dance...meaning that I'll shake my groove thing all over the house (this may or may not involve a cartwheel or two)." -Joy the Baker


Anyway back to cooking...this recipe makes 1 cake and I had visions of red wine, chocolate and peanut butter dancing through my head as I was baking. I also had the theme song from Snow White and the Dwarfs running through my head...ya know the hi-ho one. Whatever that was all about!!

I have to say this is one of the fastest and easiest chocolate fixes I have had in a long time. I did cheat a bit and I melted the butter and chocolate in the microwave instead of the bowl over boiling water thing. However, I am sure both techniques would work equally well. I also decided that this recipe was meant to be as it called for one ramekin and that is exactly what I have...1! Yeah I don't know why I have 1 ramekin...maybe I stole it from a friend or someone left it at my house or it just magically appeared via the cooking fairies or I guess in my case cooking pixie since all of you keep telling me I look like a pixie. Yeah don't ask me if looking like a pixie is a compliment or not...due to my positive nature I have decided duh of course its a compliment...seriously everyone wants to look like a pixie. Right?
I also have to confess that my cake didn't turn out aesthetically pleasing. The recipe lists various baking times depending on how molten you want the center of your cake. I went with 7-10 minutes for the molten center however when I inverted the cake the molten center melted right out of the cake and across the plate (as seen in the picture above). However, this did not impact the flavor of the cake in the least it has an intense chocolate flavor with a hint of peanut butter and its extremely decadent. I actually only had 2 bites and decided that I needed to stop unless I wanted to find myself in a food and/or diabetic coma within the next 15 minutes.
Here is the recipe:
- 1/2 teaspoon plus 1 tbsp. unsalted butter, divided
- About 1 tsp. unsweetened cocoa (or use flour or sugar)
- 1/4 cup semisweet or bittersweet chocolate chips
- 1 large egg
- 4 teaspoons sugar
- 1 tablespoon natural peanut butter or 1 tbsp. bourbon
- Pinch of salt
- 1 teaspoon flour
Preparation
- 1. Preheat oven to 375° and set a baking sheet on rack in center of oven. Grease a 3/4-cup ramekin with 1/2 tsp. butter, then dust with unsweetened cocoa. Set aside.
- 2. Put 1 tbsp. butter and the chocolate chips in a small heatproof bowl set over a small pan of simmering water. Heat, stirring, until chocolate melts; let cool a few minutes.
- 3. Whisk egg, sugar, and peanut butter in a small bowl to blend. Whisk in chocolate mixture until well incorporated, then stir in salt and flour just until combined. Pour batter into ramekin. Set on baking sheet and bake until as done as you like, 7 to 10 minutes for a molten center (a 3/4-in. ring around the edge will look dull) or 10 to 12 minutes for a soft center (cake edge will puff slightly).
- 4. Let cake cool 2 minutes. Protecting hands, invert onto a plate. Eat right away.
Hope everyone is having a fabulous weekend full of good karma, good wine and good food. Cheers my friends!
Friday, June 15, 2012
Am I the only one?
So I know that I have a few cooking/food quirks but I wanted to see if I was the only one. So do you do the following:

 Tonight I made Chipotle Chile Flank Steak and it had a gorgonzola cream sauce. The recipe was from Cooking Light however after the wine and chocolate I consumed I am sure the Cooking Light part was irrelevant. However, with this recipe I love the spice of the chile and the cooling nature of the gorgonzola sauce. I served the steak with a red blend from Opolo vineyards and a caesar salad. As many of you know I am not the best at coordinating side dishes so sometimes the best I can pull off is a bag-o-salad and that is what I went with tonight. However, the spicy steak, cream sauce, wine and salad were a perfect combination. And to make it even better it was a beautiful summer night so sitting on the patio with a glass of wine truly was the perfect "night cap."

- Plan your weekend around what recipes you want to make
- Plan your trips with food in mind (going to Chicago must eat pizza, going to Vegas need to go to Craftsteak, etc)
- Look forward to the glass of wine you are going to drink on your Friday night...even going so far as to think of what variety/brand you are going to consume
- Get excited when you find exotic ingredients at the store that you have been searching for because you have a recipe you have wanted to make forever but you can't find that one thing...
- Carry recipes in your purse
- Invite yourself to your best friends house and tell her what you want her to make you
- Have cooking traditions...ya know like how I cook with a glass of wine and smooth jazz
- Have favorite childhood memories that are completely based on the food you ate
- Dream of certain foods ie. Eggplant Parmesan Pizza from NJ, cannolis from NY, potato burrito from GA
- Drive people insane with your random food knowledge
- Normally only cook a recipe once...there are so many options out there most of the time you don't have to revisit the old
- Have more pictures of food than you have of your friends and family
- Love to eat off peoples plates....actually have to remind myself that not everyone likes my fingers in their food


Here is the recipe:
- 1 teaspoon ground chipotle chile pepper
- 1 teaspoon paprika
- 1/4 teaspoon salt
- 1 (1-pound) flank steak, trimmed
- 1 teaspoon olive oil
- 2 tablespoons finely chopped shallots
- 1 garlic clove, finely chopped
- 1 teaspoon all-purpose flour
- 2/3 cup 1% low-fat milk
- 1/4 cup (1 ounce) crumbled Gorgonzola cheese
- 1 teaspoon butter
- 2 teaspoons chopped fresh flat-leaf parsley

Preparation
- 1. Preheat broiler to high.
- 2. Combine first 3 ingredients. Sprinkle steak with chipotle mixture. Place on a broiler pan; broil 5 minutes on each side. Let stand 5 minutes. Cut thinly across grain.
- 3. Heat oil in a saucepan over medium heat. Add shallots and garlic; cook 1 minute. Add flour; cook 30 seconds, stirring. Add milk; boil. Cook until reduced by half. Remove from heat; stir in cheese and remaining ingredients.
Now for randomness...I was thinking that it was halibut season however I learned that California doesn't have a halibut season as it can be fished year round. But if you want an amazing halibut recipe this is my recommendation. Love the citrus and wine sauce!


- 1/2 cup all-purpose flour
- Salt and freshly ground salt and pepper
- 2 (6-ounce) halibut fillets
- Extra-virgin olive oil
- 3 tablespoons butter
- 2 slices prosciutto, cut into strips
- 1/2 cup white wine
- 1/2 lemon, juiced
- 2 teaspoons capers
- 2 tablespoons chopped fresh flat-leaf parsley plus whole sprigs, forgarnish
Directions
Preheat the oven to 375 degrees F.
Put the flour on a deep plate or in a shallow bowl and season well with salt and pepper. Dredge the fish in the flour. Put a large skillet over medium-high heat, add 1 tablespoon oil and the butter and get the skillet hot. Add the fillets and cook until browned on 1 side, 2 to 3 minutes. At the same time, add the prosciutto and cook, stirring, to brown. Then flip the fish, put the skillet in the oven, and roast until the fish is just cooked through, about 10 minutes.
Remove the fish to 2 serving plates. Dump the prosciutto out onto paper towels to drain. Put the skillet back over medium heat. Add another tablespoon olive oil, the white wine, lemon juice, capers, the remaining 2 tablespoons butter and the parsley and bring to a boil; boil until reduced and thickened. Season with salt and pepper. Pour the sauce over the fish, top with the prosciutto, and serve immediately.
Tuesday, June 12, 2012
Karma Kick Back
When I was a kid my Mom use to tell me that I needed to be nice to people because I wanted good karma. So to all of you that I am nice to its not because I like you its because I don't want bad karma...haha I am joking I am really a nice person. She also use to tell me when something bad happened that it was bad karma and I even remember we use to say the phrase "karma kickback," when something bad occurred. Yes, I know I totally sound like a hippie child, right? Hey I did grow up in Humboldt County so some of that stuff had to stick.
 For those of you who are unfamiliar with karma it is common in Eastern religions and New Age Theology. It is basically the belief that what goes around comes around and it is often referred to as the "law of return." It has also become popular in pop-culture for example:
I know by this time you are thinking, well Danah that is great thanks for sharing about your childhood and karma, but what does this have to do with cooking, right? Well today I made Mushroom and Spinach Korma, however when I first read the recipe I thought it said Mushroom and Spinach Karma and so I thought "damn I need to make this for my Mom and I can't wait to call and tease her about it." It wasn't until after I bought the ingredients that I realized "well hell this is korma not karma," so I had to make it anyway.

Korma is actually an Asian dish that is usually a curry dish with coconut milk. This is a vegetarian version from Food Network with no curry but it has does have some authentic spices like coriander and it has coconut milk which is traditional. My Mom would be thrilled as its vegetarian, which she is, and it has protein in the form of garbanzo beans. Talk about a win/win. This dish actually has a lot of flavor due to the ginger, cumin and coriander. And because of the texture of the mushrooms and the hardiness of the rice it really is a great complete meal. I honestly don't think I will make it again, but it was a healthy meal and better than I expected. So for my vegan and vegetarian readers out there this is for you...yes, I am hoping that by posting a recipe for my varied readers I will get good karma.

The recipe is very easy to make and I love the way the sauce smells. If anyone has any tips for how to use ginger please send them my way. It seems like every time I use ginger I start with a big 'ol piece and by the time I get done peeling the skin away its a little nub....hmmm. So when I buy ginger for a recipe I always buy extra because I just know how I operate...yes we can call that adapting and
 compensating.
Hope you all are having a wonderful week so far. Let me leave you with one of my favorite cooking quotes, "Cooking is like love. It should be entered into with abandon or not at all." -Harriet Van Horne
I know by this time you are thinking, well Danah that is great thanks for sharing about your childhood and karma, but what does this have to do with cooking, right? Well today I made Mushroom and Spinach Korma, however when I first read the recipe I thought it said Mushroom and Spinach Karma and so I thought "damn I need to make this for my Mom and I can't wait to call and tease her about it." It wasn't until after I bought the ingredients that I realized "well hell this is korma not karma," so I had to make it anyway.

Korma is actually an Asian dish that is usually a curry dish with coconut milk. This is a vegetarian version from Food Network with no curry but it has does have some authentic spices like coriander and it has coconut milk which is traditional. My Mom would be thrilled as its vegetarian, which she is, and it has protein in the form of garbanzo beans. Talk about a win/win. This dish actually has a lot of flavor due to the ginger, cumin and coriander. And because of the texture of the mushrooms and the hardiness of the rice it really is a great complete meal. I honestly don't think I will make it again, but it was a healthy meal and better than I expected. So for my vegan and vegetarian readers out there this is for you...yes, I am hoping that by posting a recipe for my varied readers I will get good karma.
Ingredients
- 1 1/4 cups basmati rice
- 1 medium red onion (1/2 roughly chopped, 1/2 thinly sliced)
- 1 2-inch piece ginger, peeled and roughly chopped
- 1 plum tomato, chopped
- 1 teaspoon ground cumin
- 3/4 teaspoon ground coriander
- Kosher salt
- 2 tablespoons vegetable oil
- 1 pound mixed mushrooms, sliced
- 8 ounces baby spinach (about 8 cups)
- 1 15-ounce can chickpeas, drained and rinsed
- 1/2 cup light coconut milk
- Chopped fresh cilantro, for topping
Directions
Cook the rice as the label directs. Meanwhile, combine the chopped onion, ginger, tomato, cumin, coriander, 1/2 teaspoon salt and 1/4 cup water in a blender or food processor and puree until smooth.
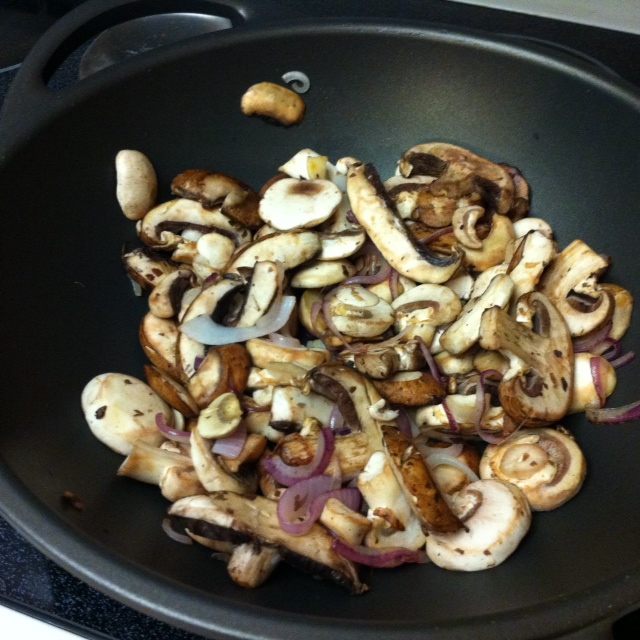
Heat 1 tablespoon vegetable oil in a wide saucepan over medium-high heat. Add the sliced onion and cook, stirring, until golden, about 5 minutes. Add the mushrooms and cook, stirring occasionally, 3 more minutes. Add 1/2 teaspoon salt. Transfer the vegetables to a plate.
Heat the remaining 1 tablespoon vegetable oil in the same pan; add the tomato mixture and cook, stirring, until very thick, about 6 minutes. Return the mushroom mixture to the pan. Add 1 1/2 cups water, bring to a simmer and cook until the mushrooms are soft, about 4 minutes. Stir in the spinach and chickpeas and cook 2 more minutes. Stir in the coconut milk, season with salt and top with cilantro. Serve with the rice.
The recipe is very easy to make and I love the way the sauce smells. If anyone has any tips for how to use ginger please send them my way. It seems like every time I use ginger I start with a big 'ol piece and by the time I get done peeling the skin away its a little nub....hmmm. So when I buy ginger for a recipe I always buy extra because I just know how I operate...yes we can call that adapting and

Hope you all are having a wonderful week so far. Let me leave you with one of my favorite cooking quotes, "Cooking is like love. It should be entered into with abandon or not at all." -Harriet Van Horne
Subscribe to:
Posts
(Atom)
Visit My Website!


