Tuesday, December 27, 2011
Yup I Went Cajun
Ok so I know that I am often a poser and yes I do pretend to
be a lot of things that I am not like Jewish or tall. However, I can honestly
say that the one thing I have never pretended to be is French…I have a horrible
fake accent, I know very little about French food and I have never been to the
country. However, tonight I think I came pretty close to being French because I
made a damn good meal…Shrimp Etouffee…ok sure technically its Cajun but really
we all know the roots are still French. I found the recipe in Cooking Light and
I felt that I needed something light after eating everything that came within a 10
mile radius of me over the weekend.
So tonight I had quite a few firsts….made my first roux and
it was way easier than I expected…just don’t walk away. And if you are unfamiliar with roux it is a thickening agent that is often used as a base for French sauces. It is most commonly made with butter and flour.

I also defrosted shrimp
for the first time…after a quick google search I learned that they can be
defrosted quickly under cold running water…worked like a charm. I also learned
that if you talk too much your broth can boil over if you aren’t paying
attention. And finally I learned if this recipe is any indication of my
inclination for French cooking I pretty much rock.

The recipe starts with chicken broth with dried thyme, basil
and a bay leaf. It simmers on the stove...until I boil it over. Then make your roux which is just
butter and flour and even though the recipe is from Cooking Light it still uses
real butter. I also learned that the color of the roux means something as this
recipe wanted a nutty and rich flavor so you cook it for 8 minutes until it
turns a dark toasted color. Then add the broth and create a thick gravy that is
smooth and smells like deliciousness.

In a separate pan melt some butter and sautee the onion,
celery, red pepper and green pepper. Once they have cooked for approximately 10
minutes add ¾ cup water and deglaze the pan. Then add tomato paste, creole
seasoning (what is the difference between Creole and Cajun seasoning, does
anyone know?), Worcestershire sauce (I hate that word cause I can’t say it),
salt, pepper and red pepper (ground). Add the gravy mixture and finally add the
shrimp, green onion and parsley and cook for 3 minutes. Serve over rice and it is so flavorful, warm,
cozy and spicy. It is perfect for a cold winter evening.
And just so you all know I tried to google the difference between creole and cajun seasoning and all I could find was the difference between the ethnicity. Cajun is of French descent and Creole is French and Spanish. But how that translates into a spice I am just not sure.

I do believe I first had an etouffee in Las Vegas or
Henderson...ok lets just go with some part of Nevada so I am not a liar. It was at one of those restaurants where they use the silver funnel
looking pots (I have no idea what they are called) and although I am sure the
version I had was not from Cooking Light this recipe had a similar flavor
palette and texture which is what made this so surprisingly good. In case you
haven’t got the picture yet I am really happy with this recipe as it is damn
good. I also thought it was an unusual coincidence as I spent my day off today reading
a book that my Mom sent me called Love, God and the Art of French Cooking…think
this might be a theme in my life right now…and the only thing I can hope for is
that it will all end in a European vacation filled with cheese, baguettes and
French winery tours just saying. Sugar Daddy where are you?
P.S. Nic and Marl, while making my French Cajun recipe I
wore my “Kitchen Bitch” apron and thought of you. XOXO
Monday, December 26, 2011
Happy Holidays-To Good Food & Good Wine
Let me start by saying I hope everyone had an amazing
holiday weekend. I hope you all had a Merry Christmas or Happy Hanukkah or any
other holiday celebration you all engaged in. As you all know I was fairly bah
humbug this year and I was really quite the procrastinator. However I do have
to say it was a blessed Christmas weekend for me…although I still cant wait for
2011 to be over because I have high hopes for 2012. This weekend for me was
filled with moments that touched my heart, amazing friends and family and life
lessons. And of course some amazing food and wine.

Here are a few of my holiday highlights:
- I got a wok actually two!!!
- I opened presents while drinking a cool glass of chardonnay and eating antipasto…that was found by rummaging through the pantry…damn I keep some weird stuff in there
- The cookbook collection received some new additions….oh yeah!! Thank you Fabio for the autograph.
- I worked on Christmas Day for a few hours and I was truly thankful for the positive attitudes, funny stories, laughter, Hanukkah cake pop and getting to see The Christmas Story twice in one sitting
- I had some amazing conversations, laughter and smiles that I will always cherish.
- One of my co-workers got her hand stuck in an electric mixer and she continued to turn it on repeatedly even after she recognized that her hand was enmeshed.
But before I move on to 2012 lets discuss some fun food and
wine lessons/experiences from the past 3 days:

Let me start by saying thank you to Tom because on Christmas
Night I finally opened the bottle of Caymus Cabernet Sauvignon and dear god I
swear I heard angels. This wine paired with prime rib was definitely the
closest I have ever been to heaven. It was truly one of the smoothest cabs I
have ever had.

My Christmas meal consisted of prime rib from Green Acres in
Simi Valley. If you haven’t been there or haven’t had their meat it is a must.
This is a great family run business that has a beautiful meat counter and it is
one of those last existing true butcher type locations that allow you to walk
in, request a specific cut and weight of meat and they make it happen. The
prime rib can be ordered already seasoned which is what I do and it makes
Christmas extremely easy because all I have to do is put it in the oven and set
the timer…so truly the most challenging part is hearing the timer and paying
attention to it. The prime rib cooks at a high temperature first to give it
that crispy exterior and then its slowly roasted for another 2 hours to allow
for thorough interior and moist cooking. Holy yum!

With the prime rib I made a Tuscan Potato Casserole. This
recipe takes small baby red potatoes and adds buttermilk, fontina and blue
cheese to them after they are smashed. They are then cooked in the oven with a
panko, parmesan and Italian herb crust which makes for decadent and rich
flavors. I honestly think this was the highlight of the meal for me. I did put
the blue cheese on only half of the potatoes because I was told that one of my
guests could possibly be allergic and that his throat sometimes closes off when
he eats blue cheese…although I thought briefly of just saying fuck it I decided
that I wanted all of my Christmas guests to survive this year.
I also made creamed spinach for the first time thanks to
Emeril…yes I know I use his name like we are close family friends and not just
some celebrity chef who happened to have the first recipe to come up when I
googled “Creamed Spinach.” However, creamed spinach is really easy and this
recipe had a lot of great flavor from sautéed shallots and garlic…ahhh yes they
are sautéed in butter…and well when you add heavy cream to anything it pretty
much gets decadent…just saying.

And if anyone is looking for a festive after dinner drink I
learned about mulled wine. This wine is actually from the Santa Ynez valley and
it comes complete with the spice packet so all you have to do is put the wine,
spices, apple juice and brown sugar in a pan bring to a boil (which I didn’t
do) and simmer for 60 minutes. There is nothing better than a warm glass of spicy
wine at the end of a Christmas celebration.
And although these recipes were not from the actual
Christmas day I still wanted to share them. I was tasked with dessert for
Christmas Eve and I made a Chocolate Tart which actually was my first tart and yes
I even made homemade tart crust. This tart had a shortbread crust which was
really flaky and buttery…hmmm probably from the 2 sticks of butter just saying.
The filling was very rich and decadent and kind of reminded me of chocolate
mousse in a pie crust. It was super easy to make and it traveled well in the
car…no experience taking my tart on a plane or a boat so I can’t give you
advice on that one.

Finally, if you are just looking for an easy recipe for a
fast dinner during the crazy holidays this recipe for Salmon and Ravioli was
great, super fast and still kind of festive…cause the salmon is almost red
which is a Christmas color.
I can hardly believe we have another holiday weekend a mere
4 days away. I am one of those people who holds New Years near and dear to my
heart and I view it with a great deal of supersitition and trepedition. I
believe that the way you spend your New Years is kind of like a reset for the
year ahead so I always use that time to set my goals, set my mind set and set
my aspirations for the next 365 days. I also use this time to reflect and look
back on the past-remembering life lessons, experiences, laughter and joys. This
next weekend will not be any different except for the fact that I have learned
a lot in 2011 and it has made me stronger, more self aware and more reflective.
Cheers!
Monday, December 19, 2011
Tis The Season-Peanut Butter Cup Stuffed Ginger Cookies
I will admit that this year I am a tad bit bah humbug…just
kind of a procrastinator with a little lack of Xmas spirit. And I don’t know
what to blame it on…the house is decorated all cute, my Comm. Center is a
winter wonderland and you all know how much I love to cook and entertain,
however I just can’t get my butt in gear this year. For example, I just started
my Xmas shopping on Friday and normally if I started that late I would be in a
mini-panic right now but I am kind of lackadaisical and have an “ah fuck it,”
attitude.

However, the cooking show must go on, right? Last week one
of my night shifters came into my office and asked to speak to me. I thought
for sure she was going to tell me she changed her mind and that she was going
into law school next semester and since I love her that was going to break my
heart. However, what she wanted to talk about was way more serious…she wanted
to know why the day watch folks always got my baked goods and the night time
gang never even got to see them. Although I wanted to tell her that the day
shift was a bunch of cookie hoarders (haha love you guys) I didn’t. I told her
I would make it up to her this week.
 |
| I have the hardest time with parchment paper...it always wants to roll up on me. |
So cooking confession #1-I did it again. Yet another recipe
where I didn’t read all of the instructions prior to beginning the cooking. So
I bought the ingredients for Peanut Butter Cup Stuffed Ginger Cookies and last
night I started making the dough with the expectation that I would bring them
to work today and hide them ALL day long and deliver them to my night time gang
at 1800 when they came to work. However, about halfway into the recipe I read
the caveat “cookie dough must sit for at least an hour and up to 1 day,” well isn’t
that great since I started the recipe at 2100 and it was getting to be way past
my bedtime so the thought of waiting an hour made my eyes heavy. So I confessed
my flaws today at work to the gang and promised to come through tonight.
 After work tonight I ran my 3 miles and then hit the
kitchen. These cookies are actually pretty fun to make. I made the dough
yesterday and you mix the dry ingredients in one bowl and the wet ingredients
in the mixer. And then you add the 2 together and put them in plastic wrap and
put the dough in the oven. Tonight I took the dough out of the oven and it was
kind of a rock hard play dough texture and I thought hmm there is no way in
hell I am going to be able to mold this dough around a peanut butter cup
without smashing it to smithereens (yes that is the technical cooking term).
However, the dough becomes more pliable in your hands as it gets warm and you
are actually able to mold it around the peanut butter cups. They cook in the
oven for 12-14 minutes, cool on a wire rack for 5 and then you dust them with
powdered sugar. They have a great spicy flavor from the ginger, cinnamon and
molasses, a great texture from the peanut butter cup and a light sweetness from
the powdered sugar. They are actually really different and very enjoyable. They
make actually make it into my Xmas cookie repertoire…oh that’s right I don’t
have a Xmas cookie repertoire….so this might be my first entry haha.
After work tonight I ran my 3 miles and then hit the
kitchen. These cookies are actually pretty fun to make. I made the dough
yesterday and you mix the dry ingredients in one bowl and the wet ingredients
in the mixer. And then you add the 2 together and put them in plastic wrap and
put the dough in the oven. Tonight I took the dough out of the oven and it was
kind of a rock hard play dough texture and I thought hmm there is no way in
hell I am going to be able to mold this dough around a peanut butter cup
without smashing it to smithereens (yes that is the technical cooking term).
However, the dough becomes more pliable in your hands as it gets warm and you
are actually able to mold it around the peanut butter cups. They cook in the
oven for 12-14 minutes, cool on a wire rack for 5 and then you dust them with
powdered sugar. They have a great spicy flavor from the ginger, cinnamon and
molasses, a great texture from the peanut butter cup and a light sweetness from
the powdered sugar. They are actually really different and very enjoyable. They
make actually make it into my Xmas cookie repertoire…oh that’s right I don’t
have a Xmas cookie repertoire….so this might be my first entry haha.
Hope everyone is having a fabulous holiday season and
remember to enjoy your family and friends, say a toast to good health and good
fortune and lets bring in 2012 already.
Monday, December 12, 2011
Rainy Day Baking
So is it just me or does the rain make you want to stay at home, turn on the fire place and bake your little heart out. And fortunately or unfortunately we don't have many of those rainy days in So Cal so when it is raining my motivation to work is completely out the window. I remember being a Dispatcher up in Eureka and I use to love to work on rainy nights because the criminals stayed inside, the cops hung out in dispatch and you didn't feel icky about being at work because it was raining outside anyway. However, down here its almost completely the opposite. I am like hey its raining why can't I be home today instead of at work. Guess its one of those grass is always greener things, right?
 However, I did go to work today and I actually was pretty productive. But I did have a yearning to bake all day. So even though I got off work late tonight all I could think of was how quickly I could turn on the heater, warm up the oven and start baking my little heart out. Last week I had bought ingredients to make Reese's Chocolate Peanut Butter Cookies. I had noticed this recipe awhile back in my Hersheys cookbook which as you all know I am quite fond of as of late because it called for peanut butter chips and I thought to myself, where do I find those? So when I was at the grocery store and I saw them I knew it was a sign that I had to make these cookies...yes, I am even superstitious about my baking/cooking...a little weird yes I know.
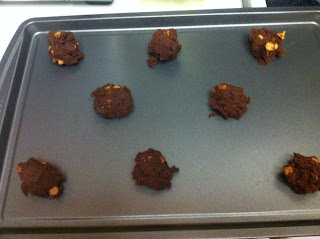
Anyway I digress....so this recipe creates some really moist and chewy chocolate peanut butter cookies. The recipe is easy to make because the majority of it is done in the mixer and they are done quickly so I am not up all night baking my little heart out. Start by creaming the butter and sugar in a mixing bowl...and yes there is a lot of butter and sugar which is probably what makes the cookies taste good. Add 2 eggs and vanilla to the mixture. In a separate bowl combine the flour, cocoa, baking soda and salt and gradually add to the mixing bowl. When its all combined stir in the peanut butter chips and yes, I actually did use Reese's peanut butter chips because that is what I found and duh the name of the company is in the name of the recipe so it must be pertinent...don't ask me why.

The cookies are placed by the rounded teaspoon on ungreased cookie sheets and baked for 8-9 minutes. They are then left on the pan to cool slightly and then transferred to a wire rack to cool completely.
Seriously there is nothing better than turning on the oven to bake cookies and warm up the house on a cold rainy night. It just makes you feel cozy, nurturing and comforted in the very act of baking. Hope all of my So Cal folks stayed dry today and don't worry the rain should disperse tomorrow. And I am just thrilled that I got my baking exploit in before the rain went away...ya know down here you have to move fast. Good night

Anyway I digress....so this recipe creates some really moist and chewy chocolate peanut butter cookies. The recipe is easy to make because the majority of it is done in the mixer and they are done quickly so I am not up all night baking my little heart out. Start by creaming the butter and sugar in a mixing bowl...and yes there is a lot of butter and sugar which is probably what makes the cookies taste good. Add 2 eggs and vanilla to the mixture. In a separate bowl combine the flour, cocoa, baking soda and salt and gradually add to the mixing bowl. When its all combined stir in the peanut butter chips and yes, I actually did use Reese's peanut butter chips because that is what I found and duh the name of the company is in the name of the recipe so it must be pertinent...don't ask me why.

The cookies are placed by the rounded teaspoon on ungreased cookie sheets and baked for 8-9 minutes. They are then left on the pan to cool slightly and then transferred to a wire rack to cool completely.

Seriously there is nothing better than turning on the oven to bake cookies and warm up the house on a cold rainy night. It just makes you feel cozy, nurturing and comforted in the very act of baking. Hope all of my So Cal folks stayed dry today and don't worry the rain should disperse tomorrow. And I am just thrilled that I got my baking exploit in before the rain went away...ya know down here you have to move fast. Good night
Sunday, December 11, 2011
Comfort Food for 1/2 Marathon Pain
So today I finished my 3rd 1/2 marathon in a month and my 8th 1/2 marathon overall. Let me just start by saying yes, I hurt!!! However, today was an awesome run!! I ran Santa to the Sea in Oxnard and it was logistically easy, a great flat course, cool weather, fun people and an all round great experience! Sure our bus driver did get lost and we got an added tour of Camarilo and Hwy 101 on the start but it must have been a good luck run. Thank you to all those people who were directing traffic...especially those of you whom I work with...because I was bound and determined not to walk a step due to you all. Thank you to Staci (my partner in crime), Evelyn (my guilt trip buddy even though I didn't see you), Eduardo (3 miles of motivation), Andrew (passing me at mile 2) and Denise ( we finally saw each other at a run). I loved every minute of today, however I am loving laying on the couch right now even more. And yes I have a chiropractor appointment tomorrow morning.
Tonight I was craving comfort food. It was cold today and even after a hot shower and nap I still had a hard time staying warm. Oh that's probably from exerting every ounce of energy first thing this morning. So I decided to make some warm comfort food to help me on the path to recovery. So I made Beer Braised Chicken: ww.foodnetwork.com/recipes/food-network-kitchens/beer-braised-chicken-recipe/index.html

This recipe takes a 1/4 lb of bacon, yes I am still stuck on the bacon kick. Cut the bacon into 1/2" pieces and cook until crisp. Take the bacon out and drain on a paper towel. Take the boneless, skinless chicken thighs and season with salt and pepper and then dredge in flour. I use to kind of have an aversion to chicken thighs but over time I have found that this is a great cut of chicken especially in the crock pot. It is low in fat and becomes tender pretty quickly. Cook the chicken in the bacon fat and 1T olive oil for approximately 8 minutes. Take the chicken and add the beer, mustard, thyme, water, potatoes and pearl onions. The recipe did call for frozen pearl onions which I couldn't find so I used fresh and they worked just as well in my opinion.
Overall, this recipe had a lot of flavor, was warm and comforting. The chicken was extremely tender and shredded easily with a fork and the potatoes/onions were hearty and added a heartiness to the meal. The sauce had a great tang due to the mustard and a nutty flavor due to the beer. If anyone is looking for a one pot comfort food this is definitely a great recipe to try.
Wednesday, December 7, 2011
I love bacon....
Let me start by saying I love bacon!! Sure I am one of those healthy eaters who is super conscientious of the things I put in my mouth but we all have our downfalls and normally for me those are bread, cheese and wine....however sometimes you need to throw another one in the mix and that could easily be bacon. I love the way it smells, the salty taste and the crispy texture!!! And I am sorry for those of you who think turkey bacon is equal its not and for my Humboldt folks veggie bacon is just down right disgusting I am sorry. Mom, please don't hurt me.

So when I saw this recipe for "Grown-up Mac N Cheese" in Sunset magazine I thought OMG yum!! I also thought hmmm I am over 18, just got carded in Vegas while standing on the casino floor because they thought I was too young to be there...yes I love that Asian woman who deals Let 'Em Ride and I actually know where to buy the cheeses they are talking about in this recipe. Now I know for some people the only true Mac N Cheese is Kraft but lets just be honest here you are wrong....down right friggin wrong!!! Sure this mac n cheese isn't that unnatural orange color and it doesn't have powder in place of cheese but holy heck its yum!! I love homemade mac n cheese...and this recipe will not disappoint as it has a great combination of fontina, Parmesan and Gruyere cheese which has a nutty texture and a great smoky and cheesy flavor. And for those of you who are anal about cheese like I am do not buy the already shredded pre-packaged cheese...shred it yourself!!!

This recipe is actually very easy and its the perfect comfort food for these few cold southern California nights. Cook the pasta according to the package directions. Then cook the bacon in a separate skillet. I used kitchen scissors and cut it into bite sized pieces prior to cooking so once it was done cooking I could just sprinkle it on top of the mac n cheese. Then shred your cheeses and you can mix them together. Once the bacon is done cooking put the bacon on a paper towel to drain and get rid of all of the grease except 1T. Add 2T of flour and whisk then add 2 cups milk, but 1/4 cup at a time. Once that has become pretty thick add the cheese. Stir the cheese mixture into the pasta and cover with the bacon and chives. Oh holy yum!!! Random thought I did think it was weird that this recipe called for adding the cheese in 3 portions...who cares just add the cheese and stir.
Hope everyone is having a wonderful December. I just got back from Vegas last night as I was there running a 1/2 marathon...let me just say it was very strange being sober and drinking water in Vegas. And somehow I also decided to run another 1/2 marathon in Oxnard this weekend...please thing happy thoughts for me....and yeah now you know why I can afford to be eating a little extra bacon right now.
Thursday, December 1, 2011
Peppermint Brownies-Do I Need To Say More?

 Let me start by saying holy crap its December 1st and let me also say I love living in So Cal because this past weekend the temperatures were in the 80's. So a girlfriend of mine had the great idea to take me to a place in Malibu called M Cafe. They have the most gorgeous outdoor seating area and on Sunday afternoon we had a late lunch consisting of mimosas, brie cheese and spinach salad. It was truly a heavenly afternoon and to make it even better they had a basset hound wandering the grounds...which was my favorite dog as a childhood. Yes, I admit I tried to make friends but it really wanted nothing to do with me so I said fuck it and went back to my mimosa. However, if you are looking for a great environment for a warm sunny afternoon this is definitely the place!! Thank you Lydia!
So in general I am just not a candy girl. Even as a child I
didn’t have a favorite candy per se. However, the closest thing to a candy
obsession I have is York Peppermint Patties. I loved the old skiing off the
coffee table commercials they use to have, I love the combination of chocolate
and mint, I love the combination of textures-hard chocolate and smooth mint and
being as health conscious as I am I love that they are one of the lower fat
candy varieties. Sure I do have a few other candy favorites such as chocolate
covered gummy bears, sour patch kids and red licorice once in awhile in a movie
theater but in general candy isn’t my down fall.

However, prior to my weekly grocery shopping trip I was
thumbing through some cookbooks in search of inspiration and I came across this
peppermint chocolate brownie recipe and I thought to myself “holly heck that
sounds like heaven.” So the ingredients made their way onto my shopping list
and the rest is history. On a side note has anyone else found that as you get older
you always forget something on your grocery list? I remember in my 20’s I would
pretty much have my grocery list memorized and writing it down would just be an
added bonus. Now I write down my list, do not have it memorized and still
forget something. Yes, that was the case today because as I was baking my
brownies I realized that I forgot to buy more cocoa powder. Thankfully the
grocery store is quite close to my house but these in the middle of cooking run
to the store for ingredients voyages are starting to becoming a pain in the
butt….just saying.
The brownies smell delicious as they bake and this recipe is
super easy and kind of festive for the holidays…just because it has peppermint
in it duh. Speaking of which I love all of the Starbucks “seasonal” coffee
flavors but I have to say I liked it better when the calories weren’t glaring
at me from the big board. Grande eggnog latte 420 calories, really? Hmmm lets
see for lunch I can have a sandwich or oh wait a latte and still be
hungry…friggin kills me.
Anyway back to the brownies just add melted butter, sugar
and vanilla in a bowl. Mix in the eggs and slowly add the dry mixture which
consists of flour, cocoa powder, salt and baking powder. Does anyone else
always get baking powder and baking soda confused? I always double check the
recipe and the containers like 900 times when I am baking because I am so
paranoid of mixing these 2 ingredients up. Oy.
Take 2 cups of the brownie mixture out of the big bowl and
then spread the rest of the mixture in a 13x9 greased baking pan. Add a single
layer of unwrapped peppermint patties, don’t you love how the recipe tells you
to unwrap them!!! You know that is because some dumbass complained to Hershey
about the wrappers in their brownies because they failed to read the recipe
with common sense. Kind of like all of the lame ass instructions on electrical
products-oh I can’t put my curling iron in the bathtub…well hell!!!
Then add the remaining 2 cups of brownie mixture and bake
for 50-55 minutes and cool on a wrack. I did have some of the peppermint
patties bubble through the top layer of the brownies but they still look like
heaven and taste absolutely divine. These are actually good enough that I don’t
want to give them away and take them to work…but me and my big mouth…my
co-workers know they are coming so there is no hiding them now.

Hope everyone has a fabulous week. I am on the countdown to
yet another ½ marathon which is this Sunday in Vegas. I am truly looking
forward to it, but I am also a little nervous as this is the first race I have
ran that starts at 1730….how do I prepare and how will this impact my OCD race
preparation tendencies? Wish me luck and cheers!!!
Subscribe to:
Posts
(Atom)
Visit My Website!


