Saturday, November 19, 2016
First Snow, Two Grilled Salads and Football
It is November 19th and I am sitting at my counter drinking coffee and trying to mentally prepare myself for the first snow. For many people they equate this to the first snow of the year. However, for me, when I say first snow I mean "first snow" EVER!!! This Cali girl is getting ready for snow and all that comes with snow-driving in snow, walking in snow, breathing in snow, living in snow, sleeping in snow, eating dinner in snow and wearing a jacket.
The crazy thing is that yesterday it was 68 degrees and we actually had dinner outside so not only am I confused, but obviously so is Mother Nature. Anyway prior to today I have enjoyed some beautiful fall days and we have embraced the crisp and incredible weather by making some amazing grilled sales. Last night we made a Grilled Mexican Chicken Salad and a few weeks ago we made a Grilled Salmon Cobb Salad. Both of them were awesome!! The marinade for the chicken in the Grilled Mexican Chicken Salad was too die for and made the chicken so moist even after grilling. The Grilled Salmon Cobb Salad was the perfect modern twist on a cobb, however if I did it again I would definitely toss some blue cheese in there as well.

Now as many of you know I have been enamored with my new home and the wildlife that lives in my neighborhood. I have also been excited by the fact that you can feed the deer and actually even buy feed at the gas stations here. So a few weeks ago we bought feed and although I thought this was a nice way to supplement the deers diet during the colder months I quickly was schooled and a little devastated to learn that it was used by hunters to lure them in so they could shoot them!! Don't get me wrong I have nothing against hunting, but in my opinion it is not necessary to cheat and play dirty. That is like luring me in with a good glass of wine and a dark chocolate bar-straight up just not fair!!


Anyway once we bought the feed, the discussion in my household was centered around presentation and whether or not the deer would prefer their dinner served on the ground or in a football platter. I voted football platter since well as you know it is football season. Therefore, you will also notice a football platter being used in both of our grilled salads. I promise it is different football platter because yes we have 2!!

 For the Grilled Mexican Chicken Salad, you start by grilling the jalapeño, tomatillos, orange and lime. Toss them into a blender with fresh oregano, cilantro, chili powder, garlic, salt and pepper.
Mix the chicken with half of the salsa/dressing mixture and marinate for 4-6 hours. Refrigerate the rest of the dressing.

After the chicken has marinated grill the poblano pepper, bell peppers, pineapple and red onions. Grill the chicken. You can also grill the tortillas or cook them on your cooktop, whatever you prefer.


Arrange the lettuce on a platter and serve with the sliced bell pepper, poblano, chicken and pineapple. Put the red onions, cheese, tortillas and dressing on top.

This had incredible flavor! It had a slight hint of spice and all of the charred vegetables just made this dish amazing!! To be honest, the hardest part of this recipe was trying to explain to the grocery store clerk what all of the vegetables were as he had never seen anyone purchase them before. Welcome to the Mitten!
Here is the actual recipe:
Ingredients
Vegetable oil, for the grill
1 jalapeno pepper
1 pound tomatillos, husked and rinsed
1 orange, halved
2 limes, halved
1 small bunch cilantro, chopped 1 tablespoon fresh oregano
1 teaspoon chili powder
2 cloves garlic
Kosher salt and freshly ground pepper
1 1/2 pounds skinless, boneless chicken thighs (about 6)
3 assorted bell peppers, halved and seeded
1 poblano chile pepper, halved and seeded
2 small red onions, cut into 1-inch-thick rings
1/2 pineapple, cored and sliced 1/2 inch thick
6 corn tortillas
6 heads Little Gem or other baby lettuce, quartered
1/2 cup crumbled Cotija cheese
Directions
Preheat a grill to medium high and brush the grates with vegetable oil. Make the dressing: Grill the jalapeno and tomatillos, turning, until well charred and softened, about 5 minutes for the jalapeno and 20 minutes for the tomatillos. Transfer to a platter. Grill the orange and 1 lime cut-side down until well marked, about 2 minutes. Remove to the platter. Turn off the grill.
Stem the jalapeno (remove the seeds for less heat); transfer to a blender. Add the tomatillos, the juice from the grilled orange and lime, the cilantro, oregano, chili powder and garlic. Season with salt and pepper; puree until smooth. Transfer half of the dressing to a large bowl; add the chicken and toss. Cover and refrigerate 4 to 6 hours. Refrigerate the remaining dressing until ready to serve.
Reheat the grill to medium high; brush the grates with more vegetable oil. Brush the bell peppers, poblano and red onions with vegetable oil. Grill, turning, until charred and softened, about 15 minutes; transfer to a cutting board. Meanwhile, remove the chicken from the marinade and grill, turning once, until cooked through, 10 to 12 minutes; transfer to the board. Brush the pineapple and the remaining halved lime with vegetable oil. Grill until marked, about 3 minutes; transfer to the board. Warm the tortillas on the grill.
Arrange the lettuce on a platter. Slice the bell pepper, poblano, chicken and pineapple. Arrange on top of the lettuce along with the red onions. Sprinkle with the cheese and season with salt and pepper. Serve with the grilled lime, tortillas and reserved dressing.
The next salad is the Grilled Salmon Cobb Salad. To begin with make some hard boiled eggs or you can cheat like I did and just buy some hardboiled eggs. Ya know on a busy work night any time saved is a reason for celebration.
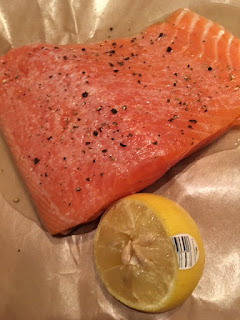
Season the salmon with lemon and salt and pepper. Let it sit for 10 minutes.
Make the dressing which consists of lemon juice, lemon zest, vinegar, shallot and fresh tarragon. Whisk in the olive oil and season with salt and pepper.
Next grill the romaine lettuce, avocados and corn. I had never grilled avocados before and I don't know if it was psychological or natural but it seemed to give them a creamier texture. Grill the salmon.


Chop the lettuce and add fresh basil and fresh dill. Cut the kernels off the corn and chop the avocado and salmon. Arrange the corn, tomatoes, egg, salmon and avocado over the bed on lettuce. Drizzle with the dressing and top with parsley.

I loved the fresh herbs and pretty much anything with avocado in it makes me happy. This salad was just straight up perfect!
Here is the actual recipe:
Ingredients
3 large eggs
1 1 -pound piece skinless center-cut salmon (preferably wild)
1/2 teaspoon grated lemon zest, plus the juice of 1 lemon
Kosher salt and freshly ground pepper
3 tablespoons white wine vinegar
1/2 shallot, chopped
2 tablespoons finely chopped fresh tarragon
1/2 cup extra-virgin olive oil
Vegetable oil, for brushing
2 heads romaine lettuce, halved lengthwise
2 avocados, halved, pitted and peeled
2 ears of corn, shucked
1 cup fresh basil, torn
1/2 cup roughly chopped fresh dill
1 1/2 cups cherry tomatoes, halved
Chopped fresh parsley for topping
Directions
Preheat a grill to medium high. Put the eggs in a medium saucepan and cover with cold water. Bring to a boil, then remove from the heat and let sit, covered, 10 minutes. Drain and rinse under cold water until cool. Peel, chop and set aside.
Meanwhile, drizzle the salmon with the juice of 1/2 lemon and season generously with salt and pepper; set aside 10 minutes.
Make the dressing: Combine the juice of the remaining 1/2 lemon in a small bowl with the lemon zest, vinegar, shallot and tarragon; whisk to combine. Gradually whisk in the olive oil until combined; season with salt and pepper. Set aside.
Brush the grill grates with vegetable oil. Lightly brush the lettuce, avocados and corn with vegetable oil. Grill the vegetables, turning, until well marked, about 2 minutes for the lettuce and avocados and 5 to 6 minutes for the corn; transfer to a cutting board. Meanwhile, grill the salmon, turning once, until just cooked through, 6 to 8 minutes. Transfer to the cutting board and let rest 5 minutes.
Roughly chop the lettuce, discarding the core; transfer to a large platter. Add the basil and dill and toss. Cut the kernels off the corn and chop the avocado and salmon. Arrange the corn, tomatoes, hard-boiled eggs, salmon and avocados in rows over the salad; season with salt and pepper. Drizzle with the dressing and top with parsley.
I would love to write more, but I am pretty sure I need to go chop wood and gather nuts to store for the winter or my upcoming hibernation. Cheers everyone and stay warm!
The crazy thing is that yesterday it was 68 degrees and we actually had dinner outside so not only am I confused, but obviously so is Mother Nature. Anyway prior to today I have enjoyed some beautiful fall days and we have embraced the crisp and incredible weather by making some amazing grilled sales. Last night we made a Grilled Mexican Chicken Salad and a few weeks ago we made a Grilled Salmon Cobb Salad. Both of them were awesome!! The marinade for the chicken in the Grilled Mexican Chicken Salad was too die for and made the chicken so moist even after grilling. The Grilled Salmon Cobb Salad was the perfect modern twist on a cobb, however if I did it again I would definitely toss some blue cheese in there as well.

Now as many of you know I have been enamored with my new home and the wildlife that lives in my neighborhood. I have also been excited by the fact that you can feed the deer and actually even buy feed at the gas stations here. So a few weeks ago we bought feed and although I thought this was a nice way to supplement the deers diet during the colder months I quickly was schooled and a little devastated to learn that it was used by hunters to lure them in so they could shoot them!! Don't get me wrong I have nothing against hunting, but in my opinion it is not necessary to cheat and play dirty. That is like luring me in with a good glass of wine and a dark chocolate bar-straight up just not fair!!


Anyway once we bought the feed, the discussion in my household was centered around presentation and whether or not the deer would prefer their dinner served on the ground or in a football platter. I voted football platter since well as you know it is football season. Therefore, you will also notice a football platter being used in both of our grilled salads. I promise it is different football platter because yes we have 2!!

 For the Grilled Mexican Chicken Salad, you start by grilling the jalapeño, tomatillos, orange and lime. Toss them into a blender with fresh oregano, cilantro, chili powder, garlic, salt and pepper.
Mix the chicken with half of the salsa/dressing mixture and marinate for 4-6 hours. Refrigerate the rest of the dressing.

After the chicken has marinated grill the poblano pepper, bell peppers, pineapple and red onions. Grill the chicken. You can also grill the tortillas or cook them on your cooktop, whatever you prefer.


Arrange the lettuce on a platter and serve with the sliced bell pepper, poblano, chicken and pineapple. Put the red onions, cheese, tortillas and dressing on top.

This had incredible flavor! It had a slight hint of spice and all of the charred vegetables just made this dish amazing!! To be honest, the hardest part of this recipe was trying to explain to the grocery store clerk what all of the vegetables were as he had never seen anyone purchase them before. Welcome to the Mitten!
Here is the actual recipe:
Ingredients
Vegetable oil, for the grill
1 jalapeno pepper
1 pound tomatillos, husked and rinsed
1 orange, halved
2 limes, halved
1 small bunch cilantro, chopped 1 tablespoon fresh oregano
1 teaspoon chili powder
2 cloves garlic
Kosher salt and freshly ground pepper
1 1/2 pounds skinless, boneless chicken thighs (about 6)
3 assorted bell peppers, halved and seeded
1 poblano chile pepper, halved and seeded
2 small red onions, cut into 1-inch-thick rings
1/2 pineapple, cored and sliced 1/2 inch thick
6 corn tortillas
6 heads Little Gem or other baby lettuce, quartered
1/2 cup crumbled Cotija cheese
Directions
Preheat a grill to medium high and brush the grates with vegetable oil. Make the dressing: Grill the jalapeno and tomatillos, turning, until well charred and softened, about 5 minutes for the jalapeno and 20 minutes for the tomatillos. Transfer to a platter. Grill the orange and 1 lime cut-side down until well marked, about 2 minutes. Remove to the platter. Turn off the grill.
Stem the jalapeno (remove the seeds for less heat); transfer to a blender. Add the tomatillos, the juice from the grilled orange and lime, the cilantro, oregano, chili powder and garlic. Season with salt and pepper; puree until smooth. Transfer half of the dressing to a large bowl; add the chicken and toss. Cover and refrigerate 4 to 6 hours. Refrigerate the remaining dressing until ready to serve.
Reheat the grill to medium high; brush the grates with more vegetable oil. Brush the bell peppers, poblano and red onions with vegetable oil. Grill, turning, until charred and softened, about 15 minutes; transfer to a cutting board. Meanwhile, remove the chicken from the marinade and grill, turning once, until cooked through, 10 to 12 minutes; transfer to the board. Brush the pineapple and the remaining halved lime with vegetable oil. Grill until marked, about 3 minutes; transfer to the board. Warm the tortillas on the grill.
Arrange the lettuce on a platter. Slice the bell pepper, poblano, chicken and pineapple. Arrange on top of the lettuce along with the red onions. Sprinkle with the cheese and season with salt and pepper. Serve with the grilled lime, tortillas and reserved dressing.
The next salad is the Grilled Salmon Cobb Salad. To begin with make some hard boiled eggs or you can cheat like I did and just buy some hardboiled eggs. Ya know on a busy work night any time saved is a reason for celebration.
Season the salmon with lemon and salt and pepper. Let it sit for 10 minutes.

Make the dressing which consists of lemon juice, lemon zest, vinegar, shallot and fresh tarragon. Whisk in the olive oil and season with salt and pepper.
Next grill the romaine lettuce, avocados and corn. I had never grilled avocados before and I don't know if it was psychological or natural but it seemed to give them a creamier texture. Grill the salmon.


Chop the lettuce and add fresh basil and fresh dill. Cut the kernels off the corn and chop the avocado and salmon. Arrange the corn, tomatoes, egg, salmon and avocado over the bed on lettuce. Drizzle with the dressing and top with parsley.

I loved the fresh herbs and pretty much anything with avocado in it makes me happy. This salad was just straight up perfect!
Here is the actual recipe:
Ingredients
3 large eggs
1 1 -pound piece skinless center-cut salmon (preferably wild)
1/2 teaspoon grated lemon zest, plus the juice of 1 lemon
Kosher salt and freshly ground pepper
3 tablespoons white wine vinegar
1/2 shallot, chopped
2 tablespoons finely chopped fresh tarragon
1/2 cup extra-virgin olive oil
Vegetable oil, for brushing
2 heads romaine lettuce, halved lengthwise
2 avocados, halved, pitted and peeled
2 ears of corn, shucked
1 cup fresh basil, torn
1/2 cup roughly chopped fresh dill
1 1/2 cups cherry tomatoes, halved
Chopped fresh parsley for topping
Directions
Preheat a grill to medium high. Put the eggs in a medium saucepan and cover with cold water. Bring to a boil, then remove from the heat and let sit, covered, 10 minutes. Drain and rinse under cold water until cool. Peel, chop and set aside.
Meanwhile, drizzle the salmon with the juice of 1/2 lemon and season generously with salt and pepper; set aside 10 minutes.
Make the dressing: Combine the juice of the remaining 1/2 lemon in a small bowl with the lemon zest, vinegar, shallot and tarragon; whisk to combine. Gradually whisk in the olive oil until combined; season with salt and pepper. Set aside.
Brush the grill grates with vegetable oil. Lightly brush the lettuce, avocados and corn with vegetable oil. Grill the vegetables, turning, until well marked, about 2 minutes for the lettuce and avocados and 5 to 6 minutes for the corn; transfer to a cutting board. Meanwhile, grill the salmon, turning once, until just cooked through, 6 to 8 minutes. Transfer to the cutting board and let rest 5 minutes.
Roughly chop the lettuce, discarding the core; transfer to a large platter. Add the basil and dill and toss. Cut the kernels off the corn and chop the avocado and salmon. Arrange the corn, tomatoes, hard-boiled eggs, salmon and avocados in rows over the salad; season with salt and pepper. Drizzle with the dressing and top with parsley.
I would love to write more, but I am pretty sure I need to go chop wood and gather nuts to store for the winter or my upcoming hibernation. Cheers everyone and stay warm!
Sunday, November 13, 2016
Cooking Light's Steamed Mussels with Garlic, Wine and Cilantro
Does anyone else have that one food that they are just a little afraid of? I am not referring to being afraid of eating it because I will eat anything, at least once, that someone puts in front of me. I am talking about cooking it. So for me, mussels have been one of those foods.

It was a beautiful fall day here in the Mitten and I let the man head to Costco on his own. Yes, I know that is a completely different mistake. Anyway I am running my errands and I miss a phone call from him and seeing as he isn't a chatty phone kind of guy when my phone rings it is usually some form of crisis. Little did I know that the crisis would be mine. By the way I missed his call because I was getting a spray tan. On a side note, another little thing I have learned about beautiful Michigan is that you become VERY pale very quickly. You may find the need for artificial tanning so that you don't resemble Casper the friendly ghost for 8 months out of the year and not just on Halloween.
Anyway I digress....so by the time I called him back he excitedly told me he had purchased....4 lbs of mussels. Um what? I don't know how to cook mussels, I don't know what to do with mussels, um what the hell!! And not just 1 lb of mussels or even 2 lbs of mussels, but we are talking about 4 lbs of mussels. However, I did not want to kill his enthusiasm and so I promptly told him I would google how to cook mussels and promptly got off the phone so I could freak out on my own.

The mussels came home...all 4 lbs of them...and during that period of time I learned just how to cook them. The first thing you need to know about mussels is how to clean them. So thanks to YouTube I learned that you scrub them with a brush and then debeard them. No, that is not a typo, just must debeard a mussel. There is strands of tissue attached to the shell of mussel and you must pull the strands off. To make matters worse cleaning mussels comes with a time crunch as they spoil quickly after debearding and so you must cook them immediately.
Therefore, I quickly got to work scrubbing and scrubbing some more all 4 lbs of mussels and then individually pulling off their beards. By the time I finished I had soaked through an entire set of clothes from the amount of water utilized and I had partially moistened another apron. I pretty much felt and looked the part of a fish monger.
However, once they are clean and I am not diminishing the chore of cleaning them, they are super easy to cook. I found a recipe in Cooking Light for Steamed Mussels with Garlic, Wine and Cilantro and I decided to give it a go.

To begin, heat olive oil in a large pot (very large pot if you have 4 lbs of mussels) and sauté the garlic. Add water and wine and bring to a boil. I was sold on this recipe as soon as I saw the wine part because that justified me having a glass of wine while I cooked.

Next add the mussels to the pot and cover and cook for 6 minutes. Remove from the heat. Any mussels that did not open in the cooking process you should throw away as those are not recommended for human consumption. My understanding is that if they remain closed that is an indication that they were either deceased prior to the cooking process or there is something wrong with them and you don't want to pry them open and eat them.

Sprinkle the mussels with pepper and cilantro and eat!! We ate them with some baguette bread and a glass of Chardonnay and it was absolutely perfect. I have to admit that I was pretty dang proud and I would totally make them again. My only critique of this recipe is that I missed the butter. Yes, I know this was a Cooking Light recipe, but sometimes you just want some good old fashioned fattening butter and I do have to admit I missed it.
Ingredients
1 1/2 teaspoons olive oil
8 garlic cloves, thinly sliced
1 1/2 cups water
3/4 cup dry white wine
4 pounds small mussels, scrubbed and debearded
1/4 teaspoon freshly ground black pepper
1/2 cup chopped fresh cilantro
Preparation
1. Heat oil in a large stockpot over medium-high heat. Add garlic; sauté 3 minutes. Add water and wine; bring to a boil. Add mussels; cover and cook over medium-high heat 6 minutes or until shells open, stirring well after 3 minutes. Remove from heat; discard any unopened shells. Sprinkle with pepper and cilantro.
2. Remove mussels with a slotted spoon, and arrange in each of 8 shallow bowls.

Slight confession though...last week we were back at Costco...together...and he says oh look mussels do you want to get some more? I promptly thought of being soaked in mussel liquid and my raw battered hands from the cleaning brush and I said how about some shrimp instead? Cheers!
Friday, October 14, 2016
Learning About Seasons and Coconut Lime Pork

As many of you know I took the plunge and moved to Michigan in May. I have undergone such severe culture shock from the mundane to the terrifying. However, probably one of the biggest adjustments for me has to do with this thing called a weather report. Living in California I just didn't understand the purpose of it and so I promptly didn't use it or pay attention to it or apply any value to it. I quickly learned here that it has a purpose as in a span of mere minutes the weather can go from beautiful to torrential downpour rain to foggy to sunny again. I have also learned that my car is equipped with a severe weather feature that lets you know, by scaring the shit out of you with a loud siren noise, that you are near any weather event.

Besides this crazy thing called weather and this report that is supposed to guide you through life there is a thing called seasons. And yes I know winter hasn't arrived yet...I am in a beautiful blissful delusion about it right now...please don't remind me. However, I am in one of the most beautiful seasons in Michigan-Fall. Yes, the leaves are changing colors and it is getting a little cool in the mornings and last weekend I got to go to a pumpkin patch and drink hard cider. All of which is wonderful!!
But I am just not ready yet....
 |
| Yes those are goosebumps on his face |
 |
| JK's Scrumpy Hard Cider-it is amazing! Find it! It is organic! |
Last week was no different. The temperatures feel like Fall. We are all wearing boots and long sleeves. We are all drinking red wine. And yet we made Coconut and Lime Pork on the grill, which was amazing I might add. So if you live in the East and you want to brave cold weather bbq'ing or you live in the west and you can embrace the grill 365 days a year this is a must try.

 To begin with, marinate the pork in coconut milk, vegetable oil, garlic, brown sugar, cilantro, fish sauce, lime juice and Sriracha. Cover and refrigerate for 1-4 hours. I let mine sit for about 3 hours and it was perfect. And let me just say this marinade smells amazing!!
 Thread the pork on skewers. And remember to soak wood skewers in water for about 20 minutes prior to using so they don't catch on fire. I have tried this and it works and I do it every time now!!
Grill the kebabs and brush with coconut milk for about 12 minutes, as you turn them every so often.
Now make the dipping sauce which is a combo of water, brown sugar, fish sauce, lime juice and Sriracha.

Serve the kebabs in romaine lettuce leaf bowls, drizzle with sauce and top with chopped peanuts, scallions, cucumber and cilantro.
Here is the actual recipe-Coconut and Lime Pork
Preheat a grill to medium and lightly brush the grates with vegetable oil. Thread the pork onto eight 10-inch skewers. Grill the kebabs, turning occasionally and brushing with the remaining coconut milk, until marked and cooked through, about 12 minutes.
Meanwhile, combine 1 tablespoon water and the remaining 1 tablespoon each brown sugar, fish sauce, lime juice and Sriracha in a small bowl. Serve the kebabs in romaine leaves and drizzle with the sauce. Top with chopped peanuts, scallions, cucumber and cilantro.

The flavors are incredible and the Sriracha gives it a slight heat. I love the texture of this recipe as the cucumber and peanuts add the perfect crunch!! This is truly one of my favorite recipes recently. I served it with chilled white wine...yes more seasonal denial. I also served it with sauteed baby bok choy, which on a side note I have discovered is hard to find here. I am sure I will continue to have additional revelations over the coming seasons and until that point I will keep wearing my flip flops and grilling. Cheers!!
Thursday, September 29, 2016
Love Affair with Pimento Cheese
I am celebrating the anniversary of my love affair with pimento cheese. I was in Norfolk, Virginia with two amazing friends enjoying Sunday brunch. We were at one of those modern, trendy restaurants that takes Southern food and puts a new spin on it. And they said to me,"have you ever had pimento cheese?" I gave them a blank stare as this recovering Cali girl had no idea what they were talking about.
So I am sitting at this table in the South enjoying my cocktail when a plate of Ritz crackers and lumpy cheese shows up at the table. I am unimpressed with the presentation and I am confused by their excitement. So they take a Ritz cracker, spread some globular looking cheese on it and put it in their mouth and I watch these giant smiles light up both of their faces. And I am confused...just straight up confused. So I follow along although I am pretty sure I am going to have to fake the smile part....until that pimento cheese hit my mouth.
A lot of people describe meeting their spouse as love at first sight. That is not an experience I can say I have understood until this very moment. I fell in love with pimento cheese! Straight up passionate, overwhelming, obsessive love!!
However, it was not until last weekend that I actually tried to make it myself. I found The Pioneer Woman's recipe for Pimento Cheese and I had to try it. However, before I launch into the recipe let me share a few tidbits of knowledge about pimento cheese.
Now lets talk about cooking pimento cheese. To begin with, it is crazy easy. I started with a mixer and I combined the mayo,cream cheese, mustard and adobo sauce.
I added shredded sharp cheddar and jack cheese and then added the pimentos and dill.
I refrigerated the cheese for 2 hours and served with crackers. Voila!!
Here is the actual recipe:
1/2 cup Mayonnaise
4 oz Cream Cheese, Softened
1 Tablespoon Dijon Mustard (more To Taste)
1 Tablespoon Adobo Sauce From Canned Chipotles (more To Taste)
1/2 teaspoon Black Pepper
8 ounces, weight Sharp Cheddar Cheese, Grated
8 ounces, weight Monterey Jack Or Mozzarella Cheese, Grated
4 ounces, weight Sliced Pimentos, Drained
2 teaspoons Chopped Fresh Dill
Combine cream cheese, mayonnaise, Dijon, adobo, and black pepper in the bowl of an electric mixer. Mix it until totally combined (if you have a few lumps from the cream cheese, no problem; you won't see them later!)
Add the cheddar and Monterey jack and mix gently until combined. Use a rubber spatula to scrape the bowl and make sure all the ingredients are mixed together. Stir in the pimentos and dill. Taste and mix in more of whatever you think it needs. Add more cheese if you like the pimento cheese to be less creamy; add less if you like it to be more creamy.
Refrigerate pimento cheese for at least 2 hours before serving.
Serve with crackers, small hollowed-out peppers, carrot and celery sticks, and olives. (Or make small sandwiches or even a grilled cheese with it!)
***Note: For best results, make sure the cheddar and jack cheeses are nice and cold when you mix them in.
I loved the flavor that the adobo sauce and mustard gave to the pimento cheese. This recipe is truly a great take on a old Southern tradition and one that I would definitely make again. Cheers!
So I am sitting at this table in the South enjoying my cocktail when a plate of Ritz crackers and lumpy cheese shows up at the table. I am unimpressed with the presentation and I am confused by their excitement. So they take a Ritz cracker, spread some globular looking cheese on it and put it in their mouth and I watch these giant smiles light up both of their faces. And I am confused...just straight up confused. So I follow along although I am pretty sure I am going to have to fake the smile part....until that pimento cheese hit my mouth.
A lot of people describe meeting their spouse as love at first sight. That is not an experience I can say I have understood until this very moment. I fell in love with pimento cheese! Straight up passionate, overwhelming, obsessive love!!
 |
| Shout out to my new state! Go Lions! |
However, it was not until last weekend that I actually tried to make it myself. I found The Pioneer Woman's recipe for Pimento Cheese and I had to try it. However, before I launch into the recipe let me share a few tidbits of knowledge about pimento cheese.
- Did you know that pimento cheese started in New York and not the South? It started as a result of industrial America, as a creation of cream cheese and an importation of pimentos from Spain.
- Did you know that a pimento is a pepper? It is an imported sweet red pepper from Spain. It was originally called pimiento and the word mutated to pimento when they started being grown in Georgia in 1911.
- Did you know the first published pimento cheese recipe was in Good Housekeeping in 1908? However, word on the street is that pimento cheese was gracing American tables for a lot longer.
- Did you also know that the Masters Golf Tournament has a tradition involving pimento cheese sandwiches? The tournament has been serving these sandwiches for over 40 years. The tradition started with Nick Rangos until the tournament started using a company called Wife Saver. Everyone was upset over the new sandwiches so in 1998 they tried to recreate Nick's recipe using a batch of frozen originals that someone running the tournament had. That brought pimento cheese peace until 2013 when they switched vendors again. Both Wife Saver and Nick who recently passed away have kept the original recipe a secret and so now the tournament is struggling again for the secret to the "caviar of the south."
 |
| Yup these are the ingredients and whomever thought of putting these odd combos together and eating it...well you are a genius and a little strange...but it works! |
Now lets talk about cooking pimento cheese. To begin with, it is crazy easy. I started with a mixer and I combined the mayo,cream cheese, mustard and adobo sauce.
 |
| Definitely not the most photogenic food |
I added shredded sharp cheddar and jack cheese and then added the pimentos and dill.
 |
| Right before it went into the fridge. Still not pretty! |
I refrigerated the cheese for 2 hours and served with crackers. Voila!!
Here is the actual recipe:
Combine cream cheese, mayonnaise, Dijon, adobo, and black pepper in the bowl of an electric mixer. Mix it until totally combined (if you have a few lumps from the cream cheese, no problem; you won't see them later!)
Add the cheddar and Monterey jack and mix gently until combined. Use a rubber spatula to scrape the bowl and make sure all the ingredients are mixed together. Stir in the pimentos and dill. Taste and mix in more of whatever you think it needs. Add more cheese if you like the pimento cheese to be less creamy; add less if you like it to be more creamy.
Refrigerate pimento cheese for at least 2 hours before serving.
Serve with crackers, small hollowed-out peppers, carrot and celery sticks, and olives. (Or make small sandwiches or even a grilled cheese with it!)
***Note: For best results, make sure the cheddar and jack cheeses are nice and cold when you mix them in.
I loved the flavor that the adobo sauce and mustard gave to the pimento cheese. This recipe is truly a great take on a old Southern tradition and one that I would definitely make again. Cheers!
Thursday, August 11, 2016
Celebrating the Olympics with Brazilian Chicken in Coconut Milk

I am straight up addicted to the Olympics right now. My life pretty much consists of work, gym (while watching the Olympics), more Olympics and a little more Olympics and sleep...repeat. How is it that this competition causes us all to watch sporting events we had never ever heard of? Seriously when was the last time you said to someone,"you know what I want to do tonight? Watch synchronized diving?" I am pretty sure I am not the only person on the planet who thought those were words that would never leave my mouth....until last Tuesday. Ack!!
Under normal circumstances I would NEVER watch archery let alone the bizarre events like solo synchronized swimming (who are they synchronized with?) or live pigeon shooting, however when you put “Olympics” in front of any sport ,it all of a sudden becomes more intriguing….well it does for me anyway. So Sunday night I watched Brazilian basketball as I cooked Brazilian Chicken with Coconut It was so good! And I had a theme, which is a huge accomplishment for me.

The recipe was incredible! It had a hint of heat to it, amazing flavors from the spice rub and the coconut milk and it just straight up made me happy and it also made me feel a little more tropical! Love it!
On a side note, I also have to say these Olympics are great for breaking up the long dog days of summer. Ya know the long wait between the end of NBA playoffs and the start of football season…also called baseball season. Don’t get me wrong I love going to baseball games and eating hot dogs and beer, but the American pastime is just a little boring to watch on TV, in my opinion. Therefore, I will gladly take the Summer Olympics distraction to help me while away the time.

to cooking. Slight word of caution, this recipe is spicy, and not just
in the cayenne pepper way, but the mix of spices from the ginger to the cumin
to the coriander just made it zesty….incredibly flavorful, but zesty! To begin
with, create a spice rub for the chicken, consisting of cumin, cayenne,
turmeric, coriander, salt and pepper. Rub it on the chicken and cook in olive
oil for 6 minutes each side. Remove the chicken and put it on a plate and tent
with foil.


Next make the sauce. Saute the onion, garlic, ginger and
jalapeno in olive oil. I used the same pan that I cooked the chicken in just to
enhance the sauce with the leftover spice rub mixture in the pan. Cook for 5
minutes or until the veggies are soft. Next add the tomatoes. And as a side
note remove the seeds from the tomatoes and chop. Cook for another 5 minutes.
Finally add the light coconut milk and cook for yet another 5 minutes or until
the sauce has thickened.

Finally, add the chicken to the sauce mixture and cook
for….want to guess how long? Yup 5 minutes! I served this dish over rice with
some roasted asparagus and it was heaven. I also paired this with Kung Fu Girl
Riesling which is a wine out of Washington state, that is crisp and citrusy and
not the typical syrupy sweet we often thing of when we think of Riesling.

Here is the actual recipe:
1 tsp ground cumin
1 tsp ground cayenne pepper
1 tsp ground turmeric
1 tsp ground coriander
4 skinless boneless chicken breast halves
salt and pepper
2 T olive oil
1 onion, chopped
- In a medium bowl, mix the cumin, cayenne pepper, turmeric, and coriander. Place the chicken in the bowl, season with salt and pepper, and rub on all sides with the spice mixture.
- Heat 1 tablespoon olive oil in a skillet over medium heat. Place the chicken in the skillet. Cook 10 to 15 minutes on each side, until no longer pink and juices run clear. Remove from heat and set aside.
- Heat the remaining olive oil in the skillet. Cook and stir the onion, ginger, jalapeno peppers, and garlic 5 minutes, or until tender. Mix in the tomatoes and continue cooking 5 to 8 minutes. Stir in the coconut milk. Serve over the chicken. Garnish with the parsley.
This recipe made me happy and honestly it may be one of those few recipes that I would make again. I would love to write more, but I have more Olympics to watch...at least for a few more days. Cheers!
Saturday, July 23, 2016
California Salad in the Mitten

I know I have been M.I.A for quite some time. Life has been a crazy roller coaster of a broken neck recovery, moving across the country, going back to traveling for work, romance and just living. Some very high highs and some very low lows. I am happy to report that overall I am continuing to feel blessed, lucky and loved, but not without some bumps in the roads.
 I am in Michigan or as those who live here love to call it, "the Mitten," because the state resembles a mitten when viewed on a map. I purchased a Michigan cutting board to hang in my new kitchen so I can learn my new states geography one slice, dice and chop at a time. We shall see how that goes since I am geographically challenged (understatement of the year).
I am learning about all things Michigan! Like the fact that a sliding glass door is now called a "doorwall." Or the fact that there is a reason for a weather report, not just in the winter, but all year round. Or the fact that you can have a fire in your backyard without fear of torching the entire state. Or the fact that there are certain ingredients for recipes that you can't get year round, what exactly is this thing called seasons? This list could continue for pages, but you get the idea.
So since I have been absent from my blog for quite sometime I thought it would be appropriate that I start back up the night I made a recipe called California Salad. Ya know a shout out to my previous state, and with my cutting board a tribute to my current state. Speaking of which, one of the other things I learned that sometimes it is too hot to cook. And by that I mean this is the first weekend that I have experienced Michigan humidity and so the thought of turning on an oven....well it just wasn't an option. And this recipe appealed to me because it was light, easy and only required brief cooking, which would not turn my house into a sweat lodge.

First of all you hard boil some eggs. I am sure we have all had some hard boiled egg successes and some epic failures. Ya know the kind where the shell sticks to the egg and all you get is a yellow blog and a hint of white. Well this technique actually worked very well...put eggs in cold water, about one inch over the eggs. Bring to a boil and then simmer for 10 minutes. Run the eggs through cold water and set aside. When I peeled them about 20 minutes later the shells came off without hesitation. Success!!
 Next saute a can of garbanzo beans in a tablespoon of olive oil. I also learned a non-geography related lesson with these beans. When you saute them at a high heat in oil they sometimes explode. Yup!! I had garbanzo beans and skins scattered across my floor as when I put them in the hot pan of oil they reacted like popcorn. Just a word of caution!!
After the garbanzo beans have cooked for approximately 3 minutes, add 1/3 cup pumpkin seeds or pepitas (as they are called in Cali). Cook for another minute. A few of these ended up in my mouth prior to the salad. Oopsie!!
Toss the 5 oz of mixed baby greens, 8 radishes that you slices and the sprouts in a bowl.

 As a side note, I must add that I was pretty excited to find sprouts. This was a childhood favorite of mine and I loved avocado, cream cheese and sprout sandwiches as a kid. There is actually a Danah kid legend about me trying to order one of these sandwiches in a swanky NY restaurant at the age of 5ish and them staring at me like I had 3 heads. "What!! I am from Cali lady!! Why are you looking at me like that?" I did not say that, but that is what I was thinking as I stared up at the lovely waitress with my giant 5 year old brown eyes and chubby cheeks. I did not get my sandwich. Hence, the lesson about seasonal fruits and vegetables. However, today I was able to find an avocado...come December...well I will keep you posted.
Next I made the salad dressing, which was a combination of Greek yogurt, olive oil, vinegar, chives and salt and pepper. It was good, but this is probably the only thing I would change about this recipe. I was just a little bland.
Finally serve the lettuce mixture with the chopped eggs, sliced or diced avocado, the garbanzo bean mixture and the salad dressing.
Here is the actual recipe:
- Put the eggs in a medium saucepan and cover with cold water by 1 inch. Bring to a boil, then reduce the heat and gently simmer 10 minutes. Drain and rinse under cold water until cool; set aside.
- Meanwhile, heat 1 tablespoon olive oil in a small skillet over medium heat. Add the chickpeas and season with salt and pepper. Cook, stirring, until the chickpeas are lightly browned, about 3 minutes. Add the pepitas and cook, stirring, until lightly toasted, about 2 minutes; let cool.
- Make the dressing: Whisk the yogurt, 2 tablespoons water, the vinegar, chives and the remaining 1 tablespoon olive oil in a small bowl; season with salt and pepper.
- Peel and roughly chop the hard-boiled eggs. Toss the greens, sprouts and radishes in a large bowl; season with salt and pepper. Top each serving of salad with the chickpeas and pepitas, eggs and sliced avocado. Drizzle with the dressing and top with more chives

It is truly light, refreshing, tangy and perfect for a warm Summer evening. I had mine with a citrusy Washing Chardonnay and I was truly so content....especially since tonight is my first night alone in my new home...and I am just enjoying the house, Miss Kitty and my own company. Cheers from my new state!
Subscribe to:
Posts
(Atom)
Visit My Website!


