Wednesday, June 20, 2018
Strawberry Bread & My Thoughts on the World
It has been a long time since I sat down with my computer and wrote this food blog. I have been compelled to pick it up again for a few reasons-the world needs a little bit of laughter and joy right now, and so do I.
Now lets talk about getting back in the kitchen. I truly have to admit that when I am struggling I tend to be one of those that doesn't eat and/or cook so that makes it a bit challenging for a food blogger. However, this weekend I turned up the jazz music, poured myself a glass of wine and decided to make Strawberry Bread from the strawberries I got at the Farmers Market. I should say I made bread with the remaining strawberries that didn't end up in my mouth promptly after bringing them home. I bought 3 baskets of them and ate 2 of them!!!

So this bread is like a coffee cake style bread. It does not require kneading or rising or being patient, which is perfect for a personality like mine. I actually really liked this recipe. It wasn't too sweet and I loved the fresh strawberries and the hint of spice from the cinnamon. A slight word of caution, it does make two loaves, so everyone I know received strawberry bread on Sunday.
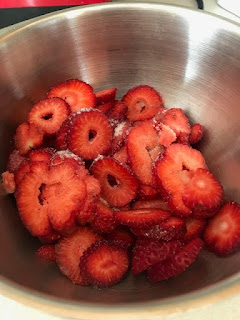
To begin with, slice the strawberries and sprinkle with sugar. I honestly debated on even using the sugar because strawberries this time of year are just so sweet. The recipe called for a tablespoon and I probably used 1/2 Tablespoon. Aren't these just straight up pretty? I love them....yes I love them so much I would marry them. Hell, it might be more successful than my other marriages...just saying. Equality!

Next, mix the dry ingredients together-flour, sugar, cinnamon, baking soda and salt.
Whisk the eggs and oil in a separate bowl and then add to the strawberries. And I have to say the strawberry, oil and egg mixture looked downright weird and unappetizing, however it all worked out ok. It actually kind of reminded me of something you would see in a Harry Potter movie, like one of Harry's failed spells.

Add the strawberry mixture to the dry ingredients and combine until just moist. Fold in pecans and divide the batter between the two pans. As a side note, the pans should be buttered and floured.


Bake for 45-55 minutes. I actually needed to cook them a little longer, however I don't know if that was due to my oven or the actual recipe. A toothpick inserted should be clean. Let the bread cool in pans for about 10 minutes and then remove to a wired rack to cool completely. Enjoy!
Here is the actual recipe:
This is a food blog and I believe strongly in not airing my political beliefs in this medium, however I do want to take a moment to express my thoughts in general about our world. I, like many of you, are struggling with the divide that is occurring throughout our country, or even our world. I personally don't believe it is just a political issue, a race issue, a gender issue, a sexuality or a religion issue. I think it is a humanity issue. We are so busy embracing, celebrating and recognizing our differences and diversity that we are polarizing our globe. We are forgetting what we do have in common. We are no longer loving our neighbor or even our own family and friends, let alone the stranger we see on the street or in another state or a different country. We have social media, technology and every communication device known to man, yet we are not talking and in my opinion the information highway is broken, complete with very large potholes. I am far from perfect and I don't have the answers, but I would love to see all of us get back to love, celebrating those differences that make us human, made our country and make us enjoy the experience of living. I recently just got back from Greece and it was a beautiful country, however it is one that is filled with people who are unhappy with their government, struggling to make a living with a 57% unemployment rate and the people are trying to identify themselves just as we are. And of course I saw temples with incredible history, ate food that was out of this world and swam in ocean that was so clear I could see for miles, however what I treasure the most about that trip was the conversations. I treasured talking to people, learning about their country, the traditions, the history and the individual stories. It is not the answer, but it is where I plan on starting....one story at a time, one conversation at a time, one love at a time.
Now lets talk about getting back in the kitchen. I truly have to admit that when I am struggling I tend to be one of those that doesn't eat and/or cook so that makes it a bit challenging for a food blogger. However, this weekend I turned up the jazz music, poured myself a glass of wine and decided to make Strawberry Bread from the strawberries I got at the Farmers Market. I should say I made bread with the remaining strawberries that didn't end up in my mouth promptly after bringing them home. I bought 3 baskets of them and ate 2 of them!!!

So this bread is like a coffee cake style bread. It does not require kneading or rising or being patient, which is perfect for a personality like mine. I actually really liked this recipe. It wasn't too sweet and I loved the fresh strawberries and the hint of spice from the cinnamon. A slight word of caution, it does make two loaves, so everyone I know received strawberry bread on Sunday.

To begin with, slice the strawberries and sprinkle with sugar. I honestly debated on even using the sugar because strawberries this time of year are just so sweet. The recipe called for a tablespoon and I probably used 1/2 Tablespoon. Aren't these just straight up pretty? I love them....yes I love them so much I would marry them. Hell, it might be more successful than my other marriages...just saying. Equality!

Next, mix the dry ingredients together-flour, sugar, cinnamon, baking soda and salt.
Whisk the eggs and oil in a separate bowl and then add to the strawberries. And I have to say the strawberry, oil and egg mixture looked downright weird and unappetizing, however it all worked out ok. It actually kind of reminded me of something you would see in a Harry Potter movie, like one of Harry's failed spells.

Add the strawberry mixture to the dry ingredients and combine until just moist. Fold in pecans and divide the batter between the two pans. As a side note, the pans should be buttered and floured.


Bake for 45-55 minutes. I actually needed to cook them a little longer, however I don't know if that was due to my oven or the actual recipe. A toothpick inserted should be clean. Let the bread cool in pans for about 10 minutes and then remove to a wired rack to cool completely. Enjoy!
Here is the actual recipe:
Ingredients
- 2 cups fresh strawberries
- 3 1/8 cups all-purpose flour
- 2 cups white sugar
- 1 tablespoon ground cinnamon
- 1 teaspoon salt
- 1 teaspoon baking soda
- 1 1/4 cups vegetable oil
- 4 eggs, beaten
- 1 1/4 cups chopped pecans
Directions
- Preheat oven to 350 degrees F (175 degrees C). Butter and flour two 9 x 5-inch loaf pans.
- Slice strawberries and place in medium-sized bowl. Sprinkle lightly with sugar, and set aside while preparing batter.
- Combine flour, sugar, cinnamon, salt and baking soda in large bowl; mix well. Blend oil and eggs into strawberries. Add strawberry mixture to flour mixture, blending until dry ingredients are just moistened. Stir in pecans. Divide batter into pans.
- Bake in preheated oven until a tester inserted in the center comes out clean, 45 to 50 minutes (test each loaf separately). Let cool in pans on wire rack for 10 minutes. Turn loaves out of pans, and allow to cool before slicing.
Friday, January 12, 2018
Dill Pickle Soup

Many of you may be thinking that there has to be a typo somewhere in the title of this blog, but alas, no. I truly made Dill Pickle Soup, thanks to Noble Pig, which is a food blog and not my pen name. I saw the recipe on FB and I knew it was a must try for me. And although I got awkward questions about my pregnancy status and my sanity when I told friends and family what I was making for dinner, I knew this recipe and I were going to be best friends. If anyone needs confirmation, I am not pregnant and my mental state is strong...or well unchanged...still a little crazy, but that is my normal state of being.
So let me start by saying, I am friggin in love with this soup recipe!! You can taste the dill pickle and I love it. The soup is also creamy, comforting, hardy and just downright happy. Granted I am sure the salt content is extreme so if you are looking for a low-sodium recipe, just stay away. But seriously, this may be my favorite soup of the moment and as many of you know I eat a ton of soup!!
This soup does contain dill pickles and pickle brine and so at first you are a little confused when you have a pickle bite explode in your mouth and then you just start to embrace and celebrate the uniqueness of the experience. I love dill pickle soup!!

Now in case you wanted to know a few fun facts about pickles let me help:
- Cleopatra ate them because she believed they helped her stay beautiful. Well dang I must be friggin gorgeous!
- Pickles are supposedly mentioned in the Bible! Maybe Jesus turned water into wine and paired it with pickles? So, my wine and pickle pairing is not all that original or unique.
- During WWII 40% of pickles were commandeered to feed the soldiers.
- In Fiji, pickles are part of the courtship process. Men create pickle pits to prove they can afford a wife. Do you think "pickle pit" has multiple meanings? Asking for a friend.


To begin with, bring the broth, potato, butter and carrot to a boil and cook until the potatoes are tender. Add the chopped dill pickles and continue to boil. One of the many questions that was posed to me last night was whether or not the pickles were hot or cold....and they are hot...and it works!! Just go with it!!

In a bowl, combine sour cream, water and flour, making a paste. My one snafu with this recipe last night was when I got to this step and went to add the flour, only to discover that I had purchased a giant bag of cornmeal instead of flour. In my defense, the cornmeal bag was disguised as a flour bag....minus the fact that it said "corn meal" on the outside instead of flour. Details!! Or lack of attention to details on my part!! However, thankfully I have the worlds most amazing neighbors and they got a frantic text about borrowing flour and they came through for me...yet again.
 Whisk the sour cream mixture into the soup and it is ok if some of the potatoes fall apart on you. For the record, it adds some additional thickness to the soup which just makes it more hardy and yummy.
Add the pickle juice, Old Bay seasoning, salt, cayenne and pepper. I went with the traditional Vlasic pickles for this recipe and I thought the flavor was great. However, there are very few pickles I have met that I didn't love so I might not be the best judge on the great pickle juice debate. Cook for 5 minutes.
 |
| I obviously should have been a hand model. |
I served mine with diced pickles on top because really even after snacking on pickles while cooking, making pickle soup with pickles and brine, I knew the soup needed a few more pickles.
Here is the actual recipe:
Ingredients
- 5-1/2 cups chicken broth
- 1-3/4 pounds russet potatoes, peeled and quartered
- 2 cups chopped carrots (smaller dice)
- 1 cup chopped dill pickles (smaller dice ~ about 3 large whole dills)
- 1/2 cup unsalted butter
- 1/2 cup all-purpose flour
- 1 cup sour cream
- 1/4 cup water
- 2 cups dill pickle juice*
- 1-1/2 teaspoons Old Bay seasoning
- 1/2 teaspoon table salt
- 1/2 teaspoon coarsely ground pepper
- 1/4 teaspoon cayenne pepper

Garnish (optional)
- sliced dill pickles
- fresh dill
- black pepper
- In a large pot, combine broth, potatoes, carrots and butter. Bring to a boil and cook until the potatoes are tender. Add pickles and continue to boil.
- In a medium bowl, stir together flour, sour cream and water, making a paste. Vigorously whisk sour cream mixture (2 Tablespoons at a time) into soup. (This will also break up some of your potatoes which is okay. You might see some initial little balls of flour form, but between the whisking and boiling all will disappear. Don't panic.)
- Add pickle juice, Old Bay, salt (*see below), pepper and cayenne. Cook 5 more minutes and remove from heat. Serve immediately.
- *All pickle juice is not created equal. Some is saltier than others. Taste your soup after adding the pickle juice and final seasonings. It's possible you will not need any salt or would prefer more or less.
By the way as for wine pairing, because yes of course you can pair pickles and wine, I recommend a crisp oaky white wine. I chose a Napa Valley oaked Chardonnay because I wanted classy wine with my Dill Pickle Soup. Cheers and seriously try it!! You will like it!
Tuesday, December 26, 2017
Green Shakshouka
This is a disclaimer, if you are extremely offended about quiche bashing, please close this blog. Ok all joking aside I love a quiche just as much as the next person, however I was pretty sure if I had to eat another quiche for Christmas breakfast/brunch I may throw something. Don't get me wrong usually mimosas can help with my aggression, but this year we wanted to do something a little difference.

So my Mom found this recipe in Sunset magazine for Green Shakshouka and the rest is history. If you are as unfamiliar with Shakshouka as I was up until yesterday let me tell you a little bit about it. Shakshouka, which can also be spelled shakshuka or chakchouka is a Middle Eastern or North African dish with poached eggs in a sauce of tomatoes, chili peppers and onions. However, this recipe, according to Sunset was of the North African variety.
For our Christmas brunch, this was truly the perfect dish as we had at least two vegetarians at the table and we wanted something easy, flavorful and lets be honest...we wanted some good comfort hangover food because our big celebration is on Christmas Eve. Somehow, I got elected to be the chef. Thankfully my Mom was a lifesaver yet again...story of my life...as she had prepped everything for me and I just had to cook.
To begin with, preheat the oven to 375 degrees (for the record my Mom even turned on the oven for me). Chop the chard, keeping the leaves and stems separate. As a side note, we used a combination of chard, spinach and kale from my Moms garden because she can grow stuff whereas I did not get that gene and I kill everything.


Next, toast the fennel, cumin and coriander seeds in a frying pan until fragrant. The recipe says 1-2 minutes, however I found that it took a little bit longer for me. I am not sure if my heat was lower, my sniffer was bad or it just took longer.
Grind the seeds using a mortar and pestle and add the smoked paprika, chile flakes, pepper and cardamom. Set aside. Set a 9x13 pan in the pre-heated oven to heat.

 Heat oil in a pan over medium high heat. Add onion and chopped stems, cook until golden brown, approximately 10 minutes. Stir in garlic, jalapeno and spices. Add half the greens and cook until wilted, about 2 minutes. Repeat with the rest of the greens.
Stir in tomato sauce, chicken broth and salt. Bring to a boil and then reduce heat to low and cook, partially covered, 5-7 minutes or until greens are tender.

 Set aside 3 T feta cheese, 1T parsley and 1T cilantro. Stir the rest into the greens.
Arrange greens in preheated pan. Nestle eggs into greens. Bake until egg whites are just set. The recipe says 12-18 minutes, however we found it to be closer to the 18 minute mark. Scatter with feta, cilantro and parsley.
Here is the actual recipe:
1 3/4 pounds mixed winter greens (such as kale, spinach, and Swiss chard), rinsed well, water shaken off
1 teaspoon cumin seeds
1/2 teaspoon each coriander and fennel seeds
1 teaspoon each smoked paprika and red chile flakes
1/4 teaspoon each freshly ground pepper and cardamom
6 tablespoons extra-virgin olive oil
1 medium onion, chopped
3 garlic cloves, chopped
1 large jalapeño chile, seeded and diced
1 1/4 cups (12 oz.) tomato sauce
1 1/2 cups reduced-sodium chicken broth
1 teaspoon kosher salt
7 ounces feta cheese, coarsely crumbled
1/2 cup chopped flat-leaf parsley, divided
3 tablespoons chopped cilantro leaves, divided
12 large eggs
Preheat oven to 375°. Remove stems and large ribs from greens and finely chop; set aside. Coarsely chop leaves and set aside.

So my Mom found this recipe in Sunset magazine for Green Shakshouka and the rest is history. If you are as unfamiliar with Shakshouka as I was up until yesterday let me tell you a little bit about it. Shakshouka, which can also be spelled shakshuka or chakchouka is a Middle Eastern or North African dish with poached eggs in a sauce of tomatoes, chili peppers and onions. However, this recipe, according to Sunset was of the North African variety.
For our Christmas brunch, this was truly the perfect dish as we had at least two vegetarians at the table and we wanted something easy, flavorful and lets be honest...we wanted some good comfort hangover food because our big celebration is on Christmas Eve. Somehow, I got elected to be the chef. Thankfully my Mom was a lifesaver yet again...story of my life...as she had prepped everything for me and I just had to cook.
To begin with, preheat the oven to 375 degrees (for the record my Mom even turned on the oven for me). Chop the chard, keeping the leaves and stems separate. As a side note, we used a combination of chard, spinach and kale from my Moms garden because she can grow stuff whereas I did not get that gene and I kill everything.


Next, toast the fennel, cumin and coriander seeds in a frying pan until fragrant. The recipe says 1-2 minutes, however I found that it took a little bit longer for me. I am not sure if my heat was lower, my sniffer was bad or it just took longer.
Grind the seeds using a mortar and pestle and add the smoked paprika, chile flakes, pepper and cardamom. Set aside. Set a 9x13 pan in the pre-heated oven to heat.

 Heat oil in a pan over medium high heat. Add onion and chopped stems, cook until golden brown, approximately 10 minutes. Stir in garlic, jalapeno and spices. Add half the greens and cook until wilted, about 2 minutes. Repeat with the rest of the greens.
 Stir in tomato sauce, chicken broth and salt. Bring to a boil and then reduce heat to low and cook, partially covered, 5-7 minutes or until greens are tender.

 Set aside 3 T feta cheese, 1T parsley and 1T cilantro. Stir the rest into the greens.
Arrange greens in preheated pan. Nestle eggs into greens. Bake until egg whites are just set. The recipe says 12-18 minutes, however we found it to be closer to the 18 minute mark. Scatter with feta, cilantro and parsley.
Here is the actual recipe:
Preheat oven to 375°. Remove stems and large ribs from greens and finely chop; set aside. Coarsely chop leaves and set aside.
Toast cumin, coriander, and fennel in a small frying pan over medium heat until fragrant, 1 to 2 minutes. Grind seeds with a mortar and pestle. Add paprika, chile flakes, pepper, and cardamom; set aside.
Set a 9- by 13-in. or similar baking dish in oven to heat. Heat oil in a 6- to 8-qt. pot over medium-high heat. Add onion and chopped stems; cook, stirring often, until golden brown, 10 minutes. Stir in garlic, jalapeño, and spices. Add half the greens; cook, stirring, until wilted, 2 minutes. Add remaining greens; cook until barely wilted.
Stir tomato sauce, broth, and salt into greens and bring to a boil. Reduce heat to medium-low, partially cover, and cook until greens are just tender, 5 to 7 minutes. Set aside 3 tbsp. feta cheese and 1 tbsp. each parsley and cilantro; stir the rest into greens.
Arrange greens in preheated dish. Nestle eggs into greens. Bake until egg whites are just set, 12 to 18 minutes. Scatter reserved feta, parsley, and cilantro on top.
Make ahead: Through step 3, chilled, 1 day; preheat oven with -baking dish in it, reheat greens in
pot, and continue with step 4.
Set a 9- by 13-in. or similar baking dish in oven to heat. Heat oil in a 6- to 8-qt. pot over medium-high heat. Add onion and chopped stems; cook, stirring often, until golden brown, 10 minutes. Stir in garlic, jalapeño, and spices. Add half the greens; cook, stirring, until wilted, 2 minutes. Add remaining greens; cook until barely wilted.
Stir tomato sauce, broth, and salt into greens and bring to a boil. Reduce heat to medium-low, partially cover, and cook until greens are just tender, 5 to 7 minutes. Set aside 3 tbsp. feta cheese and 1 tbsp. each parsley and cilantro; stir the rest into greens.
Make ahead: Through step 3, chilled, 1 day; preheat oven with -baking dish in it, reheat greens in
pot, and continue with step 4.
I have to be brutally honest, this is one of the best breakfast dishes I have ever had. The flavors are incredible with the tomato sauce and the mix of spices. There is a slight heat, but nothing overwhelming for the average eater. It is hearty and just truly comforting. I actually had it for brunch and I ate the leftover as well....just couldn't stop!! Although I have no idea what Christmas 2018 has in store for me...this very well may make it back onto the brunch table. Wishing everyone a Happy Holiday and let's bring in the New Year with a bang!! Cheers!
Monday, December 4, 2017
Turkey & Roast Poblano Chili

When I selected this recipe I had no idea that the "roast," portion of the recipe title was referring to what this recipe would do to my house. As many of you know I recently moved and with moving comes some joyful adjustments! For example, running into the wall as you get up to go to the restroom in the middle of the night because you have forgotten that the bed to bathroom location has changed. Or being told after you sign the lease that there is a bear, like a real bear, that lives in the greenbelt behind your house. Um say what!!
And last night brought about another learning experience dealing with smoke detectors. And in case you were concerned about my fire safety, fear not!! Because last night I tested those bad boys...not just once....nope not even just twice....but three times!! I am safe!! And my chiles were well roasted. For the record, I did not burn them, but when the recipe calls for roasting the chiles in the broiler with the door open...just don't...unless you want a billowing cloud of dark chili flavored smoke taking over your house and making you cough uncontrollably. Good times!!


So as you guessed it step one in this recipe involves roasting the poblano chiles. Place them on a rimmed baking sheet, put them in the boiler and roast until blackened 7-8 minutes, with the door open if you are following the recipe. However, in my experience I would recommend closing the door and if you do they may take a little longer to roast, but in the long run it will save you a lot of pain and suffering. Once they are roasted, place in a bowl and cover until they are cool enough that you can touch them.


Heat the olive oil in a large skillet. Add the turkey and break into pieces, cooking for approximately 5 minutes. Season with salt and pepper and stir in the cumin, chile powder, oregano and cinnamon. I liked the hint of cinnamon in this recipe, it gave it a nice addition without being too overpowering.

 At first, I thought adding cornmeal to my chili sounded a bit odd, however when I googled it I discovered that it can be used as a thickening agent. And it worked well in this recipe.
 Once the poblano peppers have cooled, peeled the skin and it should come off very easily if charred correctly. Next chop 2 peppers and add to the chili mixture.
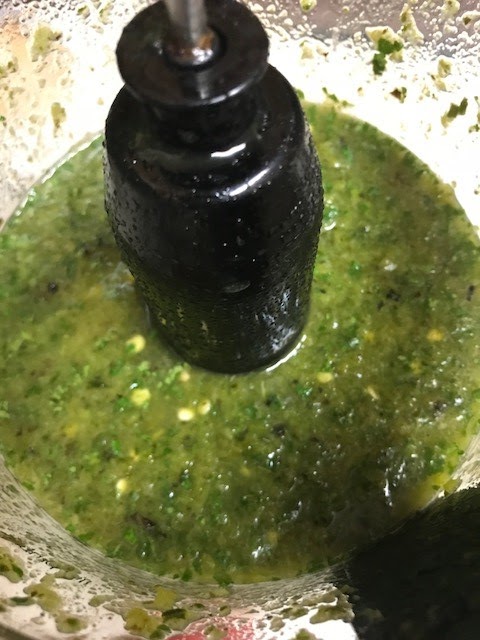
 Place the other 3 peppers in a food processor and puree with salt, pepper, chicken stock, cilantro and lime.


Add to the chili and continue to simmer until thickened slightly, 4-5 minutes.
The chili can be served with cheese, sour cream, radishes, onion, pickled jalapenos, toasted pumpkin seeds or pretty much anything else you want to toss on top. The sky is the limit and who am I to take away from your creativity?
Here is the actual recipe:
Ingredients:
5 large poblano peppers
2 T olive oil
1 lb ground turkey
salt and pepper
1 T ground cumin
1 1/2 tsp ancho chile powder
1 tsp dried oregano
1/4 tsp ground cinnamon
1 onion, finely chopped
4 cloves garlic, grated or crushed
3 cups chicken stock
1 can pinto or great northern beans (14.5oz), drained
1 can hominy (15oz), drained
3 T cornmeal
Tabasco or mild hot sauce
1/4 cup cilantro, chopped
1 lime, juiced
Toppings: Sour cream, toasted pumpkin seeds, radishes, chopped onion, crumbled cheese or pickled jalapenos
1. Preheat the broiler to high. Place the poblanos on a rimmed baking sheet and broil with the door ajar until the skins are blackened, turning once 7-9 minutes. Place in a bowl, cover and let cool.
2. Heat a large nonstick or cast iron skillet over high. Add the oil, two turns of the pan. Add the turkey and cook, stirring occasionally and breaking up with a spoon, until browned, about 5 minutes. Season with salt and pepper and stir in the cumin, chile powder, oregano and cinnamon. Add the onion and garlic and cook, stirring often, until softened, 2-3 minutes. Stir in 2 cups stock, the beans, hominy and cornmeal; season the chili with Tabasco and reduce the heat to a simmer.
3. Peel and seed the poblanos. Chop 2 poblanos into bite size pieces or strips. Coarsely chop the remaining 3 poblanos and place in a food processor; season with salt and add the remaining 1 cup of stock, the cilantro and lime juice. Pulse a few times to finely chop, then process into a thick puree. Add to the chili and simmer, stirring occasionally, until thickened slightly, 4 to 5 minutes.
4. Serve the chili from the skillet into shallow bowls and top with toppings.
I thought this chili had a lot of great flavor and it wasn't too spicy or too bland. The roasted poblanos made for a smoky flavor and as I mentioned above the hint of cinnamon gave it a nice diverse flavor profile. This is a recipe that is even better leftover and it is just straight up coze for these chilly winter evenings...well since I am back in Cali...I guess a little less chilly than last winter in the Mitten, but still a little brrr cold. Cheers my friends and enjoy every moment of this holiday season!!
Wednesday, August 30, 2017
Chocolate Cream Cheese Cookies & Comfort for the Soul

What is it about homemade cookies that just straight up
makes us all so dang happy? Last night I decided to tie on my apron and get
into the kitchen and just bake. By the time those cookies went into the oven I was
giddy with joy. Sure it also helped that I got the pleasure of watching my
families eyes light up in glee when they saw the puffed up balls of dough and
chocolate chips rising in the oven, however it started with me. Ok sure it also
probably helped that one of the family members was PMSing and so I was pretty
much an angel in disguise, but those are just details. So I decided to give it some thought, why do
homemade cookies make us joyous?
1.
The majority of us have positive childhood
memories associated with the smell of homemade cookies and the taste of warm
chocolate chips exploding in our mouths. Those memories often include loved
ones, Mothers or Grandmothers, the joy of youth and the times in our lives that
were carefree and easy
2.
The act of baking cookies is sweet and innocent.
During a time like today where the world is filled with turmoil and hate,
baking cookies reminds us of a more innocent and peaceful time.
3.
Homemade cookies are truly just an act of love.
It is nurturing, it is giving, it truly personifies the saying of “made with
love.” Often while making cookies we think of who we are making them for and
those thoughts fill the cookies with little pieces of love.
So last night I decided to try a recipe that takes a classic
like Chocolate Chip Cookies and adds a twist by adding cream cheese to the
recipe. This spin on a classic made my cookies become a cross between a cheesecake
and a chocolate chip cookie, adding a richness, intensity and fluffiness to the
cookie that made for little balls of goodness. Also for this record was one I discovered
on Pinterest, my new found addiction….yes, I know I came kind of late to the
Pinterest party….but this was definitely not a Pinterest fail.
 |
| Attempt at artistic egg pic |

To begin with, mix the dry ingredients which includes flour,
cornstarch and baking powder. I was curious as to why this recipe had
cornstarch mixed into the flour as I have not heard of this technique before.
Thanks to Google I learned that cornstarch helps powdered sugar from clumping,
which is also an ingredient in this recipe, and it helps with binding.

Next, in a mixing bowl, add the cream cheese and butter,
until it is fine and creamy. Add an egg, milk and vanilla and continue mixing.
 |
| What is the only thing better than chocolate chips? Mini Chocolate Chips! |
Then, add powdered sugar, mixing until fluffy. Add the dry
ingredients and continue to mix until dough forms. Add the chocolate chips.


Finally, roll the dough into balls and place on a parchment
lined cookie sheet. Flatten the dough balls with your hand or a flat object. I
tried using a glass, but my dough tended to stick so I opted for my hand, which
worked just fine.

Bake the cookies in a 375 degree oven for 10 minutes. Let
cool and then remove to a wire rack.
Here is the actual recipe:
Ingredients
1¼ cup all purpose flour
¼ cup cornstarch
½ teaspoon baking powder
¼ cup unsalted butter, room temperature
4 oz cream cheese, room temperature
1 large egg
1 tablespoon milk
½ teaspoon vanilla extract
1¼ cup powdered sugar
5-6 tablespoon mini chocolate chip
Instructions
In a medium bowl combine flour, cornstarch and baking
powder. Leave aside.
In a large bowl mix butter and cream cheese, with an
electric mixer on medium speed, until it is fine and creamy.
Add an egg, milk and vanilla extract and continue mixing.
Then, add powder sugar and mix some more until the mixture
is fluffy. Add dry ingredients and mix until you get fine dough.
Finally, add mini chocolate chips and stir well. Leave in
fridge for an hour.
Preheat the oven to 375 F. Line two baking sheets with
parchment paper. Take the dough out of the fridge. Shape it into balls (24-26
balls).
Place them in the baking sheets, 1.5 inch apart. Flatten the
balls using your hands or some firm object.
Sprinkle some mini chocolate chip, if you wish. Bake for 10
minutes.
Take them out of the oven and leave to cool in the baking
sheets for a few minutes.
Transfer them to a wire rack to cool down completely
These cookies were amazing with a warm mug of chamomile tea
and they were the true personification of comfort food on a night that just
needed a little extra comfort. Cheers!!
Sunday, June 11, 2017
Grilled Pizza with Homemade Dough
My Mom has been making pizza dough for as long as I can remember, however it has always been a bit of an intimidating task for me. Ya know sometimes it is just a challenge to try to duplicate heaven and her dough is seriously a slice of heaven.
However, I decided I wanted to make grilled pizza and I knew it was time for me to face my fears and make my own dough. I found a recipe in Cooks Illustrated that provides instructions for making pizza dough in the food processor and I decided I must bit the bullet. And if I can do a bit of a humble brag here...well...I am pretty proud of my dough. It was the perfect consistency and it was crispy on the outside and chewy on the inside. I think I may have made myself a believer and because it is so easy I don't think I will ever buy dough from the store again. Sorry Trader Joe's!
So to begin with I love the fact that this dough can be made in advance, as far as 3 days in advance to be exact. However, I just made it the day before. The other awesome fact about this dough is the fact that the ingredients are ones that you normally just have it home, nothing crazy or complicated.

To begin with, put 3 cups of flour, 1 Tablespoon of sugar and 1/4 teaspoon instant or rapid rise yeast in the food processor and combine for about 2 seconds (this is not a typo it is really just 2 seconds).

While the food processor is running, add 1 1/4 cups plus 2 Tablespoons of iced water to the dough. Process until the dough is just combined and no dry flour remains, about 10 seconds. Let the dough stand for 10 minutes.
So yes, you can make pizza dough in 10 minutes and 12 seconds to be exact.

Add 1 Tablespoon oil and 1 1/2 teaspoons salt to the dough and process until the dough forms a satiny, sticky ball that clears sides sides of bowl, 30 to 60 seconds. This instruction is straight from Cooks Illustrated and to be honest I just watched the dough and stopped it when it started to pull away from the food processor and it actually looked like a dough ball.

Transfer the dough to a lightly oiled counter and knead until smooth, about 1 minute. It will start off slightly sticky, but once you start working the oil into it the texture improves rapidly.
 Divide dough into 3 equal pieces and shape each piece into a tight ball. Place on a well oiled cookie sheet and cover in plastic wrap, but do not compress the dough. Refrigerate for at least 24 hours or up to 3 days.

By the way, you also want to take the dough out of the fridge an hour before you plan on using it.

As for grilling the dough, well we had a bit of a technical difficulty trying to maintain its shape while placing it on the grill. They were truly so cute and round before trying to manhandle them onto the grill, so I do have room for improvement in that area.


To cook the dough, grill for 2-3 minutes and then flip and grill for another 2 minutes. It is recommended that you cook the dough and then add the toppings and cook again because otherwise you are going to have a dough disaster. Yes, dough disaster is definitely a technical cooking term.


We had a blast with our grilled pizzas and it was a lot of fun to allow everyone to make their own pizza. This is definitely a meal that I plan to duplicate again and I love the fact that I conquered my pizza dough fears. Cheers!


However, I decided I wanted to make grilled pizza and I knew it was time for me to face my fears and make my own dough. I found a recipe in Cooks Illustrated that provides instructions for making pizza dough in the food processor and I decided I must bit the bullet. And if I can do a bit of a humble brag here...well...I am pretty proud of my dough. It was the perfect consistency and it was crispy on the outside and chewy on the inside. I think I may have made myself a believer and because it is so easy I don't think I will ever buy dough from the store again. Sorry Trader Joe's!
So to begin with I love the fact that this dough can be made in advance, as far as 3 days in advance to be exact. However, I just made it the day before. The other awesome fact about this dough is the fact that the ingredients are ones that you normally just have it home, nothing crazy or complicated.

To begin with, put 3 cups of flour, 1 Tablespoon of sugar and 1/4 teaspoon instant or rapid rise yeast in the food processor and combine for about 2 seconds (this is not a typo it is really just 2 seconds).

While the food processor is running, add 1 1/4 cups plus 2 Tablespoons of iced water to the dough. Process until the dough is just combined and no dry flour remains, about 10 seconds. Let the dough stand for 10 minutes.
So yes, you can make pizza dough in 10 minutes and 12 seconds to be exact.

Add 1 Tablespoon oil and 1 1/2 teaspoons salt to the dough and process until the dough forms a satiny, sticky ball that clears sides sides of bowl, 30 to 60 seconds. This instruction is straight from Cooks Illustrated and to be honest I just watched the dough and stopped it when it started to pull away from the food processor and it actually looked like a dough ball.

Transfer the dough to a lightly oiled counter and knead until smooth, about 1 minute. It will start off slightly sticky, but once you start working the oil into it the texture improves rapidly.


By the way, you also want to take the dough out of the fridge an hour before you plan on using it.

As for grilling the dough, well we had a bit of a technical difficulty trying to maintain its shape while placing it on the grill. They were truly so cute and round before trying to manhandle them onto the grill, so I do have room for improvement in that area.


To cook the dough, grill for 2-3 minutes and then flip and grill for another 2 minutes. It is recommended that you cook the dough and then add the toppings and cook again because otherwise you are going to have a dough disaster. Yes, dough disaster is definitely a technical cooking term.


We had a blast with our grilled pizzas and it was a lot of fun to allow everyone to make their own pizza. This is definitely a meal that I plan to duplicate again and I love the fact that I conquered my pizza dough fears. Cheers!


Subscribe to:
Posts
(Atom)
Visit My Website!


